Followers

Showing posts with label Pion Design. Show all posts

Saturday, 20 June 2015

Shabby Chic Layout!

Hello everyone! How are you all doing? For todays post I am making a Layout which has been inspired by all my fellow Dt's who make such amazing layouts! Hope you all like it! This is a picture heavy post so sit back n read on :)


This is what I created with the oh so Gorgeous Pion Designs papers!


This is a wycinanka chipboard butterfly! Isn't it gorgeous? 


I started with added the base paper to a chipboard sheet next I layered the "pink fabric" print sheet to it and distressed its edges using my favourite Prima Marketing distressing tool. 


Next I cut 2 papers and distressed and layered them on cream coloured cardstock! 


Added it to the base using double sided foam tape. 


Next I did some stencelling using a very gorgeous stencil by The crafters Workshop - Cabbage rose 

I also did little spraying with few of my Lindy's and added these gorgeous die cuts I cut using the Hollywood die by- sue willson Its a very pretty die and I just love how it looks! 


Next I added my picture and begun with the embellishing!

I've added 2 more die cuts using the Dancing doily border die by cheery lynn 
Its a very pretty die and I love the lacy look of it. I've embellished the layout using variety of mulberry roses from the store along with the oh soo prettyy chipboard cut outs by Wycinanka available in our store. 
I added this pretty art glitter to the center of the butterfly! The picture cannot do the justice to its true beauty. 


To add some finishing touches I added a sentiment from this stamp set by Justrite! 


Hope you all like it!
Have a good day
Hugs
Anchal Sapra 

PRODUCTS USED
Pion designs- Rose du Jardin- Paris Flea Market
Pion designs- Pink Fabric - Paris Flea Market
Pion designs- Baby Doll- My Precious Daughter
TCW- Cabbage Roses stencil
Liquitex- Modeling paste
Dancing Doily lace border
Hollywood die
Prima marketing- Comfort Craft distresing tool
Tonic scissors
Rose Boquet Vintage label 7
Glitter Pollens
Curved roses
Rose buds
Epoxy clock charm
Wycinanka- Tropical forest- butterflies
Wycinanka- Fullness of summer 10
Art Glitter - Baubles- Transparent art Hexis
Clearsnap- Pralines & cream


Wednesday, 27 May 2015

Banner garland

Hi friends ,
This project is very close to my heart as I made it for my daughters room. Both of us love pink and we always wanna be surrounded with this gorgeous colour .
I created a banner for her pin up board where she organises her school schedule and her other activities. 


Step 1:
I started by cutting 5 thick Kraft coloured triangles and 5 different pion patterned paper triangles( which were a little smaller than the Kraft triangles) I love the pion papers because they r so pretty and girly.

Step 2: 
I used clear bead gel and the beautiful tim holtz lace stencil to add some texutre on the triangles.

Step 3:
Next I stamped few Altenew vintage flowers and vintage roses with the help of my misti tool. Fussy cut them by hand.
I used the stampin up inks for these vibrant pretty blooms.I have a tiny video tute to introduce you to "Misti"

video  link :
https://youtu.be/Z1cW4villWQ

Step 4:
I wanted to use the super cute Julie Nutting wooden dolls for this project as my daughter loves them. I wanted to trim away the loop and it was easy with tonic scissors.


Step 5:
I used one of my spellbinders labels die to cut 5 pieces which i have placed at the base of my arrangement. There are lots of cute tags and elements in the pion stack and I trimmed and distressed them too.

Step 6: 
I punched some pink paper with the STAMPIN up border punch & added at the top. I sticked a pearl string and a white lace trim to add interest.

Step 7:
Final arrangement of the banner . I layered few pion elements and tags over each other. Then I placed the roses and leaves. I sticked the doll and a cute mini metal charm. To add a little bling I used the mariane crystals here and there. 
Finally i stringed all the five triangles through some seem binding and a cute banner was created .
Here are some close up shots :


My daughter absolutely loved it and will place it the way she wants.
I hope u too liked this post.

Thanks for stopping by
Lots of love 
Arjita 

Friday, 17 April 2015

Altered Little Cottage House!

Hello everyone!
How are you all doing? Hope you all are enjoying the fantastic posts by my fellow DT's they are doing a fab job! Today I am here to share a very dreamy whimsical project with all of you!
I decided to alter the super cute little cottage by Kaisercraft!

Here's how it looked! 

To start with I have applied Gesso to all the pcs both. And then I painted them using a lite shade of Arcylic paint. 

I dried all of them with my heat tool to speed up the process. Next I traced all the pcs on my pattern papers selecting which part of the cottage has which print. 

Next I added this Gorgeous paper by Pion designs to my base and I cut the slits using my craft knife this is a very important step cause if you dont cut the slits well the house wont assemble properly. I inked the edges with Victorian velvet distress ink its one of my favourite colours! I just lovee it! 
And yes for the entire project I've used red tacky tape from our store to add all the pattern papers. We have a wide variety of sizes available in our store and trust me this is the best tacky tape you will ever find! It holds the paper so well. 


 Next I assembelled the house and begun embellishing! Lets see how it turned out? 

Ta-Daaa! 


Isn't it pretty? I just lovee how it turned out. The pion design papers are soo Gorgeous! They are oh so perfect for shabby chic style projects. The soothing colours <3 

I have decorated the cottage with mulberry flowers from our store!


Do you see that cute nest? Its availabe in our store! And do you see those tiny crystals? They are a new addition - These are diamond gems by Marianne designs I just love them . Our store has them in 3 different colurs Do check out the "Jewells and Enamels" category of our website. 


I added this super cute mail box miniature by Timeless miniatures. I've decorated it with a cute resin bird and the tiny flowers are also available at our store. 

The main highlight of my cottage is this mini lantern by idea-ology I just love it! 


Here's how it looks in the dark! That lantern really adds up to the cottage!

Hope you all liked my post! 
All the products used are linked down below. Please feel free to ask any questions about my post :)
Don't forget to leave some love! 

Hugs 
Anchal Sapra


PRODUCTS USED
Kaisercraft Little Cottage House
Pion- Pink fabric- Pairs Flea market
Pion- Rose du jardin- Paris Flea market
Mulberry Roses pink
Sakura flowers
Micro roses
Miniature Mail box
Miniature Chair
Miniature Birdhouse
Idea-ology mini lantern
Epoxy clock charm
Corner legs
Resin sparrows
Resin bird nest
Craft Knife
Distress ink - Victorian Velvet
Ink blending tool
Prima Marketing Grey wire thread
Glitter Pollens
Inka Gold- Old Gold


Thursday, 9 April 2015

'Smile'- Mixed media layout with a tutorial.


Hello everyone !

This is Jaya here today. Hope you all are doing great. 
This is my very first post for Crafters Corner and I am really excited for this. Hope to inspire you all during my term here.
So ,today I have a mixed media layout to share with you all and I hope you like it.
So here it is


I got some gorgeous Pion design papers in my DT package and looking at the papers I at once decided I had to make a soft feminine layout.
I started with Pion design paper- Paris Flea market- Rose du jardin. It has a wonderful script on one side and a beautiful pattern with roses on the other .I decided to go with the script side as my base.


Next I cut the paper in half along one side using my We R memory keepers trim and scoreboard and distressed all the edges of both halves of paper with my Prima Comfort craft Distressing tool. 
This is one of my most favourite tools any day. The Prima Comfort Craft Distressing tool comes with four different distressing attachments and all of these give different effects. I used the blade on the side to distress my page edges.


Next I gave a generous cost of Sakura gesso on my entire paper.  Gesso is basically a primer and prevents the soaking of inks and mists into paper thereby giving gorgeous vibrant results.


 I dried this using my Rangers heat it tool- a must have for mixed media projects!


I also punched out a strip of12 inch X 1 inch size using the Martha Stewart -Doily lace border punch and  the Pion design-Paris flea market Pink fabric paper and reattached my base paper with this border in between.

Next I took out my Lindys stamp gang starburst sprays in Cape cod coral, Hottie patottie hot pink,Sea mint green and Sweet Violet purple teal and sprayed randomly on the paper. I dried this using Rangers heat tool again
.

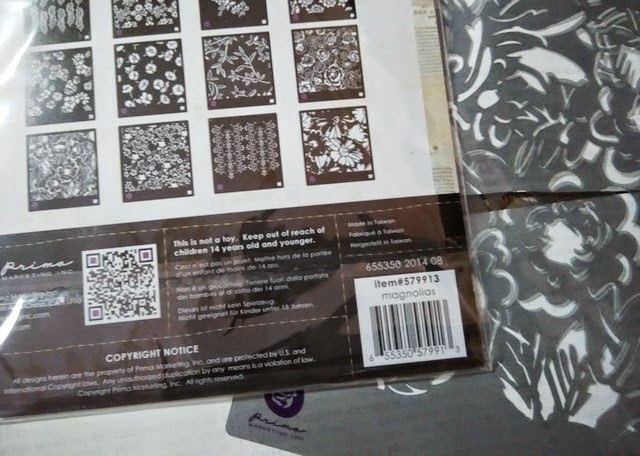
Next in process was taking out my stamps and stencils. I using the Kaisercraft Dictionary meanings texture stamp and Magnolias stencil from Prima. This is a new stencil in the shop and has these lovely flower and rose patterns. I am so in love with the design that I am thinking of making it the star of my project next time. Love it totally! 


I used black Archival ink for stamping. Archival ink does not bleed on application of inks/mists or water and this is what I wanted for my project.

I used the Pion design-Paris Flea Market- Pink fabric paper , Tags paper  and Post cards paper to make some layers behind my photo.


I used the crackle paste by Prima with the Magnolia stencil and gave some textures on the page randomly using the C-Gull spatula.


This is how I prepared my background basically.  I also did some stencilling with Prima flourish stencil later once my layout was almost done to add more texture.
I embellished my layout with some mulberry flowers and Leaves & Mushrooms- laser cut wood veneers from Prima. Also used a resin embellishment and clear glass cabochons.
My title- 'Smile' is a Heidi swapp acrylic word.I am so in love with the font! 
Hope it helps!


Here  are a few close ups of the layout-


Supplies used-

Pion design- Rose du jardin- Paris flea market
Pion design- Pink fabric-Paris flea market
Pion design- Post cards -Paris flea market
Pion design- Tags- Paris flea market
Prima stencil- Flourish
Prima stencil- Magnolias
Rangers heat it tool
Kaisercraft texture stamp- Dictionary meanings
                                                           Sea mint Green
                                                           Cotton Candy Pink
                                                           Sweet violet purple teal
 We R Memory Keppers- Trim and scoreboard                         
               Poppy flowers
                Micro mulberry roses
               Mulberry roses

Thanks for visiting!
Have a great crafty week