Followers

Showing posts with label Lindy stamp Gang Mists. Show all posts

Saturday, 27 August 2016

Tiny Bottles Candle decor

Hi you lovely crafters! 
Suzna here, I wanted to show you (just in case you hadn’t seen it yet) my cute small bottles with candles.

This isn’t the only way to do it, maybe it’s not even the you should do it. But I wanted to share my process and help you create something you can build on. This is for beginners, so if you’ve been painting for a while already it might not quench enough of your creative ability. It’s prefect for those that want to get started mixed media but are not sure where to start.


I have used Prima Marketing, Lindy's stamp gang mists and Colorarte products in this video, but any brand, any color combination will be fine to use. Click below to watch the video and you can paint along with me in real time

Supplies Used
or

Lindy's Stamp Gang Starburst Mist - Freaky Franken Lime
Lindy's Mist - Marigold Yellow Orange
Lindy's Starburst Mist - Ramblin Rose Pink
Vintage Micro Roses Combo
Green Leaf String


I hope you all enjoyed my mixed media bottles..  

We’ll see.. Have a creative day!!
Hugs 
Suzna


Thursday, 17 September 2015

"Reach Out To your Dreams"- Mixed media canvas with a video tutorial

Hello friends!
Jaya here today with you all.

Today I have a mixed media canvas to share with you all. I also have a video tutorial for it.
Have a look


Here is the link to the video tutorial


Supplies used-

Canvas board
Prima chalk edger- black
Prima resin - Butterfly
Prima SIIC


Lindys stamp gang sprays-
 Time Travel Teal,
 Rusty Lantern Lime,
Hags wart Orange, 
Yellow rose of Texas,


Stamps-
 Marion Smith Typography, 

Hope you like it. 
Have a great crafty week!


Saturday, 6 June 2015

Altered Wooden Plank

Hello everyone? 
How are you all doing? Hope all of you are enjoying the lovely posts shared here by my fellow DT's! 
Well today I am here to share a video tutorial with all of you! Isn't that great? This is the project I have created and down below is the tutorial and the link to all the supplies used! More info is the video. 


And please feel free to ask any project related questions would love to help :) 

Dont forget to leave some love!

Hugs
Anchal Sapra 

PRODUCTS USED
1) Jillibean Soup- Mix the Media Wooden Plank
2)Inka gold
3)Studio- Multi Medium Gloss
4)Rose gold liquid pearl
5)Prima Marketing- Gold Rush
6)Art Glitter- Elements Gold Diggings
7)Elements Earth Textures Adhesive
8)Ranger- Glossy Accents
9)Butterflies
10)Resin Dove Bird
11)Resin Big Roses
12)Resin Mini Blossoms
13)Gears
14)Vintage metal butterfly
15)Tiny Bird Cage charm
16)Epoxy clock charm
17)Chandelier charm
18)Prima metal flowers
19)Prima Marketing Steal deal 3
20)Kaisercraft Ribbon
21)Lindy's- Gossamer Gold
22)Little Lindy's pink
23)Lindy's- Pink ladies pink
24)Little Lindy's- Terquoise
25)Tonic Scissors
26)Gesso
27)Molding Paste
28)TCW Microbial stencil


Friday, 8 May 2015

'DREAM'- Mixed media layout + Tutorial

Hello everyone!
Jaya  here today and  I have a new post to share with you all today. This is a layout I did with just one starburst spray and stencil.


Have a look


 I also have a short tutorial to share with you all.


Step 1- 
Cover a Resin frame with black gesso. 
At Crafters Corner we have these gorgeous resin frames you must check out. 
You can alter them or use them as such.


Step 2- 
Apply some Twinkling H20s or Viva decor inka gold -Gold paint to this gesso covered frame and let it dry.


Step 3-  
Place the Rangers Bricked stencil on a black card stock 12x12 inch and spray Lindys Stamp Gang Starburst spray - Glory of seas Gold . 
The Rangers Bricked stencil is a gorgeous new stencil in the store now so get yours before its sold out.


Step 4-
Take the Wycinanka - Chipboard Cut outs. I used the Flower chipboard and coat it with Twinkling H20 -Gold. You amy also use the Viva decor Inka Gold- Gold


Step- 5-
 Adhere the frame to the page and fill the empty space with Prima Gold leaf mica flakes.
Apply white glue and sprinkle some Diamond dust to the sides of the frames.


Step 6-
Apply some more of the Lindys spray- Glory of the seas gold through the brick stencil on your design.


Step 7-
Use some rhinestones around the frame and embellish with some mulberry flowers micro roses and twisted bud . You may colour these flowers in gold and black or leave them as such. I decided to colour my twisted buds here. 


Step 8-
Now adhere your title using 3D  foam tape.


Step 9-
Spray gold spray around your frame and dry with Rangers heat it tool.

 Once dry ,use any different colour of spray you like to brighten up and lift your layout.
I used some purplish/reddish tones around my frame .


Step 10- 
I used some wire thread along the page to give the frame a hanging look.
 And we are done! 


The layout once again


Supplies used from Crafters corner-


Hope you liked it. 
Please leave your comments or any questions you want me to answer. 
Have a good day!


Cheers!


Thursday, 23 April 2015

Mixed Media tags with a Pictorial tutorial

Hello fellow crafters!

This is Jaya here today on the Crafters corner blog and I have a tag to share with you all. 
This is a mixed media tag that I created. Have a look. 
I also have a pictorial tutorial you can see later in the post


Here is a pictorial tutorial  for the same-

Step1:


 I used some scrap cardstock paper that I had randomly misted/sprayed using Lindys stamp gang sprays. I had a big sheet that was spoiled as I spilled a lot of my mist of it.Then it became my testing sheet for mists and finally I decided to make it my base for tags. 
 Isn't that a great way to reuse what you always thought as scrap? I simply loved using this as my base. More so as I could make use of something that was totally a waste. You can use almost any colours of sprays you wish to.

I cut this sheet into 4 rectangular tag shapes using my We R memory Keepers trim and score board. This is a trimmer cum score board in one and is a good buy if you are looking for something affordable and compact as it it is a two in one at the cost of one equipment and is fold-able at the same time thus saving storage space.


Step 2:


 I distressed the edges of the tags using the Prima comfort craft distressing tool. I just love using this tool for giving distressed edges to my paper. This is so versatile you will sure fall in love with this tool. It is by far my most favourite purchase of all times in tools!


 Step 3:


I stacked the smaller tag shape on the lager one and did this with both the sets . One of them I glued down with white glue easily available in the market. You may use the Aleene's tacky glue which have really great reviews.  and the second one I used the double sided foam tape. It is one of the best ways to give dimension.


Step 4:


I did some stamping on the tags using some black archival ink and Kaisercraft dictionary meanings stamp.


Step 5:


 Step 6:


 Heat dry with Rangers heat it tool. You can get this heating tool at the best price in the Crafters corner shop. 


Step 7:


Added some mist on the stencilled area again . I chose Sweet violet purple teal starburst spray from Lindy's stamp gang. Any colour spray can be used here.


Step 8:


I looked at how I wanted my embellishments to go. 


Step 9:


 Finally start adhering the embellishments. I have used quite a few Prima embellishments and flowers you see here.
Mulberry flowers- Poppy flower
                            Micro roses
                         Rose buds
                             Curved roses


 Step 10:


 Fussy cut some gorgeous butterflies from the Pion design paper- Paris flea market- Postcards using my Tonic scissors. Another of my HOT FAVOURITE tools! 
I then adhered them on the tag using white glue.


Step 11:


Once my butterflies where in place I applied some diamond dust and
  Prima art ingredient- Granite Mica flakes randomly to give some interest to the composition. Also added a few rhinestones here and there.


Step 12:


 I punched a hole on the top centre portion of the tag using the We r memory keepers crop a dile punch and misted some seam binding ribbon using the Lindy's sparys using the Yellow Rose of Texas and Hottie patoite Hot pink starburst spray and Mowed lawn distress ink.
Next was just pulling the ribbon through the punched hole and tying the knot. 


A final close up


 Hope you liked the tutorial. All the supplies are available at Crafters corner.
 You can check the links below for the same-

We R memory Keepers trim and score board
Lindys stamp gang sprays
Prima comfort craft distressing tool
Double sided foam tape
Black archival ink
Kaisercraft dictionary meanings stamp.
modelling/texture paste 
Crafters workshop microbial stencil
spatula
Mulberry flowers- Poppy flower
                               Micro roses
                               Rose buds
                              Curved roses
We r memory keepers crop a dile punch
Lindys stamp gang sprays-   Yellow Rose of Texas
                                               Hottie patoite Hot pink starburst
                                               Cotton candy pink
                                               Sweet violet purple teal
                                               Rusty lantern lime
                                               Cathedral Pines Green
                                               Bachelor button blue
Mowed lawn distress ink.


Hope you liked the tutorial. Let me know through your comments.

Have a great crafty week!

Thursday, 9 April 2015

'Smile'- Mixed media layout with a tutorial.


Hello everyone !

This is Jaya here today. Hope you all are doing great. 
This is my very first post for Crafters Corner and I am really excited for this. Hope to inspire you all during my term here.
So ,today I have a mixed media layout to share with you all and I hope you like it.
So here it is


I got some gorgeous Pion design papers in my DT package and looking at the papers I at once decided I had to make a soft feminine layout.
I started with Pion design paper- Paris Flea market- Rose du jardin. It has a wonderful script on one side and a beautiful pattern with roses on the other .I decided to go with the script side as my base.


Next I cut the paper in half along one side using my We R memory keepers trim and scoreboard and distressed all the edges of both halves of paper with my Prima Comfort craft Distressing tool. 
This is one of my most favourite tools any day. The Prima Comfort Craft Distressing tool comes with four different distressing attachments and all of these give different effects. I used the blade on the side to distress my page edges.


Next I gave a generous cost of Sakura gesso on my entire paper.  Gesso is basically a primer and prevents the soaking of inks and mists into paper thereby giving gorgeous vibrant results.


 I dried this using my Rangers heat it tool- a must have for mixed media projects!


I also punched out a strip of12 inch X 1 inch size using the Martha Stewart -Doily lace border punch and  the Pion design-Paris flea market Pink fabric paper and reattached my base paper with this border in between.

Next I took out my Lindys stamp gang starburst sprays in Cape cod coral, Hottie patottie hot pink,Sea mint green and Sweet Violet purple teal and sprayed randomly on the paper. I dried this using Rangers heat tool again
.

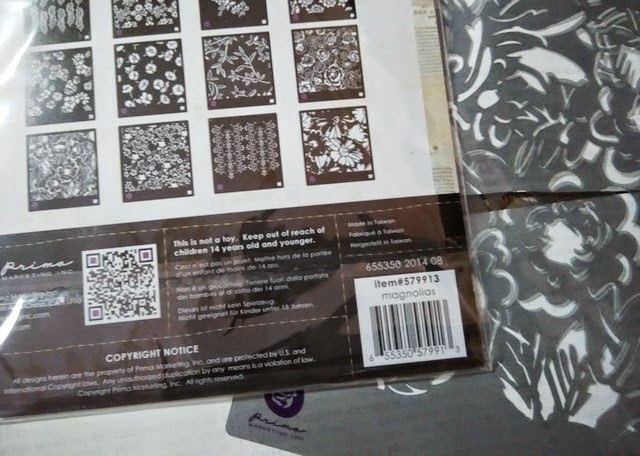
Next in process was taking out my stamps and stencils. I using the Kaisercraft Dictionary meanings texture stamp and Magnolias stencil from Prima. This is a new stencil in the shop and has these lovely flower and rose patterns. I am so in love with the design that I am thinking of making it the star of my project next time. Love it totally! 


I used black Archival ink for stamping. Archival ink does not bleed on application of inks/mists or water and this is what I wanted for my project.

I used the Pion design-Paris Flea Market- Pink fabric paper , Tags paper  and Post cards paper to make some layers behind my photo.


I used the crackle paste by Prima with the Magnolia stencil and gave some textures on the page randomly using the C-Gull spatula.


This is how I prepared my background basically.  I also did some stencilling with Prima flourish stencil later once my layout was almost done to add more texture.
I embellished my layout with some mulberry flowers and Leaves & Mushrooms- laser cut wood veneers from Prima. Also used a resin embellishment and clear glass cabochons.
My title- 'Smile' is a Heidi swapp acrylic word.I am so in love with the font! 
Hope it helps!


Here  are a few close ups of the layout-


Supplies used-

Pion design- Rose du jardin- Paris flea market
Pion design- Pink fabric-Paris flea market
Pion design- Post cards -Paris flea market
Pion design- Tags- Paris flea market
Prima stencil- Flourish
Prima stencil- Magnolias
Rangers heat it tool
Kaisercraft texture stamp- Dictionary meanings
                                                           Sea mint Green
                                                           Cotton Candy Pink
                                                           Sweet violet purple teal
 We R Memory Keppers- Trim and scoreboard                         
               Poppy flowers
                Micro mulberry roses
               Mulberry roses

Thanks for visiting!
Have a great crafty week