Followers

Thursday 29 January 2015

Sospeso Accessories tutorial

Sospeso Transparente pendant
         Hi friends...did you hear about the mega price slash on Sospeso Transparente materials? Well over and above the price mentioned on the website Shalini is offering an additional 20 %off ! Very tempting and yes I did splurge by placing my order the same day she announced the sale!
A couple of crafters were curious about the Sospeso Transparente brooches so sharing a tutorial to make Sospeso Transparente fashion accessories using brooches.
Ice crystal effect
First jazzed up Sospeso Transparente daisies by pouring  vetrification gel and adding ground crystals on top .Leave for a couple of hours or even overnight .
Ground crystals
You can use some glass colors to ink your sospeso flowers.
Brooch tutorial 
 Brooches come in circular and rectangular shapes and are made of plastic base with a metal brooch pin. They are quite economical too!
Brooch tutorial 
Cut a disc of foam [ thick or thin ---doesnt matter] to fit the base of your brooch[ plastic surface]
Brooch tutorial 
Dress up your flower wit feathers/pearl strings/ leaves etc and hot glue the foam disc to your flower base
Brooch tutorial 
Hot glue the foam to your brooch and your brooch is ready to wear on your dress/ handbag/ curtain etc

Brooch tutorial 
My daughter strung her brooch onto a metal chain to convert her brooch into a pendant!
Brooch tutorial 
And that is my little girl modelling her homemade Pendant!
Necklace
Here is another design!
Necklace
And of course we made matching hairband! And here is how we made the hairband : Easy Hairband tutorial 

DIY Hairband
Here is my little girl in her first video tutorial showing you how she made the flowers on her hairband
Its a super short video so I hope you do humor my little crafter by watching it and giving a thumbs up!
My Little Model !
Where to buy Sospeso Transparente in India : Crafters Corner
Sale till Jan 31st . Apply Coupon Code : ENJOY20 at checkout for additional 20 % discount

Sunday 25 January 2015

Altered Box with Tag mini!

Hello everyone!
Today I am back with a brand new project! This is something I really wanted to make for so long but some reason or the other it had been getting delayed but I am really happy I finally made it :D
So now let me share the pictures first followed by the video.


Hope you all like it!
Have a great day!
Hugs 
Anchal Sapra 


PRODUCTS USED
DCWV Coral Couture paper stack
Sizzix tag die
Prima Marketing - Gold Rush Glass Glitter
Glossy Accents
Bronze chain
Jump Rings
Corner Legs
Filigree Corners
Clear Glass Cabochons
10 Filigree Butterfly
11 Epoxy Clock Charm
12 Tiny Birdcage charm
13 Princess hanger charm
14 Princess comb charm
15 Rose key charm
16 Ornate frame broad
17 Round flower pendant
18 Prima Marketing - Typo bulbs
19 Glitter Pollens
20 Technique tuesday- Loving words stamp
21 Prima Wire thread
22 Spellbinders Label 20 die
23 Archival ink Jet black
24 Red Tacky tape
25 Tonic Scissors
26 Scoring Board
27 Doily Lace punch
28 Resin Frames
29 Coloured Sparrows

Saturday 24 January 2015

Messages of Love

Hello Everyone

I am back again with a new project share!! Valentines day is fast approaching and we all need to get ready for the gift giving !! But we crafters all like to make our gifts instaed of buying them right?? So, I want to inspire you with my latest creation!

Then ...


Its perfect for all occasions and you can customize the color schemes and use different papers . It's fast and easy.

I have used a lot of punched flowers and I had so so much fun making these , Its easy peasy!! I just used distress inks to get the shade I wanted.

I used chipboard to create the book and the pages and the frame as well. I cut the pattern paper using the die too.


Thanks for visiting
Don't Forget to Subscribe

Hello

Tuesday 20 January 2015

How To Make a CAS card With dies

Hello everyone

This is my first Post for the 2015 !! Can you believe it the first month of this brand new year is almost over ... My My how time flies and soon it will be  February and The month for romance and love.Also, this time of the year is full of Weddings and hence also full of Anniversaries. I wanted to Design a Soft romantic Card just for this occasion so you all can jump start you Valentine Day Craft or projects.I have created a CAS layout, using several layers of cardstock.

Here is how I did it 

Layer 1- White cardstock:- 8.5" x 8.5" Layer 2 - Silver cardstock:- 8 3/8th" by 8 3/8th "Layer 3 - White cardstock:- 8 2/8th" by 8 2/8th"Layer 4 - Silver cardstock:- 7.5" by 7.5Layer 5 - White cardstock:- 7 3/8th" by 7 3/8th"

Additional pieces 

2 pc Distressed doily
 1 pc white Romantic Couple
1 pc white Romantic Couple
1 pc silver Romantic couple
1 pc white Labels from the largest die
pc white Labels from the second largest die
1 pc silver cardstock cut at 73/8th" by 73/8th"
1 pc butterfly out in white
3 pc snow flowers
Some pearls

Procedure

  1. Glue Together layer #2 and #3 and adhere on Layer #1 centering all of them as neatly as possible. 
  2. Add the silver square piece and set aside.
  3. Glue together layer#4 and #5 and using a cutting mat and exacto knife cut a window that measure 7"by 7" in the middle.
  4. Glue the two Doily pieces on the opposite side of the window on the inside.
  5. Add foam tape to the window piece.
  6. Glue together the label pieces. Center in the frame and glue down.
  7. Adhere the white and the silver couple pieces together this is to add some weight to the piece.
  8. Add foam dots to the couple piece and glue on the labels piece.
  9. cut out just the swirls from the Butterfly out piece and glue them on the left bottom corner of the card.
  10. Add some pearls to the flowers and glue them.


Hope you all enjoyed this tutorialYou can do so many layouts and sizes and compositions with this basic construction. Experiment and Do share 


Thanks for visiting.Don't Forget to Subscribe!!

CiaoAshmita Roy

Friday 16 January 2015

Neck Piece

Hello everyone!
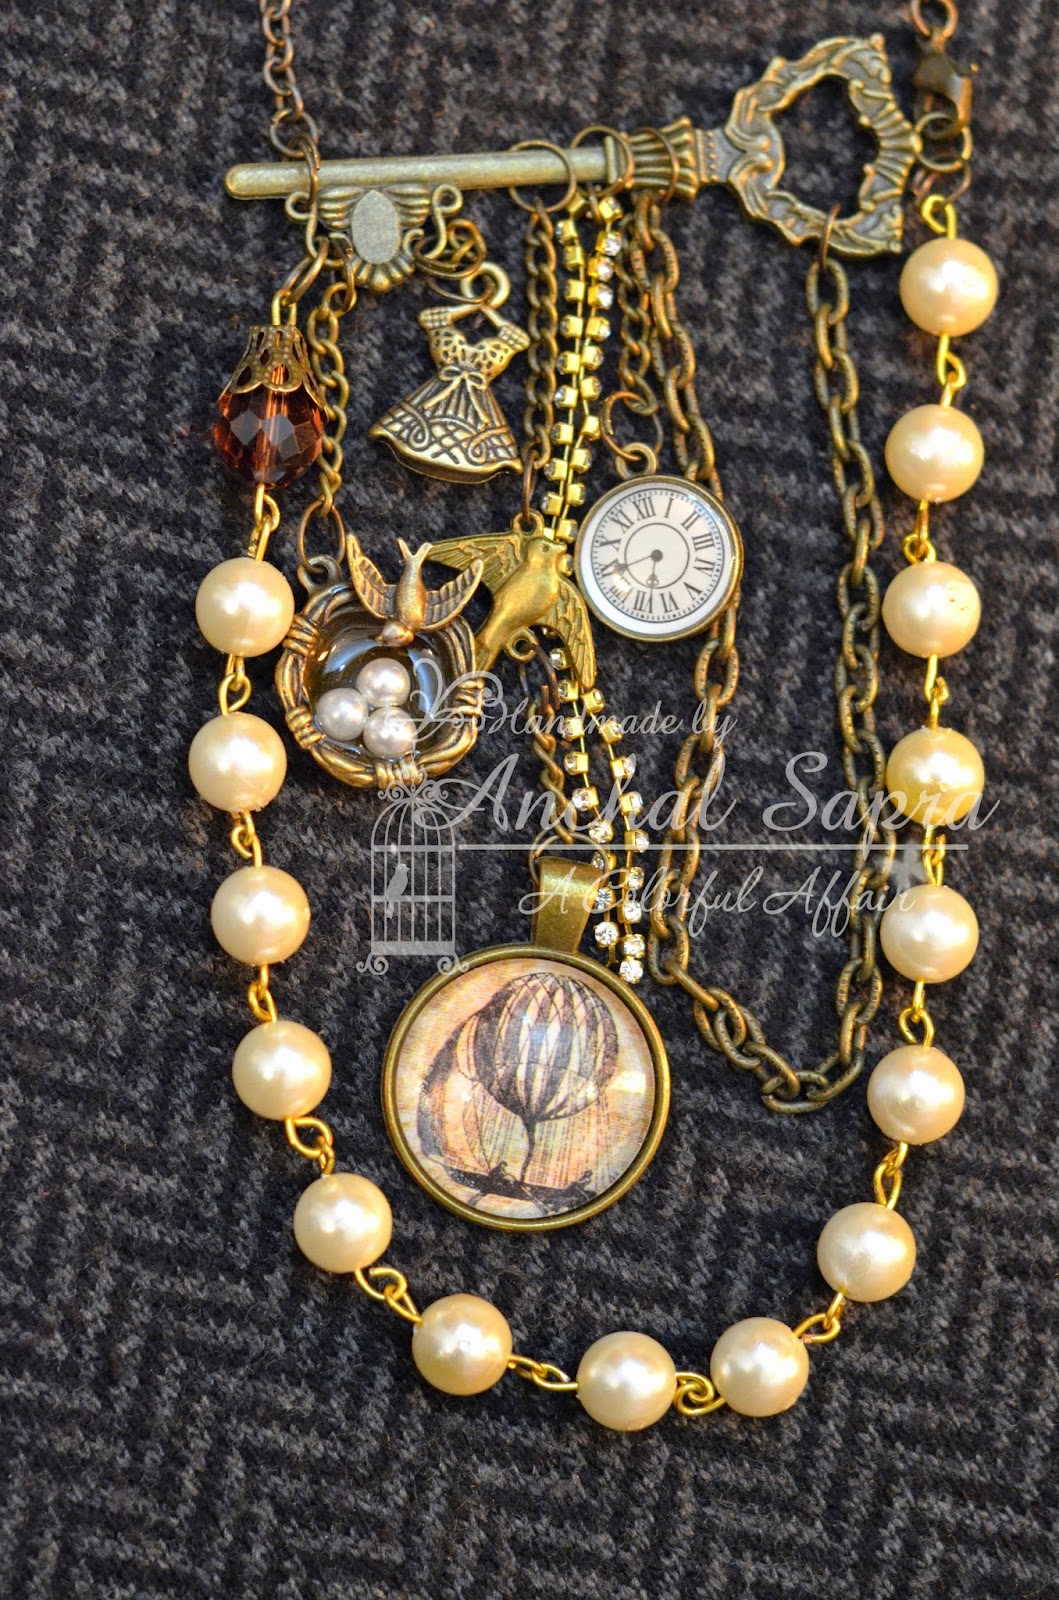
Today I am back here to share a cute neck piece I made for myself using charms and cabochons from the store!


 Our store has such a Gorgeous variety of charms and I absolutely loveee them so I decided why not make something using them which I can wear around and flaunt! :D


I made this cute Hot air balloon pendant from the Cartographer paper pad by prima isn't it adorable?


Hope you all like it! All the products used are linked down below!

Have a great day!
Hugs
Anchal Sapra


PRODUCTS USED
Antique pendant
Clear Glass Cabochons
Bird charm
Nest charm
Clock charm
Dress charm
Jump rings
Royal key charm
Bronze chain
Cartographer paper pad
Glossy accents
Craft knife

Wednesday 14 January 2015

Reviewing Glues - E6000

Adhesives!
            Hi Crafters Thank you so much for the wonderful enthusiastic response to my reviews of Crafting scissors. Cutting Tools and Glues are a basic part of a crafters armament  and the range of adhesives is so huge it is a daunting task for me to review glues!
           The picture above shows my adhesive collection. The ones on the right are ones we get in the Indian market and the ones on the left are imported ones; most of which are available at Crafters Corner.
When I started reading up about adhesives online...one adhesive was glorified  again and again by crafters the world over as the "Best glue for everything" ...the E6000!
So will start the review series on adhesives with E6000
E 6000
What is E6000 ?
E6000 is an industrial strength glue which can stick metal , ceramic, wood , glass etc.Once bonded the strength of its adhesion is fantastic! Its a hot favorite among jewelry makers since it gives such a good adhesion even with everyday wear of the jewelry.
E6000
It is not recommended for styrofoam/ thermocol , paper and certain plastics.
Tips on using E6000 
E6000 Instructions
The picture above shows the instructions printed on the package but no need to peer at the picture ......will tell you the important aspects!
           Before you use your tube of E6000...make sure your kids are not around you  and you are working in a well ventillated area [like most strong glues this one is also toxic] .

E6000
Because its a super strong glue ,clogging of the tube and the cap sticking to the tube can be a problem and this can be prevented by smearing a blob of petroleum jelly into the cap when you use the E6000.
E6000
E 6000 seems to be very popular with jewelry makers and I found many videos and articles on how to use it with gorgeous gemstones and Swarovski crystals. If you want to stick tiny gemstones you can smear a little glue onto a plastic lid and use a toothpick to apply glue.
E6000
I used E6000 to design as well as repair old broken favorite pieces of  jewelry .
E6000 projects
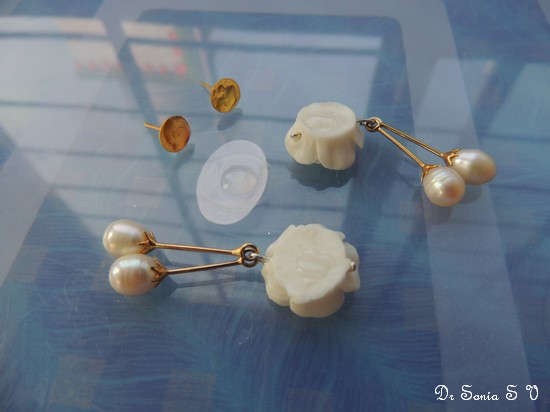
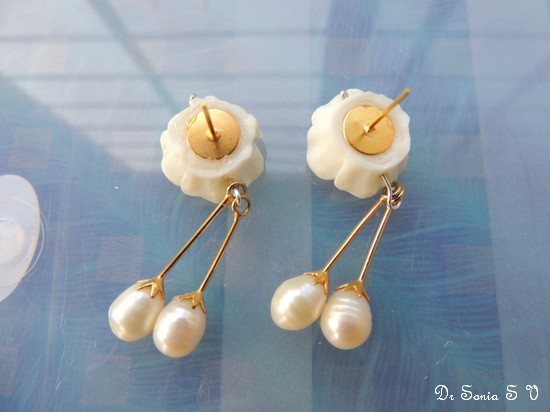
Rescued some pearl drops from broken earrings ,used jewelry pins to add it to some resin roses and created a new pair of earrings by sticking flat earring studs using E6000.
Earring Making
It is recommended to apply a bit of glue to both your surfaces to be glued and wait 2 mins before sticking them together.
When you stick your objects together you can wipe away any excess glue seepage by wiping away with a small cloth.
Earring Making
Unlike feviquick/superglue etc, the best thing about E 6000 is that it gives you 2- 5 minutes time to arrange the objects you want to glue perfectly and it doesnt stick like crazy to your skin either!
After you have placed the 2 gluing surfaces together its important to leave your project un disturbed for 24 hours minimum for it to  form a good adhesion .
Rest uneven surfaced projects such as the rings and some earrings
Rose ring
on a surface such as a cup of beads![Picked up this idea from a jewelry designer- she used rice...I couldnt bear the thought of wasting rice so used  these plastic beads instead]
Resting base for E6000 glued projects
I am not much of a jewelry artist but I did feel ecstatic making my own simple pieces of jewelry +  giving new life to old broken favorites!
E6000 Projects
Not all of us are jewelry makers so will show you one more project where I really put the E6000 to test!
CD craft with E6000
          The Glue gun is my go to adhesive for quick fixes and difficult to glue objects but anyone who has  used the glue gun for some time you will know that most things [except felt and foam] glued with hot glue will fall off over time! If you want to make a durable handicraft item...you need a stonger glue! 
           CDs are crazily difficult objects to glue things on to and since E 6000 was supposed to be a strong enough to glue ceramic I put it to test by gluing marbles all over my CD!
E6000 project
As you know marbles are pretty heavy and I even used the E6000 to add a metal cabochon atop the marbles! After the mandatory 24 hr wait I was super thrilled to see all  the marbles stuck on so firmly!
E6000
My CD- Marble plaque is quite heavy but you can see how nicely all the elements are held even when it stands upright for display!
CD- Marble craft
Since E 6000 dries clear I had a nice a shiny project reflecting light from the marbles and the CD!

Where to buy  E 6000 in India : CRAFTERS CORNER

Also checkout Other Adhesives at Crafters Corner

You can see my Pinterest Board on Adhesives  for more projects and reviews about the E6000 and other adhesives.
Will be reviewing other adhesives in the weeks to come.
My Blog : Cards Crafts Kids Projects