Followers

Friday 29 September 2017

Money Wraps using Mulberry Flowers

Hello everyone! Welcome to a brand new post at the Crafters Corner blog! Well Its starting to get busy now, the festive season has started and we all are crafting n making some pretty gifts these days! So for today's post I decided to do a tute on some Money wraps! I absolutely loved making them! 
You all know my love for mulberry flowers n Crafters Corner recently got an amzing collection of the flowers in such pretty colours! And not to forget the variety of sizes and styles available! Since I do a lot of bulk orders n need flowers in huge quantites it becomes very difficult for me , but no more Crafters Corner is here to rescue me! The store has bulk quantities available so just place your order and they will be delivered to you! 
  Well now lets get started! Here are few envelopes I created! Do you like them? 


Lets get started 
First take a three fold envelope and mark it as shown in the picture make sure you mark the center, 1inch on each side and then connect the points 


Mark and cut the envelope and this is the shape you will have

Next cut a pattern paper 0.25'' smaller than the base size, keep it under the flap and mark

You will have something like this

Now cut it and stick it to the base, you can add some ribbon for tying the envelope. I am using my favourite paper pad here Hydrangea lawns by Dress my Craft! If you havent tried it yet I strongly recommend you, its a gorgeous paper pad with such lovely prints and the quality of the paper is amazing! 

Now comes the embellishing , I've added a mix of prima flowers and mulberry flowers


 Next I've distressed this small doily die by MFT its a very cute die and looks very pretty! 

Assemble three dies as shown in the picture using some foam tape

Add it to the center and you are done!

I love blingg! So I've added some bling crystals by Kaisercraft! I feel adding bling enhances the look of it! 
Here I've also make the same design in a different colour! 

Lets go to the next one! 

Here I have taken the same base but used the ribbon over the pattern paper , you can insert the ribbon as we did in the previous envelope as well

The layout is very similar to the previous envelope, layer the dies add flowers and bling and you are done! Quick and easy! 


 Now the last envelope has a lot of detailing! Hope you all like it 

Trim down the envelope a little bit and round the edges

Add the pattern paper to the base, both base and top flap need to be covered here

Now I have distressed a doily using worn lipstick and spun sugar 

Cut and overlap two doilies as shown in the picture

Add them to the base like this 

Next I've used this frame and painted it with rose gold paint by Prima. The frame was made using mod podge melter and melts , the mold is by Martha Stewarts, You can find its tutorial in my previous posts. I love making my own embellishments and the molds and melts make it so easy!


Add the frame to a piece of cardstock, pour some glossy accents to the center and add the pearls! I love these hardware pearls by prima , these are the glass pearls and their finish is amazing!

Now add the frame , a sentiment and some flowers and you are done! 


Hope you all enjoyed today's post! Please feel free to ask any questions! 
Hugs
Anchal Sapra


PRODUCTS USED
Spring Blossom Specialty 12 x 12 Paper Pad
Hydrangea Lawns - 12"X12" Paper Pad
Worn Lipstick - Distress Ink Pad
Spun Sugar - Distress Ink Pad
Dusty Concord - Distress Ink Pad
Curved Roses 45 MM - Pastel Yellow
Curved Roses 45 MM - Vintage Lavender
Curved Roses 45 MM - Vintage Blue
Curved Roses 35 MM - Bright Pink
Curved Roses 45 MM - Baby Pink
Poppy Rose - Purple / Cream
Retro Flower - Off White
Purity W/Glitter 1.5" - 2.25" 36/Pkg
Princess
Decoration - Blue Gems
Decoration - Pink Gems
Opal Magic Rose/Gold - Art Alchemy Acrylic Paint
Frank Garcia Memory Hardware Glass Pearls #2 - 7.5oz/3 Sizes
Mod Podge Mod Melter
Milk Glass White
Decorative Design
Mini Doily Circle - Die
Crochet Doily - Purple Metal Die
Pearl Crown
Kikyou Flower - English Green
Delicate Flower - Ivory


Thursday 28 September 2017

Reverse decoupage and crackle on faux glass with Plaid

Hello...It's THURSDAY and am back with another tutorial! This time its a video and as always playing with PLAID and different techniques is so enjoyable and the element of surprise is always the upcycled item !

Have you ever thought of using a serving tray as a home decor or utility item...well that's my project for today..


I have done the reverse decoupage and crackle effect on faux glass to alter an old serving tray!


Do give your feedback and here are some pictures too.

The video link is here.


Do give the technique a try and I will see you soon.

Happy Dussera to all.

Until my next creative journey,
Happy crafting and recycling.
Cheers,
Rupa.
products from PLAID


Wednesday 27 September 2017

Mini Album using Recollections Pink Pizzaz

Heyi my dear friends,

How are you all?
Have you seen newly launched Miniature accessories by DMC ...Oh they are to die for!
Isn't it?
So all the miniatures lover ...we are waiting for your lovely creations...
And these accessories cannot only be used in miniatures project but also you can use it in your various project...It's all your creativity that decides..

So friends...today I am here with a mini album that I created using Recollections Signature Special paper pack "Pink Pizzaz". This is a beautiful collection and perfect for Love theme albums even you can use and mix these papers in baby girl scrapbooks as it has beautiful pink shades in it.

I will also be giving you a step by step tutorial from scratch to end. This album is quite easy and fun to make. So If you don't have much time, and you quickly want to make any album, here is this...So the video is around 17 min long but that's all I can edit short...but it's worth watch if you want to learn seam binding.

First let's see the album,


This album is completely made using paper collection and Confetti Collection Chipboard die cut.
I have made 6 page album and you can increase or decrease accordingly.

All the measurement will be available in video description.

So here is the video tutorial.


I hope you enjoyed watching it...please share your love in comments below..

See you soon with another project.

Till then takecare
Hugs,
Sampada

Monday 25 September 2017

KNOW YOUR TOOLS !!!!


Hello!!

Crafting is a beautiful hobby and a crafter is always seen most happy at her craft table !!! Right ?
This is Anita here bringing for you some best tools of the crafting world that take crafting to the next level. It makes this art easy and less stressful and helping you to make your projects perfect.

As we all know that mechanics eases any sort of work so when we involve the perfect or correct tools for our work, what we get is perfect and beautiful projects . Hence tools are very important .

What sort of tools should I buy when I start crafting????
A very important question by all beginners and I too faced this dilemma of what to buy and what not.
Let me tell you, buying tools is a one time investment and so if you think and study your tools before buying, you will thank me.

Before I begin discussing , this post is just a review post and I am sharing my experience with you. No particular brand has paid me for this and I am helping out fellow crafters with know how about some tools available at Crafters Corner.

Crafters Corner has brought for us wonderful tools, gadgets and craft supplies from all over the world and that too at most affordable price.Check them out here

So let me begin with my most favourite tool. I have total of 10 tools and gadgets for me that have been my on my table since many years and I just cannot do without them.

1. SCISSORS---- This scissor is my favourite and although you have the mini version, the original is the best. I am speaking of the TIM HOLTZ SERRATED NON STICK SCISSORS... Once you start working with this, I promise, all other scissors will take a back seat.

Kushgrip Non-Stick Micro Serrated Scissors 7". These scissors are being endorsed by Tim Holtz because of their overall quality, their duo-tipped feature (one serrated blade and one fine point sharp tip blade) for excellent cutting on all types of materials: great for detail cutting. Use at home, office, school, for crafts, scrap booking and other hobby projects. Extra Large soft cushion over-molding plastic handles offers a comfortable grip for hours of use and less fatigue. Non-stick coating means no build up of adhesive. Scissors come with a sheath for blade protection and safe handling.
Check the mini and 9" version also.


This trimmer is the best that I have ever used. Its been with me for almost 6 years and never have I ever faced any problem. It cuts like butter and have always given me the most perfect cutting for all paper types. If you want to invest in a trimmer, then this is the one.

Measure your lines perfectly ....Thats what score boards are for... no hassle of rulers and tilted lines. Just follow the score lines and get perfect measured folds. So make correctly fitted boxes, cards , envelopes and what not. This is a great tool that measures 1/8 and 1/16 and is also useful for making many multi card folds.
Here are some videos that will guide you more about this wonderful tool.
https://www.youtube.com/watch?v=wctH4uGFltY


4. IDEA-OLOGY DESIGN RULER-- this is no ordinary ruler... it has been divided into inches and in 1/4th and has extra special features  
Measuring will become a cakewalk with this ruler.


Some videos to guide you.


5.  RIBBON SPOOLER- Do you have a box full of ribbons all messed up? Ribbon organisation is a big problem with every crafter and we all love to hoard ribbons don't we!!!!
So this ribbon spooler will solve your problem. It rolls your ribbons in tight rolls within minutes and you can easily store them .


watch this video here to see what I mean--

6. GROOVE GOLF TOOL SET--Thats the ultimate tool for Flower making!!!!! Believe me!!!! your flower making will reach to the best levels if you have these tools.


7. CUTTLEBUG METAL ADAPTER PLATE--if you are into die cutting but face problem with intricate dies then here is something that will change your egony to enjoyment. A must have for all crafters who own a big shot or cuttlebug.This metal adapter plate gives that extra shim to your sandwich platforms giving perfect cuts everytime.

8. MISTI CREATIVE CORNERS--do you love stamping and have the MISTI... but still you are fumbling with your stamping capabilities....here is tool that will give you an extra edge while using your MISTI. This simple tool has so many wonderful features that you will be amazed. stamping multiple sentiments in straight lines, quick stamping, precise stamped lines all these is possible in minutes with the MISTI Creative Corners.


9. HEAT EMBOSSING TOOL---Another tool or gadget if thats what you call....this one deserves a top place on your craft table. Not only does it emboss over the embossing powders but is very useful for quick drying your projects or steps in flower making saving your time.


10. DIE CUTTING MACHINES--- An ultimate thing for your craft table. Be it a big shot, or big shot plus, or any electronic machine......you will love this...suit your budget and indulge in this die cutting machine and your scrapbooking or card making.....you will be amazed to see how much you can improve your creative skills with a die cutting machine.

Watch videos here----big shot plus- https://www.youtube.com/watch?v=HGSYk1xuPcE

There are many more videos on You Tube where you can see and learn about various crafting tools.

These tools above are a part of my daily crafting routine and I love each one of them. Invest in them and I promise you will thank me .....

Invest in the best tools at Crafters Corner

So leave your comments and all queries here

Happy Crafting!!!!


Tuesday 19 September 2017

Show Some Love

Hello Dear ones! Welcome to Crafters corner.....

I would love to share 2 beautiful projects with you.
Do u like Embroidery hoop? I love to work with them. I love to experiment, to go beyond comfort - take the challenge and make ...
I would be very happy if my work will inspire you.

Have a look, 

  
This is the mini frame that i cover with fabric which is like lace design. Then i arranged with Prima marketing baby theme papers, flowers and other few Prima stuffs. I stretch the fabric maximum as i can in hoop. So thats come more beauty and transparent look.

A few words about my hoop art

1. This is the paper pack which i used in hoop decor


2. I took a wooden hoop, pulled them tight cotton lace design cloth, cut off the excess fabric. 


3. Window design is from Dusty Attic chipboard.


4. Attaching design paper on back side.


5. Tight them perfectly with help of paper clips.


6. Coloring on Window : Prime with Home decor Chalk paint Sheep skin then Prima marking product Lucky Emerald wax.


7. Embellishments for hoop: Prima flowers, Prima wooden cuts, Dusty attic chipboards and few fussy cut images.


8. Blend the edges of paper with Distress mini ink: Any pink shades


9. Used Glue gun for attaching all stuffs.


10. Very small amount drops of colors : Prima Marketing Color Blooms


11. Coloring on Butterfly : White gesso + Distress mini ink


12. Die cut leafs : Prima Marketing Forest leafs


13. And this glitter gem is perfect matching to this cute flower. 


I hope you like my Tutorial details. Some more close ups


**********************************

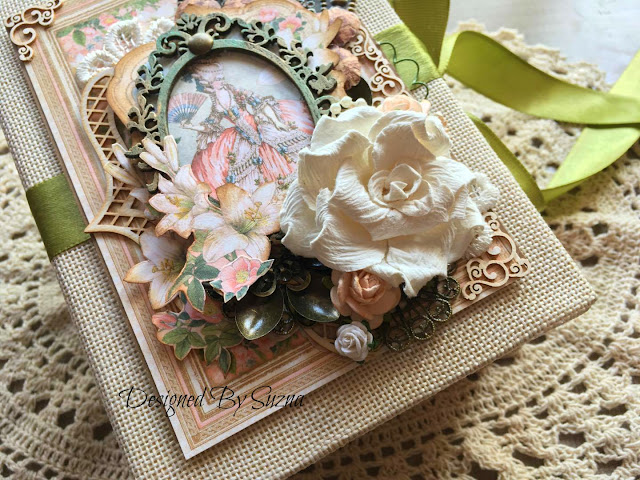
The Second Project is Miniature box I made using Graphic 45 Book Box covered with Prima Marketing fabrics & Gilded Lily paper. I decorated the box with Dusty attic frame, metal charms pearls and decorative laser cuts from Wycinanka. 


This project i couldn't take tutorial pics, but i have few idea to share with you. And here are the main materials details

Paper pack which i used 

Prima Marketing Fabrics: I used middle one to wrap my book box base  


Graphic 45 Book Box : 5 X 7 Inch


Prima Marketing Resin Embellishments : Cherub Fireplace & Shelf
 

Left side shelf of my book box.


Coloring on Frame: Black gesso + finger touch of Lucky Emerald wax 


My Book box with side shelf. 

  
I hope you like these projects and got inspired to use these great products on your next project. 
Thank you for Stopping by