Followers

Wednesday 28 February 2018

A warm welcome

Hello & A Very Good Morning :)

Hope you are having a splendid day so far!

This is your own SHALINI MITTAL.


We at Crafters Corner have always encouraged and given a platform to promising artists & crafters from all over India & the world. It is our aim to see everyone enjoying arts & crafts and learn new styles. Our earnest endeavor is to constantly evolve & become better, in order to, serve the crafting community with efficiency & professionalism. In keeping with that tradition, we'd like to share a happy & exciting news today. 

Please join me in welcoming Our new Design Team Member

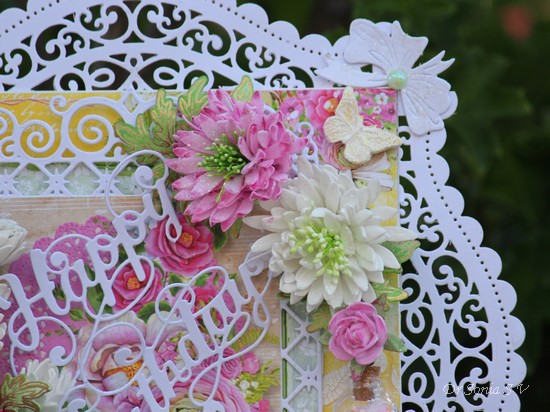
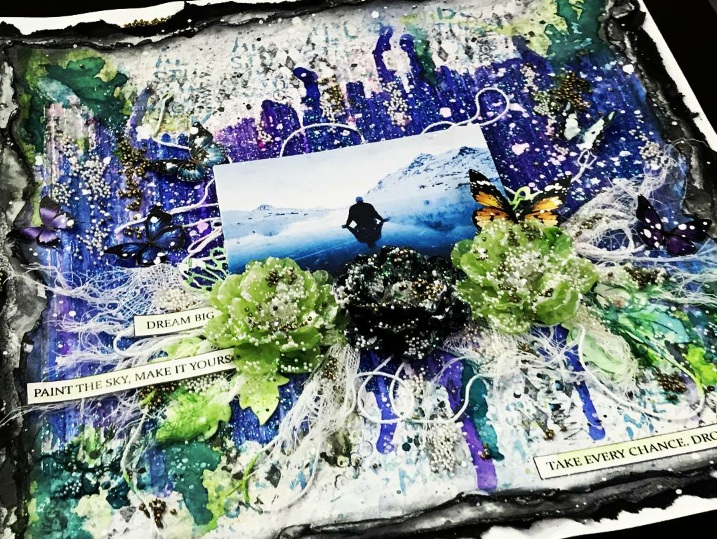
Preeti is from New Delhi, India. She has studied Clinical Psychology and works as a Psychologist and Talent Acquisition Specialist. She is extremely passionate about crafting and has an eclectic style. She mostly makes Mixed Media and Clean & Simple Projects. She loves making cards, layouts, tags, canvases and also does art journaling. 

Currently, she is on the Design Teams of 2 of our favorite Indian Brands, "Bob n Betty" & "Mudra Craft Stamps". She is also on the Design Team of Craft Stamper Magazine's TIMI Challenge. 

These are her Social Media Links, if you'd like to connect with her : 
Blog    Instagram     Facebook    Pinterest    Twitter


We look forward to lots of fun in the coming months with many new insights, projects & ideas !!

Thanks a lot everyone for your constant love & support!
Shalini & the Crafters Corner Team

Tuesday 27 February 2018

Foamiran Flowers Tutorial and 3 D project tips


Hi friends,Dr Sonia here and  sharing a DIY Shaped Drawer + Easel card decorated with lots of handmade foamiran flowers. Sharing  a video Tutorial on how to easily make  simple foamiran flowers plus a few tips and tricks about how to make a shaped drawer.

 All the flowers you see were made using foamiran . The pink ones were made from really thin foamiran and the white ones from slightly thicker sheets[ even genuine foamiran varies in thickness from sheet to sheet so dont worry if you discover that some sheets are thinner than others!]


The butterfly was made using air drying clay and a clay mold, and made to sparkle using microfine glitter from dress my craft.

I used beautiful Lemoncraft papers to line the card and box and added a lovely background texture using my favorite Scrapberry's Petals Pattern Stencil and Prima White Crackle texture paste.

I used the Cheery Lynn  tea rose die to make a tiny rose from pink foamiran and hung a bottle from the rose. The bottle is filled with tiny dress my craft little hearts and micro mini pearls!

Foamiran Flower Tutorial

Here is the short video Tutorial


More tips while making foamiran flowers
  • If you are diecutting foamiran sheets die cut 3- 5 flowers in one go depending on the thickness of your sheets. This helps to flatten your foamiran sheets even more!
  • Heating your flowers is completely optional but fun and can give a different look- In this project the buds were created using  same Cheery Lynn  sunflower die but after heating with the iron-box to curl the petals.
  • Adhesive- the easiest is hot glue and you can get a nice permanent bond but do remember to tackle those pesky glue strings while you make the flower and as soon as you glue otherwise your project will look like a nest with all those strings!!!

DIY Shaped Drawer - Tips
I love making 3 D projects and here are a few of my favorites: 3D House shaped Organizer,  3 D Garden ShedShabby Chic Dresser.
They are time consuming and not easy to construct from scratch but very gratifying nevertheless!! So I though of sharing tips I have discovered over the years especially for making 3 D projects.
The seasoned crafter will be familiar with the tips I am sharing...this part of the post is more for those starting out in this very rewarding part of our paper-crafting hobby.
  • If you are a hobby crafter or a professional and you want to make something sturdy and long lasting...chipboard is your best friend!! You can buy chipboard in different thickness and choose the thickness you feel will be best suited for your project or recycle sturdy boxes and calendars as a source of your chipboard.I recycled an old desktop calendar to make the sides of the drawer box in this project.

  • Cutting:since only a few dies like the BigZ or the special Spellbinders Contour dies can cut chipboard your best option is a craft knife. You can start off with the local ones  and when you feel you need something better you can explore the branded Craft Knife options
  • Cutting Mat : If you are just starting out and don't have a self healing cutting mat a good alternative is the kitchen chopping board .In case you are thinking of buying a cutting mat you will be surprised to know that there are quite a lot of nice options . I have an A2 mat from Morn Sun and a magnetic one by WRMK . The morn sun one has been with me more than 7 yrs and is a good , sturdy and economic option but after I got the magnetic mat that has been my go to option since the mat is large and easier to use for big projects plus it is magnetic and since the ruler is metal your chipboard will be held more securely without slipping while cutting[ that means less stress on your hands!]
  • Cutting Curves

  • The easiest way to cut a curve is to use a plate or any other flat edged object at home. Mark the center of your chipboard edge and use the grids of the cutting mat to help you get that perfect symmetry which will later help give that neat look.

  • Sandpaper is a good investment for crafters who are interested in making projects with chipboard as it is super useful to smoothen the cutting edges and shave off millimeters off an edge! You can get these from the hardware shops and they come in different grits--- pick up a couple of different ones as they are super super useful not only for chipboard but for decoupage and mixed media as well.

  • Adhesive - If you are making an album then choosing an acid free adhesive is super important so that you dont destroy your beautiful papers and photos several years down the lane. You can use the good old fevicol mr but it's drying time is crazily slow and not my preferred adhesive for quickly making 3 d projects. A fabulous quick drying alternative is  Aleene's tacky glue. Recently I tried Elmer's Craft Bond tacky glue but found it too runny ! The hot glue gun is not a good option for creating durable projects unless you are using it to stick foam as the hot glue undergoes variations based on the temperature and in a country like India where the climate changes drastically you can have projects literally falling apart if you relied on only the glue gun!
  • Supportive Strips. Any kind of glue takes time to dry when making 3 d projects and if you want nice perpendicular walls use strips of carstock to hold the pieces together like int his project : Garden Shed or for a super quick method use carpenter's adhesive tape[masking tape]
The drawer box has lining of foam on the  base and here is the side view showing dangling faux leather tassels[ from dress my craft] and the crystal feet!

The  metal handle was toned down with a bit of gesso to match the rest of the project!

And here is the easel card + drawer box in my garden!

I hope the  flower Tutorial and tips were useful to you!!

Supplies : Foamiran Sheets, Oil Pastels, Pollen- Pointed thread pollen light green, Micro mini thread green pollen
Clay Molds- Plaid Trinkets, Funnel Tray
Dies :  Creative Expressions Sue Wilson Filigree 3 D ittybitty Bow,Spellbinders Labels 47 Decorative Elements,Spellbinders Curved Borders 2,Tonic Studios Birthday Swirl,Heartfelt creations Delightful Daisy Die,Heartfelt creations Classic Leaf Die, Cheery Lynn  Sunflower, Cottage Cutz Spring Basket with Ducks,Dee's Distinctively Berry Sprigs
Papers : Lemoncraft Fresh Summer; Stamps : Heartfelt Creations Open Leaf Stamp
MS Scoring Board
Adhesive : E6000 Spray adhesive
Dress My Craft Little Hearts, Sparkling Dust

Saturday 24 February 2018

Mixed Media Canvas & Layouts: Guest Design Post by Preeti Datta

Hi folks!

Preeti Datta (aka Dutt Preety) here. Good Morning :) 
I am thrilled & honored to be back on the Crafter’s Corner Blog as a Guest Designer. 
Very grateful for this opportunity. Thanks a ton to Shalini di & the whole team at Crafters Corner.

I will be sharing 3 projects today; a Vintage Themed Mixed Media Canvas & 2 Mixed Media Layouts. 

I’ve used Dress My Craft's gorgeous products: Stencils, Glitters, Beads, Papers, Flowers & other craft supplies from the Crafter's Corner store

Let's get started. 

1. Vintage Mixed Media Canvas- "Dream"


Here are some close-up photos to reveal the intricate details :- 


Collage of the Process Photos: 


Synopsis of the Process: Prepared the canvas (10 by 8 inches) with Prima's Heavy White Gesso and added texture through DMC's Swirls & Couture Fashion stencils & Prima's modelling paste. Created the composition in the background with laces, then added color with Lindy's sprays. For more texture & details, did background stamping with a Prima stamp & Potting Soil Archival Ink, added DMC's pearl micro beads, golden antique beads, DMC rainbow glitter using Prima's 3d Matte Gel, made a wire embellishment with DMC's golden antique beads & prepared the Dusty Attic chipboards by heat embossing them & adding some DMC rainbow glitter chunks to them. Also, added tiny glass bottles with DMC's pearl micro beads, golden antique beads, stickers, thread, antique brads & rolled up book paper cigars. For creating the layers, used papers from DMC's Teenie Weenie Paper pack, fussy cut elements from DMC's motif sheets, added gauze & lace. In the end, created ink splatter, distressed the edges of the canvas with Vintage Photo Distress Ink & added a little shine using Inka Gold & Prima waxes.

2. Mixed Media Layout- Celebrate


Here are some close-up photos of the layout:


Collage of the Process Photos:

Synopsis of the Process: Prepared the base with Prima's Heavy White Gesso & then applied Prima's Modelling Paste through DMC's Alphas Stencil. Added color using ink sprays & distress inks/oxides. Added more interest to the background by stamping with archival inks & sponging on distress oxides through DMC's Thumb Print & Couture Fashion Stencils. Then prepared the elements for layering & embellishments by using DMC's Dots N Stripes Paper Pack & Motif Sheets. Further, gathered all the elements for layering like flowers, die cuts, laces, twine, gauze, DMC's 3D Fairy flowers (altered the color by applying gesso and then coloring with sprays) pollens etc and created a composition. In the end, added texture & shine to the flowers and in places around the layout, using DMC's Pearl Micro Beads, DMC sequins, Little Hearts, Rainbow Glitter, Microfine Glitter Powder & Rainbow Glitter Chunks using Prima's 3D Matte Gel. 

3. Mixed Media Layout- Dream Big


Here are some close-up photos of the layout:


Synopsis of the Process: Prepped one of the Pattern Papers from DMC's Hydrangea Lawns Paper Pack with Prima's Clear Gesso and applied Prima's Modelling Paste through DMC's Thumbprint Stencil. Then added  DMC's Rainbow Glitter & Microfine Glitter Powder to add sparkle to the background. Sprayed on a spray sealer (to bind the glitter to the layout better) then deckled the edges of the paper & adhered it to other deckled & distress edged papers to create a layered 3-D look.  For the main composition, used DMC's 3D Fairy Flowers, twine, gauze & die cuts. Fussy cut the butterflies & titles from DMC's  Motif Sheets. Did background stamping & added color to the background with ink sprays. Added texture & shine to the flowers and in places around the layout, using DMC's Pearl Micro Beads, Golden Antique Beads, DMC sequinsRainbow GlitterMicrofine Glitter Powder & Rainbow Glitter Chunks using Prima's 3D Matte Gel. In the end, created white ink splatter. 

That's all for today :) 

In case, you'd like to check out my first GD post where I shared 8 Simple Mixed Media Cards (using DMC stencils & glitters), please click HERE.

I'm very grateful to Crafter's Corner for this experience. I had so much fun playing with the supplies. I highly recommend that you check out their website, HERE and also, their brand- Dress My Craft for it’s Stencils, Glitters, Sequins, Flowers, Pattern Papers, charms, miniatures etc They have a plethora of cool options to choose from. Buy a few to try them out, experiment and see the quality for yourself. I'm sure you'll love them :) 

Please don't forget, there is a great deal on DMC stencils via a Grab Bag Offer,wherein you can pick up all 12, A4 sized DMC stencils at a discounted price, please click HERE to check it out. 

Have a great weekend!
Thanks a lot for your precious time :)
Stay Blessed
Preeti Datta
Blog
Instagram