Hello Readers ,
I am Mallika from
Aola Handmade Cards again with a new DT project .
This project I have name it as " Vintage Affair " . The name specifically denotes that how hooked I am to my favorite style vintage . I am actually having an affair with it .
This is basically a Handmade jewelry box / Chocolate box / Letter box { Limitless possibilities }
I was super confused about which picture to upload first .. so I uploaded all the shots randomly .
The entire box was initially painted by black acrylic paint mixed with brown . The MDF box was let to dry .
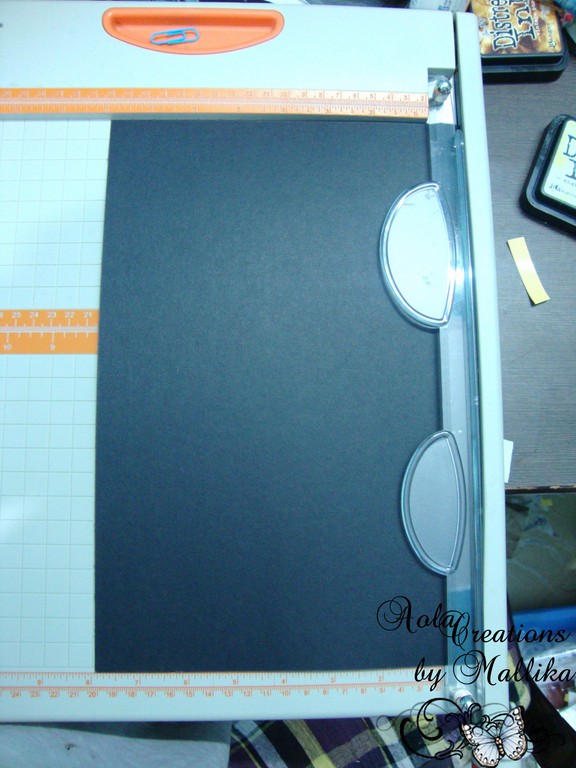
Once I had sookha box { Believe me I have no patience to wait } I started chopping my sheets by my
Tonic Trimmer before it dried .
I used some beautiful patterned paper from my stash as the base .
I did some paper tearing today after a long time .
Can you see that rose ?? yeee that's Handmade ! I was so happy after finishing it .
The little key and memories word is from my stash .
Can you see that flourish ?? That is
Victorian Romance Flourish by Cherry Lynn . { SURPRISE -
Crafters Corner is giving 20% discount on all cherry lynn designs }
I used some buttons from my stash .
The flower which is used in the side wall is a Marrianne Die which will be available soon .
Can you see how I did the lid with jute twines . I had most fun doing that though I almost burned my fingers doing that . I hate Glue guns and their Tacky Behavior :P
For the inside I was really confused of what should I keep.{ I still can't afford a diamond necklace for keeping inside }Like always little note cards came to rescue .
I made these quick note cards . The papers used are from various stacks .
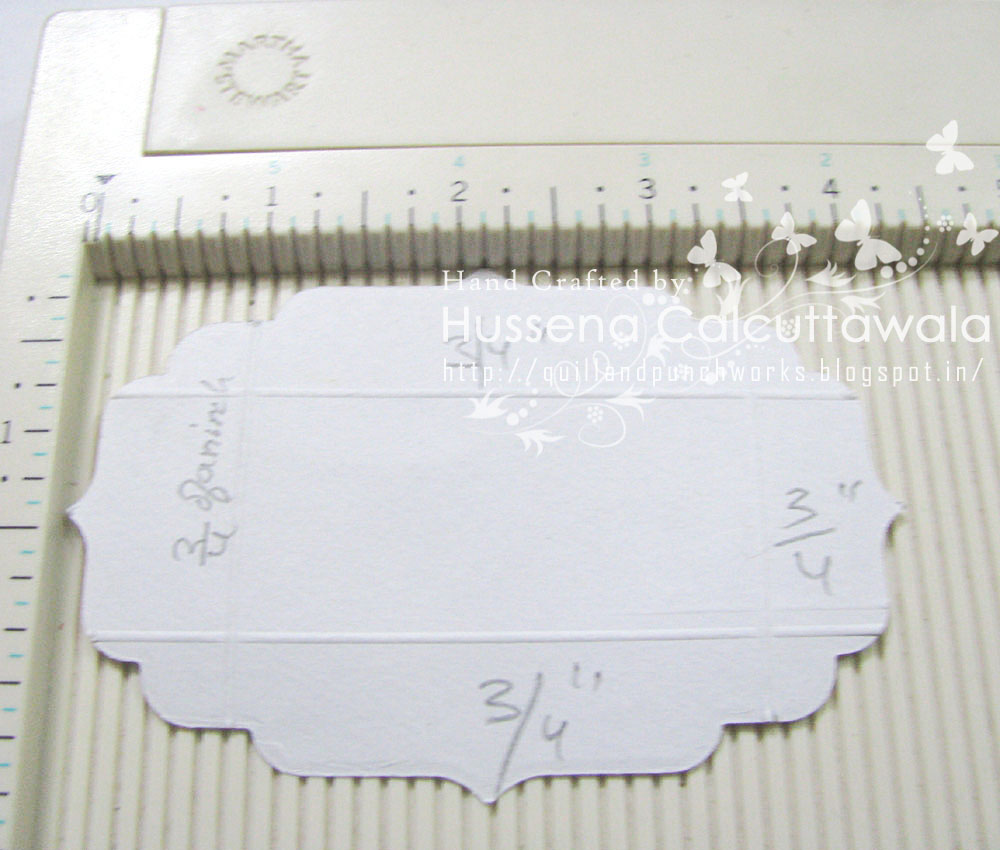
I have used the beautiful
Die Floral Ovals .
The entire box has been distressed using these
Gorguss inks available at our store ofcourse at best price too.
I kept some bhoosa for doing justice with its vintage look .
PS - Do you know you can make beautiful roses using
this die .
I hope you all will leave your valuable feedback .
Hugs
Mallika
Aola Handmade Cards
{ My Blog has a new address to those who have been wondering where miss not so good with words went - its now
Aola handmade Cards }


.jpg)


.jpg)