Followers

Showing posts with label Mini Treat Bags. Show all posts

Saturday, 15 July 2017

TREAT BAGS

Good Morning Crafty people... Isha Here

Do you like treats ?? I am sure we all love treats.
We have so many occasions around where we share treats with each other, How about adding some personal touch to make it more special.

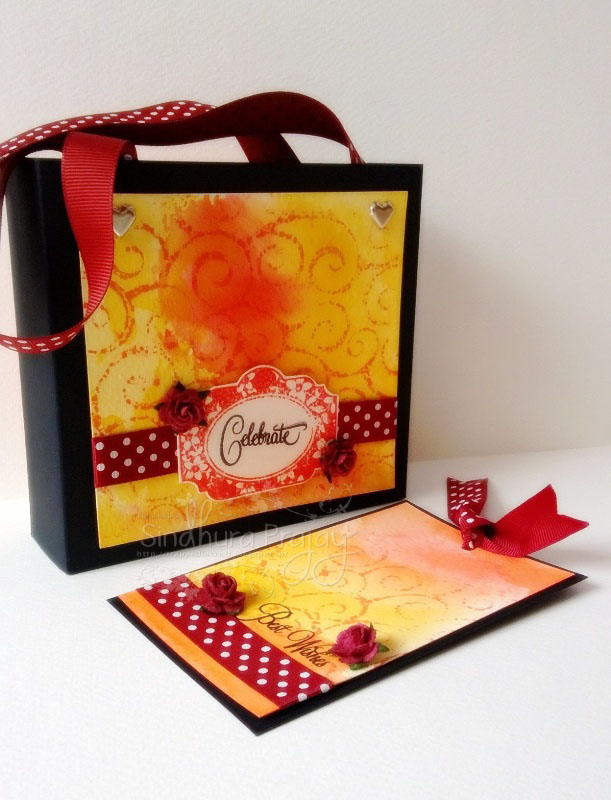
Today I will be sharing some of the gifting ideas which can be perfect for return favour gifts. In my post I have used sizzix purse die but you can use any dies to make your cute little treat bags.
Our store have many options to offer for these bag/purse dies.


                                                              Aren't they CUTE ???

Making these bags was so much fun and I actually loved the way we can use our supplies to make perfect gifting solutions.
I have fun video tutorial where you can see How I have constructed these treat bags using my Dress my craft Card stock - floral oriental collection. These card stock are quiet sturdy actually with 285 gsm of weight. I have used many more DMC supplies but my personal favourite SPARKLING DUST.

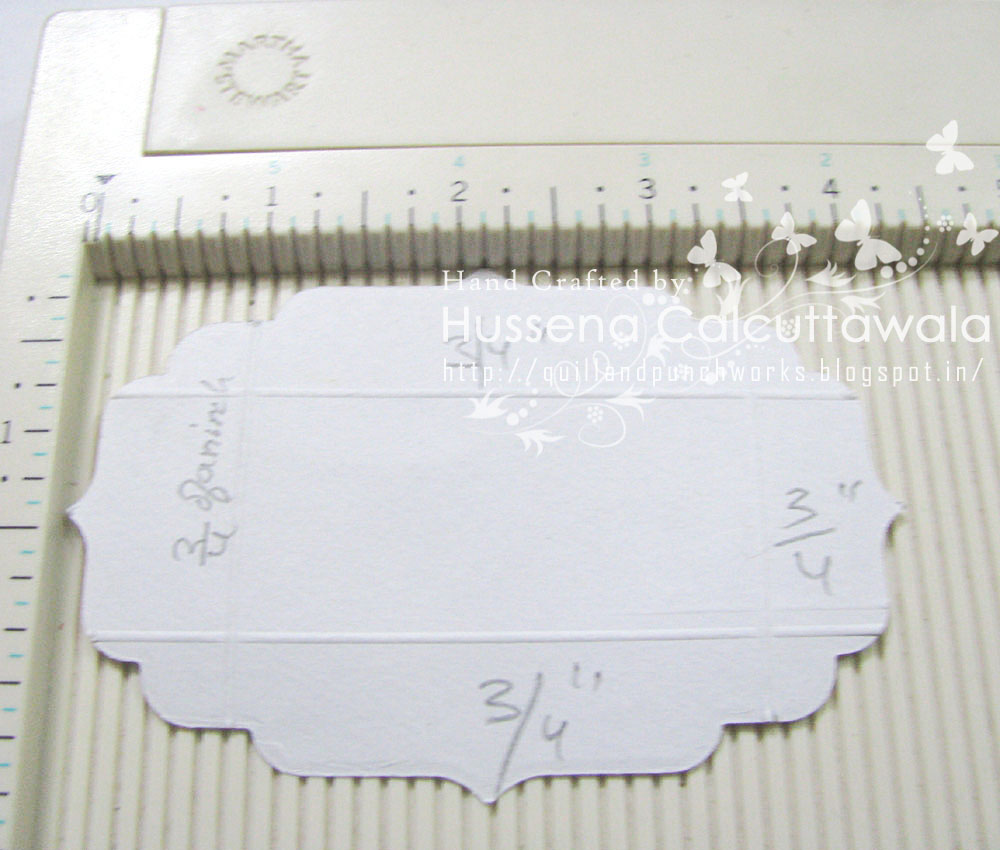
 Let's take a look how to make these treat bags - VIDEO TUTORIAL


Please avoid tiny miny errors have made in video.

                         
What say ?? Did you like these
Here are some more pictures, Sparkling dust add so much of Glamour to projects.


I have incorporated almost all the details in the video above, just in case if anything is left out please put your queries down below, will be happy to help.


Supplies used-
Dress my craft floral oreintal collection 
Dress my craft sparkling dust
Dress my craft Little hearts 
Multi medium gloss 
Mulberry flowers 
MFT- Proper pin strips pattern papers 6x6
MFT- Tiny check pattern paper 6x6
Sizzix purse die 

Happy Crafting and have a nice day
XOXO
Isha 

Tuesday, 25 June 2013

A bag, a tag and a tutorial!

Hello everyone!

I have made a gift bag and a matching tag to share with you. I also have a small tutorial for you. An easy one.

First let me show you the bag and tag...

I made that front panel with distress paints. These work amazing for back grounds. Mine isn't perfect but I like it! :p


This is the rear side of the bag. Kept it very simple...
 Made a similar BG fro the tag also.

Do you want to know how I made the background and those flourishes on the BG?

Here is a small tutorial for you..

Sorry for the bad pictures..

Supplies required-
1. Distress paints (Available in Crafters Corner. Not uploaded but contact Shalini in case you want to buy these awesome paints.)- I have used Fired brick and wild honey distress paints.
2. Water colour paper
3.Craft mat or a laminated sheet
4. Mini mister (or just anything to spray some water to blend the paints)
5. An embossing folder- I have used a cuttle bug embossing folder.
6. Distress ink - I have used worn lipstick distress ink here


Step 1. Select distress paints of your choice.
Step 2. Dab them onto a craft mat
step 3. Spray lots of water
step 4. press down a water colour paper onto the paints on the craft mat. Swirl it if you don't mind blending the colours. Mine is a bit messy but I like the final look of it.
Paints once dry dont blend when you add an extra coating. This lets you achieve brighter colours. So I took some extra wild honey colour onto my paper.
Step 5. Take an embossing folder. As you all are aware there are two sides to an embossing folder. One thats smooth and another that's not smooth. Apply distress ink to the side of the folder which is NOT SMOOTH.
Step 6. Just press it down on to the BG you have already made...

Simple, isn't it? :)

I want to thank the person who helped me by sending her embossing folders without which I wouldn't have been able to do THIS post.  It wouldn't have been possible without your help girlie! Love you! :)

So that's it for now. Have you played along our current challenge which is 'gifts galore'? You have five more days to play along.  And the prize is...


The winner will get to choose TWO distress stains of their choice from a very wide range of colours!  Isn't that great? :-)

Any queries, send a mail to Shalini at info@crafterscorner.in.
Any questions about the project or tutorial in this post, I'll be glad to answer. 

See you.. Take care!

Love
Sindhu..

Wednesday, 19 June 2013

A gift bag with a Co-ordinating Tag :)

Hi Friends,
Its Hussena here to share with you the inspiration for our this time challenge theme #9 which is" Gift's galore"  which is set by our very talented Dt member Anita...I know all my fellow Dt's have been sharing some amazing projects all through this month  and we are really looking forward to seeing some fabulous work from all of you out there based on our challenge theme this time so get creating fellow crafter's only 11 more days to go before our challenge ends :)..Oh before our get off track here's a look at what I have created ...its a matching bag and a tag set perfect for gifting for all occassion here's a quick look at it :


 And a look at them separately :


Okay here's a little bit about how I have made these  as you can see I have used the very beautiful pattern paper from Prima called the Rondelle as the base for both my bag and tag and believe me half my work was already done as these paper make such a beautiful background that I really didn't have to do much embellishing ..I just added a Cheery lynn daisy and  flourish which I have embossed and distressed using distress inks added a few flowers and pearls and not to forget the beautiful border lace from Cheeery lynn called Anastasia Border and I was all done :).... The handle of my bag are also made using the Anastasia Die which I have distressed using scattered straw distress ink .
                                             So that's  it from me Hope you like my bag and tag gift set would love to hear your comments regarding it so don't forget to drop me a line :)

Supplies Used :
Base CS : Fabriano Elle Erre
Pattern Paper : Prima Rondelle Collection
Dies :
Cheery lynn Daisy strip ,Anastasia Border, Tropical Flourish.
Spellbinders Label 9 die
Inks : Distress Inks : Scattered straw,Spun sugar,Peeled paint and Memento  Pear Tart,Versafine Onyx Black ink
Small white flower's from Crafter's Corner
Pearls : stash
If you have any queries regarding any of the products used please leave me a comment here or write to us at info@crafterscorner.in
Have a Good Day Everyone and Don't forget to play along our current challenge Gift's Galore to win some Exciting Prizes :)


Sunday, 20 January 2013

Heart shaped treat bag tutorial

Hello everyone!!
its kavitha here to share a  tutorial for making a heart shape treat bag(perfect for valentines day:))This is very easy to make with dies,you dont need any template at all.


I have taken the largest scallop heart die.Mark a 'V' shape like this upto 3/4th of the die cut(you can use any shape dies). Measure the length on both the sides.This is coming to 61/2 inches on both the sides.


Take a card stock measuring  61/2 inches by 2/1 inches.Score at 1/2 an inch on the both the sides lengthwise.Also score at 31/4 inches to make it into  'V' shape.Make a 'V' shape slit in the center.
Then apply a little bit of glue on the joining area and stick it together.Now stick this panel to the die cut.once it dires stcik the other die cut to the other side.
For the handle take 11/2 inches by 12 inches card stock and punch it on both the sides and stick it to the bag.
Hope i explained it clearly,i found it difficult in explaining this a bit,so if you have any doubt please leave a comment:))

Supplies used:
Spellbinder dies-Scallop heart ,classic heart and ribbon banner dies.
Cuttle bug embossing folder.
Martha stewart doily lace  punch
Cherry lynn small exotic butterflies.
Martha stewart leaf punch
Martha stewart score board


Hope you liked my tutorial and treat bag..
 http://www.crafterscorner.in (All craft supplies under one roof)
For any further information regarding any of the products please contact :- info@crafterscorner.in

Monday, 14 January 2013

A mini -treat box tutorial..!!

Hi everyone,
This is Hussena here & I am sharing with you all a tutorial for making a mini treat box perfect for gifting this Valentine or your preferred occasion...This is a very easy to make box & you will have loads of fun embellishing it in your own way....So here's a look at the box I have made :-


      And the top view of the box :


Supplies used for this BOX :-
Base CS -Stash
Lid is made using DCWV Garden Party Stack Pattern paper. -Crafter's Corner
Mulberry flower & leaves- Crafter's Corner
Red heart & small flowers -Colored using Tim Holtz Festive Berries Distress Ink -Crafter's Corner
Leaves & foliage -Colored using Memento Bamboo Levaes &  Tim Holtz Vintage Photo Distress Ink.
Dies:
Cheery Lynn Fanciful Flourish -Crafter's Corner
Cheery Lynn Olive Branches- Crafter's Corner
Cheery Lynn Exotic Butterflies (Small) -Crafter's Corner
Alphas & small hearts -Simple Stories
Small flowers -Stash


Now for the TUTORIAL  :

Supplies used :-
Martha Stewart Scoreboard
Fiskars Sure cut trimmer
Cardstocks of your choice
 Spellbinders Label 4 die
Double sided tape
Scissors

Step 1 - Take a piece of cardstock measuring 5- 1/4 inch * 7 -3/4 inch.

                                                               
Step 2 - Then placing the cardstock long way score it at 1 -1/4 inch , 3 -5/8 inch , 4 7/8 inch & 7 -1/2 inch.

 
Step 3 -Then flip the cardstock the other way & score at 1 -1/4 inch to make the bottom.      


Step 4 - Now ,cut the below scored line as shown in the picture below.

Step 5 -Glue the two sides of the box as shown below .

                                         
Step 6-Fold all the scored lines & glue the bottom flaps.

 
Now for the LID :

Step 1-  Take the second largest label die from the set ...It will measure approximately 4 inch * 2 -3/4 inch.


Step 2- Now score the die at 3/4 of an inch on all sides...This will fit the box perfectly giving a nice decorative edge to your lid..You can work with other shaped dies also as long as you work out the measurements for the box  against the die measurements....There are many possibilities with this kind of lids.


Step 3 - This is how the lid will look after you have scored and glued it on all four sides.


Step 4- To give you an idea how the box looks with a lid I have added to it .
                               
                                     
Hope you all like my tutorial ...If you have any doubts or queries regarding any of the steps or products used do drop me a comment & I will get back to you as soon as possible.

Don't forget to participate in our current challenge -'Anything but  a Card or Lo "...There is amazing Magnolia magazines up for grabs..:)

www.crafterscorner.in (All craft supplies under one roof)
For further information please mail at : info@crafterscorner.in    

Have a nice day everyone!                                                                                                                                                                                                                                                                       

Thursday, 13 December 2012

A card and a bag set!

Hi Friends,
This is Hussena here to share with you My inspiration for our this time's Challenge # 3 which is "Make a set " ,set by our very talented  DT member Kavitha...But before I begin I wanted to Thank all of you for the support you have extended to Me & my family on our loss.....It was a difficult time for us & all your prayers & kind words really helped .But time is a big healer and doing something which I love and am passionate about also helped ...So here's a set I had created a few days ago but  am posting now..Please have a look :


And a look at the card :
  And a look at the bag :


And here's the list of products I have used to make the card :-
                                   
*Base CS- Fabriano
*Pattern Paper -Bo Bunny Alora Collection (Crafter's Corner)
*Spellbinders Label 3 Die to make the card as well as the centre frame & also die cut the Pattern paper.-(Available at Crafter's Corner)
*Flourishes - Cheery Lynn Tropical Flourish Die (Crafter' s Corner)
                     Cheery Lynn Fanciful Flourish Die -(Crafter's Corner)
*Butterflies -Cheery Lynn Exotic Butterflies (Small) -(Crafter's Corner)
Hearts punched & covered with #Glossy Accents  (Crafter's Corner)
Sentiment -Inkadinkadoo Stamp ( Available at Crafter's Corner)
Ink -Memento Tuxedo (Black) Crafter's Corner)
Red Flower- Handmade
Small Flowers - Stash
Fillers (Off White) -(Crafter's Corner)

List of products for the bag :-

Base CS- Campap
Pattern Paper -Bo Bunny Alora Collection (Crafter's Corner)
Martha Stewart Daisy Punch (Crafter's Corner)
Dies :
*Flourishes - Cheery Lynn Tropical Flourish (Crafter's Corner)
*Butterfly -Cheery Lynn Exotic Butterflies (Small) (Crafter's Corner)
Red Flower -Handmade
Blue Flowers- Stash
Tulle & Pearls -Stash

Now, that you have seen my inspiration please do play along with our current challenge to win some awesome prizes sponsored by Crafter's Corner...We would love to see your various approaches to our challenge.

I hope you all like my projects...If you have any enquiry regarding any of the products used ,please leave a comment or mail us at :imfo@crafterscorner.in....And Shalini will definitely get back to you .
www.crafterscorner.in- (All craft supplies under one roof)


Friday, 9 November 2012

Treat bag for special occasion! & a Tutorial :)

Hi everyone,
This is Hussena  here to share with you all a treat bag which can be used for all those special occasions like the upcoming Diwali festival or birthdays or just about any occasions...These are tiny bags & can hold small chocolate bars very easily..This can also be used to gift some cards or even money to your near & dear ones!...The list is endless & up to your discretion .. :)...So here's a look at the treat bags first :-

                                                                   
And another one :-          
                                                             

 Supplies used :-

For the Orange  Treat Bag :-
Spellbinders Label 8- Available at Crafter's Corner
Stamp -Fancy Pant Designs- Crafter's Corner
Sentiment & cupcake- TPC Studio -Also available at Crafter's Corner
Faux Stitching & hair coloring of the image done with Tim Holtz Distress marker -Vintage Photo-Crafter's Corner
MS Daisy Punch-  Also available at Crafter's Corner
Balloons highlighted with Glossy Accents- Crafter's Corner

Blue & Yellow treat bag :-
Base- Spellbinders Label 8 -Crafter's Corner
Pattern Paper- Bo Bunny Alora collection- Crafter's Corner
Blue Curly Mulberry flower- Crafter's Corner
Flourish Die -Cheery Lynn Fanciful Flourish -Crafter's Corner
Punch Bunch- 3 in 1 Hydragena -Also available at Crafter's Corner
Faux Stitching- Tim Holtz Distress marker- Vintage Photo

And now for the tutorial on How to make this bag :-

 Step 1- Take a 6 1/2 inches * 61/2 inches CS.

                                                                                                               
Step 2- Mark 1 side of the CS into 1 1/2 inches * 3 1/2 inches * 1 1/2 inches & another side of the CS mark 2 1/2 inches * 1 1/2 inches * 2 1/2 inches...Like I have done in the picture below.

                                                                                           
  Step 3-Now score on the marked lines.Though i have to add please do not use pencil to create the lines the way i have done...I have done it only to make the step clearer to explain...if you draw these lines it will be difficult to remove the marks completely leaving untidy mess behind.

 
Step 4-After,you have scored on all the lines  ,cut the 1 1/2 inch line in the middle on both  sides of the CS as shown in the picture...Do not cut all the way through..Just up to where all the lines intersect.


Step 5-After you have cut on both the sides ,fold them using a bone folder as shown below.

                                                                                                                                                                                           
Step 6-Now fold the rest of the scored lines as shown below.This will give you the basic shape of the treat bag.

Step 7-After all the sides have been folded & scored properly ,glue the sides as shown below by placing the 1 1/2 inch fold inside & overlapping it with the TWO 2 1/2 inch sides.
 

Step 8- After the treat bag has been glued , now place the label dies both in the front & the back side & embellish it as you want for whichever occasion you want to create.

                                           
Hope I have explained the tutorial properly...And you all like my treat bags !...Please do leave me your Comments /Suggestions & if you have any enquiry regarding the products listed here please do drop in a mail to Shalini at  : mshalini79@yahoo.com & She will definitely get back to you 
Thank you so much for dropping by & Have a good day everyone :)