Followers

Showing posts with label Mulberry flowers. Show all posts

Sunday, 12 August 2018

CADENCE BETON RELIEF PASTE & VINTAGE LEGEND GESSO - CANVAS called Beautiful

Greetings Everyone

How are you doing today??
I am back again with my cadence mania, focusing again on the gorgeous Cadence Beton effect relief paste and vintage legend antique gesso.

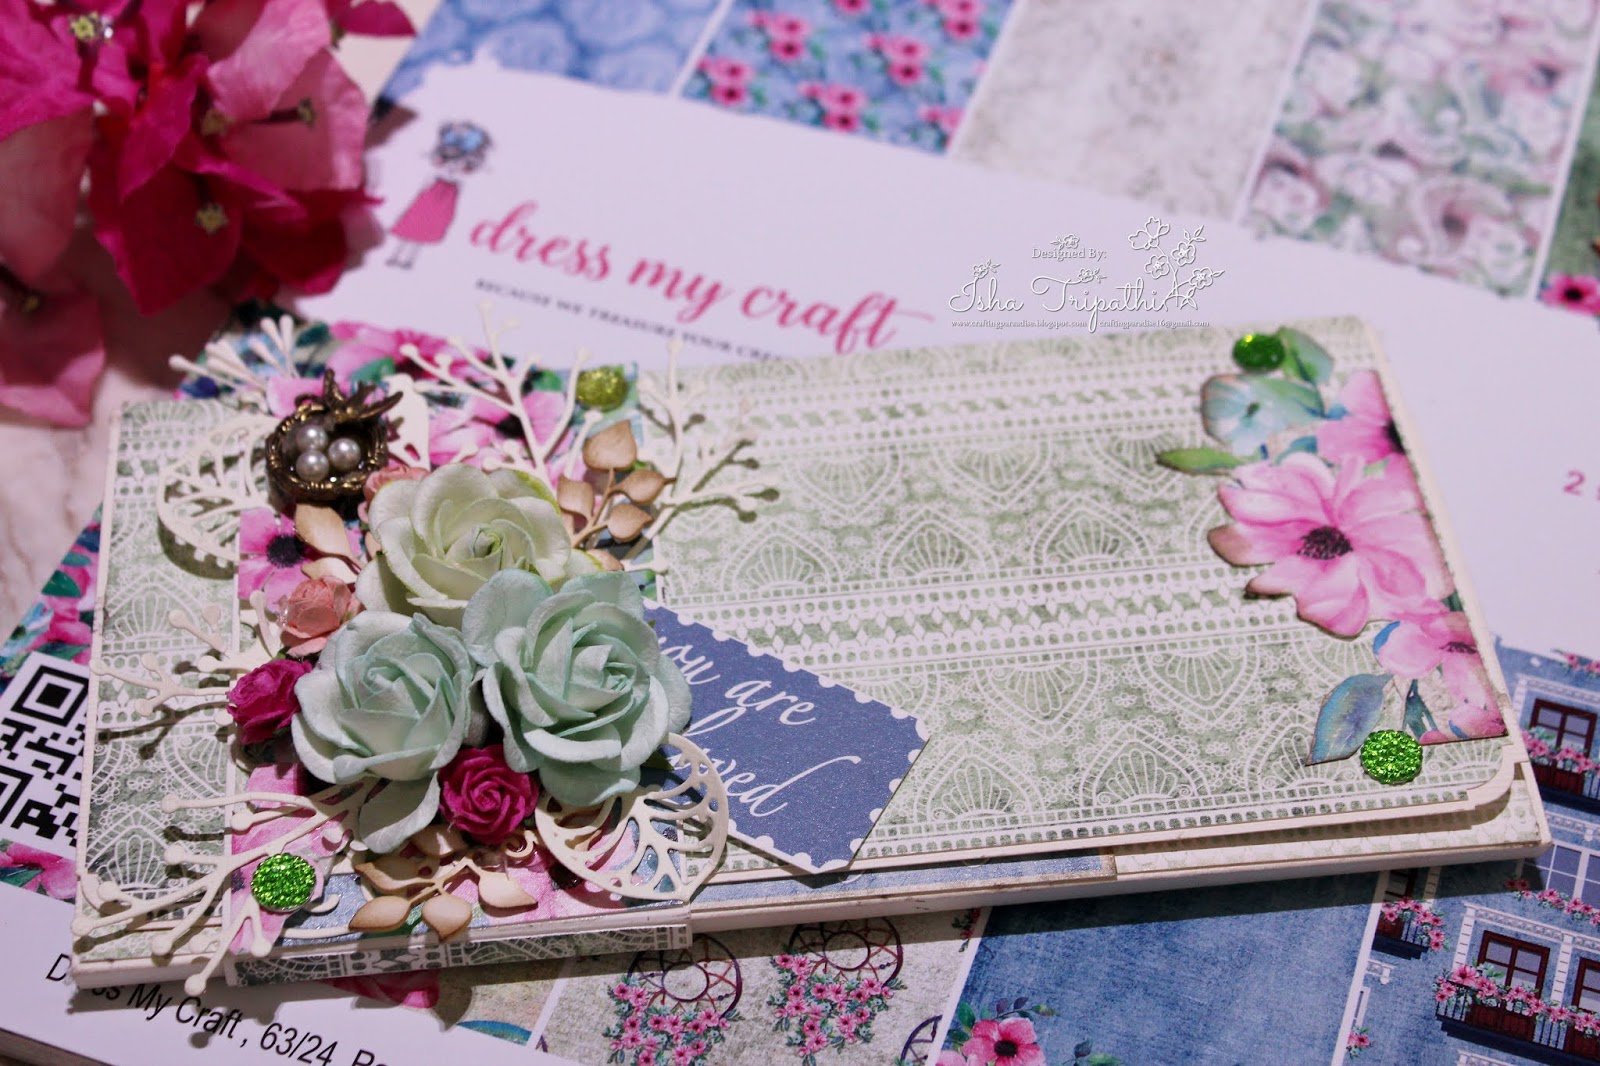
Today I have a canvas using the cadence products and believe me I am stunned by the outcome, it just look absolutely gorgeous.
Have a look

Cadence beton relief paste and vintage legend 

How is it ?? Did you liked it ....
well let me explain you the steps to create this beauty -

  • First of all choose your size of canvas you would like to work with, I have taken a small circle shaped canvas and randomly applied cadence beton effect using spatula.

  •  Now apply your choice of vinatge legend gesso all over.
  • Take TCW brick wall effect stencil 6x6" and apply beton effect relief paste all over the base.


                                   Isn't the effect amazing ..... I am in love this totally <3 

         Now you are ready to decorate your canvas with your choice of flowers or chipboards :)
I have decorated the canvas with some handmade flowers and mulberry flowers and adorable mudra chipzeb.

               Also I have made these cuties berries using styrofoam bud and DMC Rainbow glitter.
                                                  The big bloom in the center is handmade.


I hope I was able to inspire you all, don't forget to leave some love.
Keep checking the space for more amazing inspirations.

Happy crafting
XOXO
Isha

Product List-
Cadence Beton effect relief paste
Moss effect paint -light green
Moss effect paint - dark green
Vintage legend gesso - green
styrofoam bud
Mulberry leaves pinkish green
poppy rose lilac 
floral chipzeb mudra

Thursday, 7 June 2018

WALLET INSPIRED MINI ALBUM

Greetings Everyone
How have you been??

The entire team of Crafters Corner is super excited as the CRAFTY FEAST SEASON 3 is around the corners. I hope you all have booked your tickets.. Can't wait to see you all there.

Now coming back to my post I have a fun mini album which is inspired by wallet style and its super easy to make. But before that have a look ....


It is very simple, just basic tools and minimal accessories required to make this one.
I am in love this beautiful pattern paper by Dress My Craft Magnolias.
Magnolias pattern paper is new release by Dress My craft, Crafters Corner. It's a beautiful paper collection and also has Magnolia Motif sheet.


 I have a picture tutorial for you all, so let's get started.


STEP 1 
Take a piece of cardstock measuring 8"x12" and score them at the 4" ,43/4" and 8",83/4".


STEP 2
Now take 3 pcs of cardstock measuring 4"x1" to make the hinges


STEP 3Lastly you will be needing 3 pcs of cardstock, measurement shown in image, I forgot to mention about belly band for that you will be needing one piece of cardstock measuring 12' in length and 2to 2.5 inches of breath, you can totally adjust as per your requirement and score the band at 4" ,43/4" and 81/4" and83/4"


Now attach the pages with hinge created and paste them on the base cardstock 8"x12"in the center area on the left hand side.
Once done it's ready to decorate with your favorite pattern papers.
Similarly attach the belly band and decorate the same and viola you are ready with your wallet style album.

Here are some more images which will explain better... how this album look-a-like.
The idea I had while creating this was to just maximize and emphasize pattern papers. Pattern papers are so beautiful and we always hide the beauty of them with embellishments, I hope I did justice to this gorgeous paper collection.


I hope you all like the mini album and was able to inspire you all.
Don't forget to keep checking the space for more inspiration.

Happy Crafting
Loads of love
Isha

List of supplies used- 
Magnolia Pattern Paper
floral oriental collection
Mono multi liquid glue
Martha Stewart Scoring board
Mulberry roses curved
Prima Forest leaves die
Bird nest with egg metal charms  
Penny black nature song die
Mudra Leafy swirl chipboard cutout
Tonic scissors mini 5" 


Saturday, 31 March 2018

Quick Shabby chic Card Tutorial

Greetings Everyone

How have you been ? {HOPE GREAT :) }
Today I am going showcase super easy and quick card tutorial with you all.
For this you don't be needing any long list of supplies, it is very much available in your stash, go ahead look for them.


Here are the cards that I have made, take a look 

How are they ?


All the supplies used will be listed towards the end of the post and Let's get started

VIDEO TUTORIAL 


Here our some individual pictures for the same.


I hope I was able to inspire you all, and I am sure we all have plenty of stuff in our stash which we may use to create some beauties.

Don't forget to check the space for some amazing jaw dropping DT Post Inspiration by my fellow team members they are amazing totally.

XOXO
Isha 


Supplies Used - 
Pearl beads from stash 
PRIMA dies 


Friday, 29 September 2017

Money Wraps using Mulberry Flowers

Hello everyone! Welcome to a brand new post at the Crafters Corner blog! Well Its starting to get busy now, the festive season has started and we all are crafting n making some pretty gifts these days! So for today's post I decided to do a tute on some Money wraps! I absolutely loved making them! 
You all know my love for mulberry flowers n Crafters Corner recently got an amzing collection of the flowers in such pretty colours! And not to forget the variety of sizes and styles available! Since I do a lot of bulk orders n need flowers in huge quantites it becomes very difficult for me , but no more Crafters Corner is here to rescue me! The store has bulk quantities available so just place your order and they will be delivered to you! 
  Well now lets get started! Here are few envelopes I created! Do you like them? 


Lets get started 
First take a three fold envelope and mark it as shown in the picture make sure you mark the center, 1inch on each side and then connect the points 


Mark and cut the envelope and this is the shape you will have

Next cut a pattern paper 0.25'' smaller than the base size, keep it under the flap and mark

You will have something like this

Now cut it and stick it to the base, you can add some ribbon for tying the envelope. I am using my favourite paper pad here Hydrangea lawns by Dress my Craft! If you havent tried it yet I strongly recommend you, its a gorgeous paper pad with such lovely prints and the quality of the paper is amazing! 

Now comes the embellishing , I've added a mix of prima flowers and mulberry flowers


 Next I've distressed this small doily die by MFT its a very cute die and looks very pretty! 

Assemble three dies as shown in the picture using some foam tape

Add it to the center and you are done!

I love blingg! So I've added some bling crystals by Kaisercraft! I feel adding bling enhances the look of it! 
Here I've also make the same design in a different colour! 

Lets go to the next one! 

Here I have taken the same base but used the ribbon over the pattern paper , you can insert the ribbon as we did in the previous envelope as well

The layout is very similar to the previous envelope, layer the dies add flowers and bling and you are done! Quick and easy! 


 Now the last envelope has a lot of detailing! Hope you all like it 

Trim down the envelope a little bit and round the edges

Add the pattern paper to the base, both base and top flap need to be covered here

Now I have distressed a doily using worn lipstick and spun sugar 

Cut and overlap two doilies as shown in the picture

Add them to the base like this 

Next I've used this frame and painted it with rose gold paint by Prima. The frame was made using mod podge melter and melts , the mold is by Martha Stewarts, You can find its tutorial in my previous posts. I love making my own embellishments and the molds and melts make it so easy!


Add the frame to a piece of cardstock, pour some glossy accents to the center and add the pearls! I love these hardware pearls by prima , these are the glass pearls and their finish is amazing!

Now add the frame , a sentiment and some flowers and you are done! 


Hope you all enjoyed today's post! Please feel free to ask any questions! 
Hugs
Anchal Sapra


PRODUCTS USED
Spring Blossom Specialty 12 x 12 Paper Pad
Hydrangea Lawns - 12"X12" Paper Pad
Worn Lipstick - Distress Ink Pad
Spun Sugar - Distress Ink Pad
Dusty Concord - Distress Ink Pad
Curved Roses 45 MM - Pastel Yellow
Curved Roses 45 MM - Vintage Lavender
Curved Roses 45 MM - Vintage Blue
Curved Roses 35 MM - Bright Pink
Curved Roses 45 MM - Baby Pink
Poppy Rose - Purple / Cream
Retro Flower - Off White
Purity W/Glitter 1.5" - 2.25" 36/Pkg
Princess
Decoration - Blue Gems
Decoration - Pink Gems
Opal Magic Rose/Gold - Art Alchemy Acrylic Paint
Frank Garcia Memory Hardware Glass Pearls #2 - 7.5oz/3 Sizes
Mod Podge Mod Melter
Milk Glass White
Decorative Design
Mini Doily Circle - Die
Crochet Doily - Purple Metal Die
Pearl Crown
Kikyou Flower - English Green
Delicate Flower - Ivory