Followers

Showing posts with label review. Show all posts

Tuesday, 28 March 2017

DISTRESS CRAYON !!

Good Morning Everyone..


Hope you all doing good and are getting inspired from my fellow DT's creations.
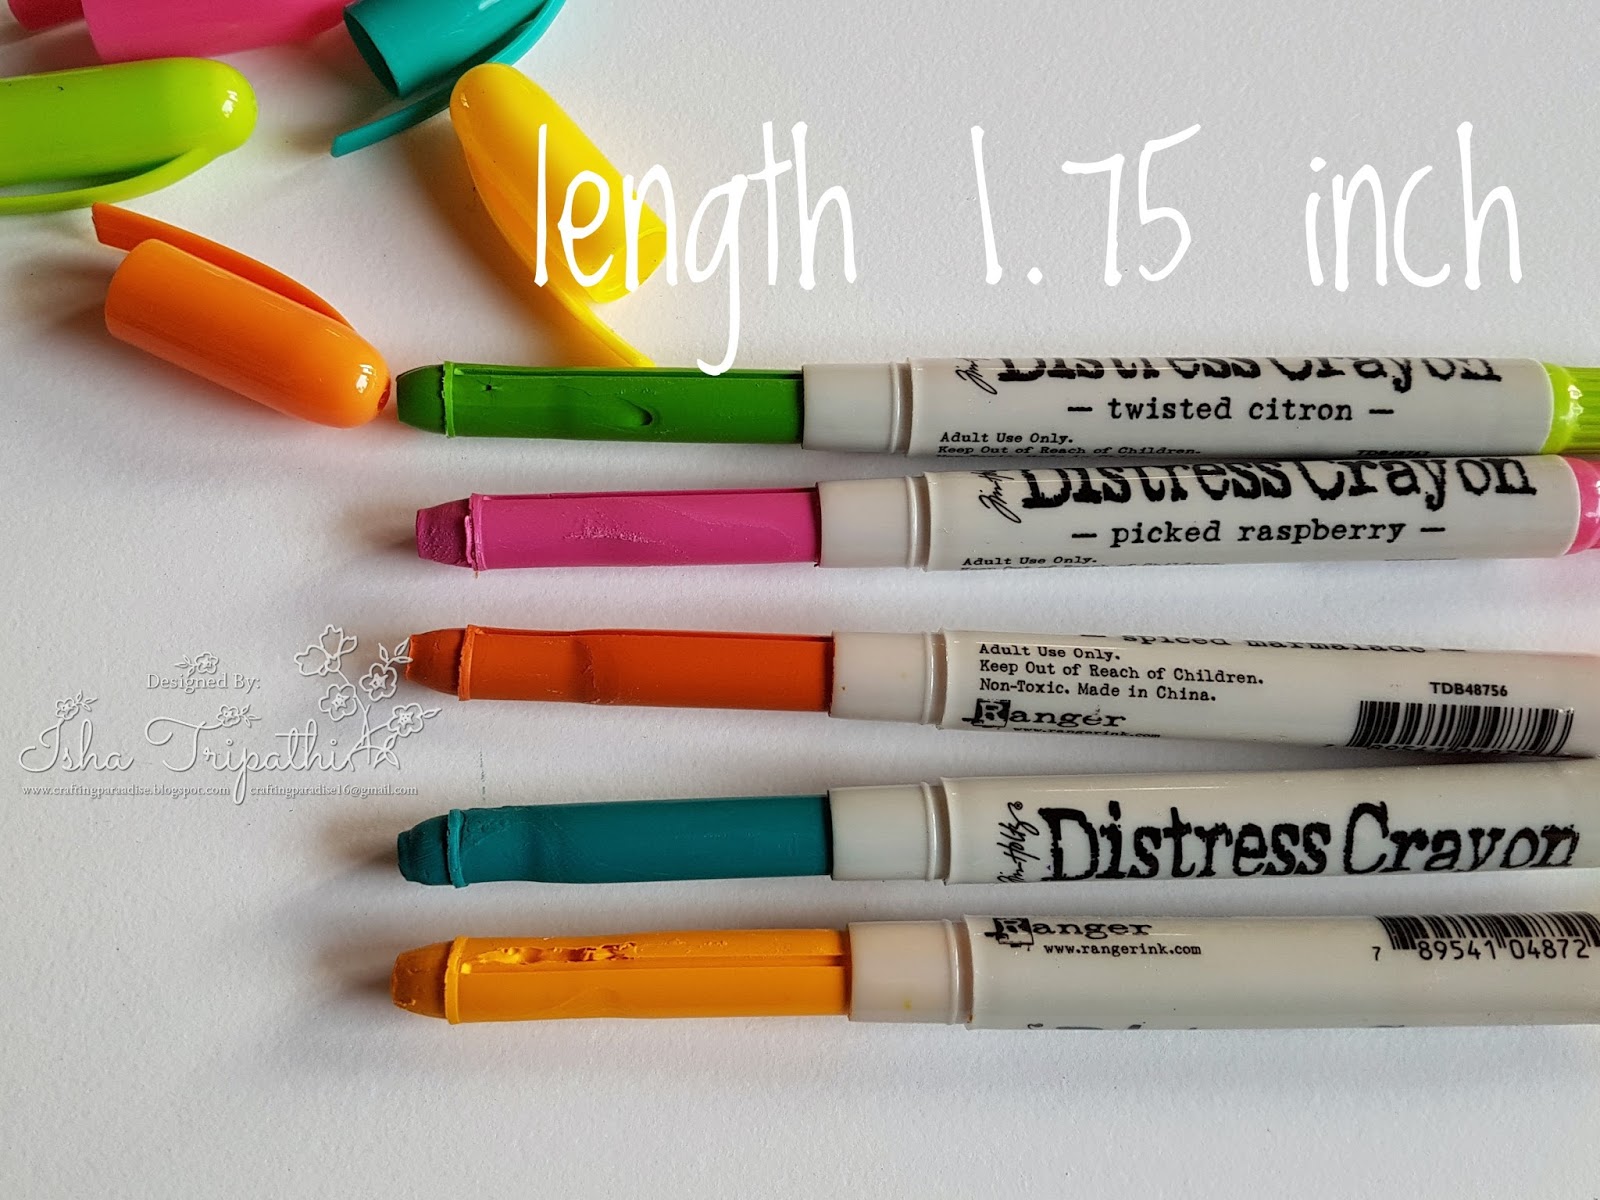
Today in continuation to my last post which was about review on DISTRESS CRAYON by Ranger, I am going to share few more tips and tricks you can try with distress crayons...

There is lot more to experiment with Distress crayon. As its properties say Distress crayon are water reactive pigments super creamy and smooth.

In the last post we have tried smudging effect, stencilling and water blending techniques with these crayons, incorporating all the techniques lets start with the post-

1- STAMPING WITH DISTRESS CRAYON
Since these are pigments, I was very much inquisitive about how these crayons may work when used as stamping medium.

When I applied black soot crayon to the stamp it glided so perfectly and smoothly leaving quite a distress image.
In the above picture, on the top left corner image, I have colored the stamp and have kept cardstock right above the stamp. With good pressure I have pressed the paper on the stamp.
once stamped the pigments are still active and water reactive, so I have heat set the image and Viola we have our stamped image.


Results were satisfactory, you will not get the crisp vibrant image.
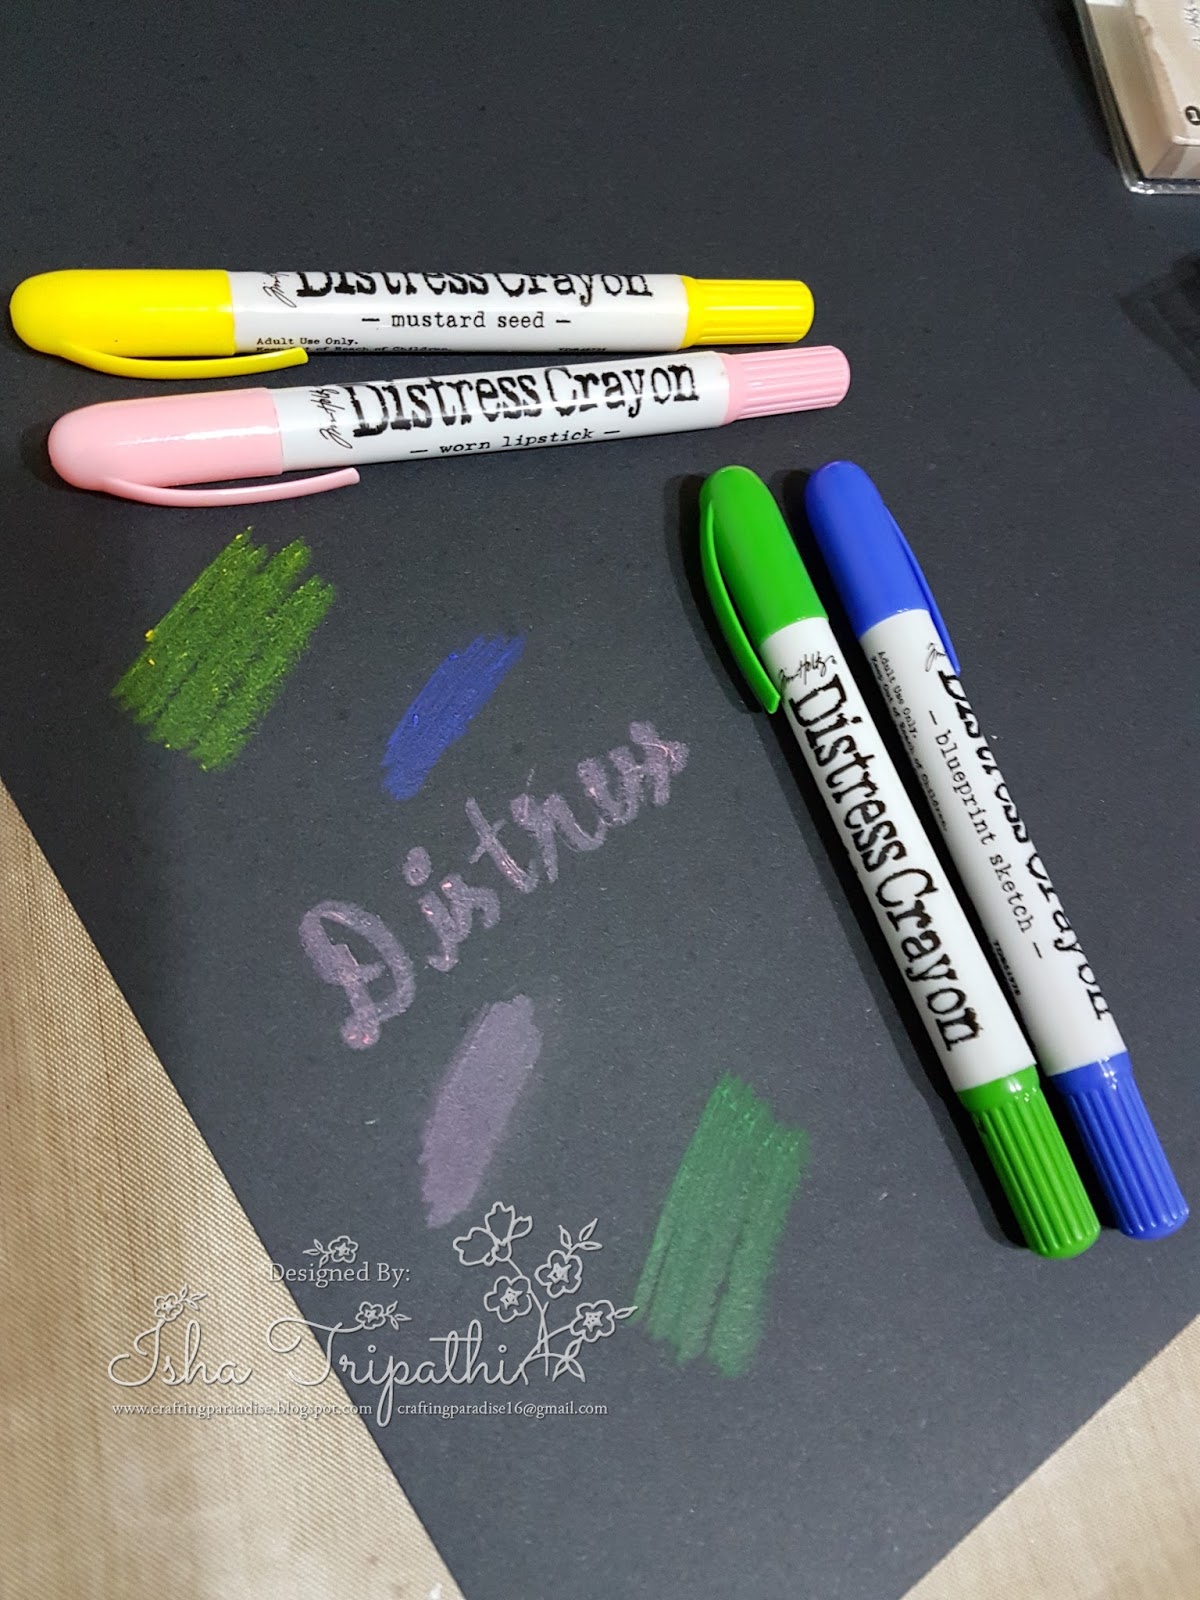
2- HEAT EMBOSSING 

Next I wanted to try distress crayons on black cardstock, In my last post I have tried to smudge the crayons on black CS and I wasn't happy with the results. So I tried distress crayons on black CS with some heat embossing.

Supplies used- 

I have used random stamp from my stash, I have taken a piece of black CS and on it I have heat embossed the image with white embossing powder.

 After that I have used mustard seed crayon right above the heat embossed image and start smudging it with my fingers.

 I loved the result and quite enjoyed colouring these heat embossed images. The best things about the colouring was it so smooth and it spread like butter and was so carried away that I have coloured three butterflies.


 You can also make cute embellishments for your projects  

Totally loving the colours.

3- WATER COLOURING 
Next thing I tried was next level water colouring with distress crayon, In my first post I have talked about water spritzing technique, moving ahead with the same I have made a galaxy theme card. I always wanted to try one ... 

In the above image I have first washed the card stock with water ad started adding colors one by one.
The best part about the crayons is, it doesn't smudges the base color if any color is added right above it, It only reactivates with water(base color)


This is my very first attempt in creating a galaxy theme background & I loved it.
Stamp set used is here from my stash and totally love the card.

Next I tried colouring the clear heat embossed image.I have scribbled some crayon on my craft sheet and with water brush I have picked the colour and painted the image,(below pic for reference )
Possibilities are endless with crayons.


You can layer the inks on one top of the another, I have observed it blends smoothly while layering and base colour or colour underneath does not get picked up,,, well this was the case with smudging, 
Crayon once dried completely can still be picked up with water. It works very much similar to distress inks.... keeping the name of the family of water reactive inks. 

4- HEAT RESIST TECHNIQUE 

In this technique you need to stamp the image with distress crayon as shown above on a glossy sheet and allow it to dry or you can heat set it. On top of it with any archival ink distress the entire background. Now take a baby wipe and rub it on top of the stamped image,it will pick yup the distress crayon and leaving image bleached out.


I hope you all loved the Distress Crayon so far and was able to inspire you all.
Do try your hands on these and share with us your lovely creations.

Oh I totally forgot to share my take on distress crayon painting. 
I am a die hard disney fan .. and a very bad painter ... distress crayon gave me a way out to try my hands on paintings.
I am so much in love with the character of Sadness from the movie Inside out ... so I made her on a canvas. Okay I am not a pro at this and this is my very first attempt on painting  so please be nice while judging, I have incorporated the technique here like water blending and finger smudging to create this.


Don't forget to leave some love.
XOXO
Isha 
Have a nice day 


Supplies used- 

Distress crayons
Dress my craft card stock 
Archival ink black 
Ranger heat tool
Ranger craft sheet
Stencils  

Hero arts and just rite stamps.
Tonic scissors


Saturday, 18 March 2017

DISTRESS CRAYON REVIEW

Good Morning Everyone !!!

How are you all doing today :D
First of all lemme scream here it feels great to be back here..... yeyyeyye 
I missed so much crafting  and all of you tooo of course... and I am back here after long break, and lets just not waste anymore time and jump straight to the POST...

Today I am going to share with you my take on DISTRESS CRAYON ..


Distress Crayon was launched last year in CHA 2016.. and who doesn't love the distress line of products by TIM HOLTZ. These are water reactive pigment crayon.

"Distress Crayons are formulated to achieve vibrant coloring effects on porous surfaces for mixed-media. The smooth water-reactive pigments are ideal for creating brilliant backgrounds, watercoloring, smudge effects and more! Color directly onto your surface and blend with water then layer with Distress Inks or Stains for more creative possibilities. Available in 10 sets that coordinate with the Distress Palette." - RANGER (website)

Each crayon pen is about 5″ in length, and comes in a grey plastic retractable body with the cap. The color pallete of crayons is just the same as of other products in the distress line. These are for ‘adult use only’ and are to be kept out of reach of children as clearly mentioned on each of the crayons. 
 When fully retracted out the crayon medium is about 1.75″ in length approximately. 

I believe that its to less in size/quantity as compared to price. That's one minus point for my side.


Whenever we think of crayons, only one thing pops up in mind i:e wax crayon !!!. But distress crayon is nothing like it, they are soft smooth cream like crayon and it is very much similar like lipsticks... as said by TIM HOLTZ. I personally felt they are even more softer then lipsticks.It literally glides on the surface.


When I applied them on the paper i could not wait to try my fingers to smudge these creamy crayons.
Ooops they didn't smudge .... I was wondering why it did not happen... I realised I might have let is set on the paper for too long and pigments got absorbed into the paper and dried off, therefore it didn't smudge.

I tried again, scribbled few dots and immediately smudge them and I got the results they smudged perfectly..... you can spot the difference between the two in the above picture.

Since they are pigments, I wanted to try them out on Black cardstock.. but somehow was not much happy with the results.You can see yourself how they turn out to be on Black CS.


Another attempt was to try these creamy crayons with gesso.. Since lot us are mix media lover and I was very much curious to see how they works with mix media mediums.....


I scribbled some crayon on the craft sheet and then start mixing it with gesso ... Voila they works well with the same and I was very much happy to see the effect.. so Here goes a big thumbs up to distress crayon.

Playing with DISTRESS CRAYON.....
Since I am big fan of distress products and Tim Holtz, I cannot wait more to play these crayon with water ...  I have randomly scribbled them on white cardstock ... spritz some water and start blending them with my fingers.. and heat set it with ranger heat gun.

Next I tried crayon with stencils... What I did here was I scribbled them directly on the stencil and started smudging with my fingers. You can see below the results .. I loved how the extra pigment is creating a highlighted effect . It really pops up the stencil pattern.


So as of now this is all what I have tried with DISTRESS CRAYON. I personally believe that it is a great product and is perfect for beginners and journaling lovers or anyone who loves to play around with colors. I have made a cute card and tag with distress caryon and I am totally loving these crayons... 

Here is what I have created...


I am loving the bright and creamy colors... I have just used the simple water technique and smudging to create these card and tags.. I have stamped the crazy birds with jet black archival ink and colored them with distress crayon. Sentiment is from dylusions ..and have been hoarding them for quite some time.

Thank you for visiting and reading, hope this post is helpful and you will include the crayons in your next shopping list and try them out too. Don't forget to share your creations with us :) 

XOXO 
Have a nice day 
Isha 

Supplies used- 

Distress crayons
Dress my craft card stock 
Archival ink black 
Ranger heat tool
Ranger craft sheet
Stencils  

Thursday, 17 November 2016

Rulers to create Perfect mats,frames and more!

Hi friends,I love experimenting with a product in depth to the hilt! Researching and experimenting for this blogpost for Crafters Corner was so challenging[ I had to make it interesting for you guys] and exhilarating [ as it was sheer joy to discover new ways to use rulers!] at the same time!

And I fervently hope you find this post and the linked in video useful !!

Rulers are one of the most basic of craft supplies ...you and me have used it from childhood.
Well did you know that there are specialised rulers that cater to the need of crafters!!

Special features of Craft Rulers 

Metal Edge 
Crafters Corner has a nice variety of rulers with a metal cutting edge.
The metal cutting edge is a super useful feature for papercrafters as it allows you to use a rotary cutter or craft knife with a cutting mat to easily and snugly cut along your ruler without slicing off a part of your ruler!
This allows you to use your ruler to get a nice straight cut on paper , fabric, chipboard etc
Cons: you need to hold the ruler firmly against your paper/chipboard so that it doesn't slip
You need to use a cutting mat when using the craft knife/rotary cutter!

Clear Acrylic Rulers
Being able to see under your ruler is an indispensable feature !
Pro : You can see exactly where you are cutting and measuring and only acrylic rulers can have the feature of a grid
Con : Scratches, Breakage, markings wearing off over time

Grid Feature
You can use grids to
  • Easily and quickly draw parallel lines by using the grids as guides
  • Easily create mats and frames for your pictures as I have shown in the video
Centering Feature
This is the feature I find most useful and its something which you will find indispensable once you start using it!
How to use Centering : refer to the video

Uses of centering
  • Hanging something precisely requires finding its center point!
  • Centering an image
  • Scrapbooking -precise centering of photos
  • Card making- Matting and Layering precisely and easily
  • Card making- making card bases easily and quickly
Card with mats and layers
  • Adding embellishments at equi distances.
  • Adding brads/eyelets/pearls at equi distances
    Centering Eyelet holes perfectly
Tag
  • Precise placement of a sentiment

Here is a Video Tutorial  I made to show you how to use grids and the centering feature.
Its my very first video with a voice so please do forgive my mistakes!


Piercing Holes in the Ruler

Stitched shapes are the vogue in the craft world right now and there are so many dies which can give the beautiful pierced hole edge feature but how about if you don't have a die cutting machine or want the versatility of being able to create your own customized pierced lines...well then pick up a ruler with the piercing holes feature.
Things you can do with the piercing feature
  1. Add a pierced hole border around your cards/ layouts
  2. Stitch through the holes
  3. Create a lattice of holes
  4. Create patterns and even letters with the pierced holes
  5. Play with spacing of the holes
Tim Holtz Ruler
In the Tim Holtz ruler, holes are placed at 1/8 inch intervals so you can create stitch lines on your cards or layouts by using a needle tool [ I have used a humble thumb tack] and a foam base .

You can create a stitched border all around!

And you can play around with the distance and create rows and even create patterns!

Now that I have discussed the features of craft rulers here are the salient features to consider when buying rulers from different brands.

And here are details about popular craft rulers at Crafters Corner . Click on the heading and you will be taken to the link in the shop.
Tim Holtz Idea-ology Design Ruler
12 inch clear acrylic, centering ruler, with piercing holes, grid and metal edge.
Sturdy ruler
Creative Impressions Acrylic Ruler
This is my personal favorite among the lot!
12 inch clear acrylic ruler with metal edge,grid and Centering ruler  with 1/4 inch measurements on one side and 1/16 th measurements on  the other side
Pros : The markings are only 1/4 inch on one edge and that gives a nice uncluttered look
You also have the option of a centering of 1/16th inches which is an advantage over the ideaology Tim Holtz ruler
It is also 2 inch wide which is wider than most rulers
Also comes with a nice plastic cover which you can  use to store the ruler and also hang it .
Cons : It doesn't have piercing holes so keep this in mind if that feature is very important to you
Universal Crafts Metal Edge Ruler
 30 cm clear ruler with metal edge , grid, centering feature and piercing holes.
You can get centering to millimeter accuracies!

Westcott Wooden Ruler with Metal Edge 12 inch

  • Lightweight wooden ruler which is super cheap costing just 70 rupees!
  • Has a Metal edge on one side and is calibrated in both inches and centimeters
  • The groove in the center allows you to firmly hold the ruler and press it while you use your craft knife this protecting your fingers and decreasing the chances of the ruler slipping.
  • Manufactured by the pioneers of ruler making, the Westcott company who have been making rulers since  1872 .Here is the link to a wikipedia article about the brand for those interested in a bit of history : Westcott Scissors and rulers
I dont know how well this post is going to be received...but I am hoping it was useful!!!

Here are the links to other basic supplies reviews I have written for Crafters Corner in the past:
Review of Adhesives
Spray Adhesive
E6000
Red Tacky Tape
Review of Scissors
Reviewing the Best Crafting Scissors

Thursday, 12 May 2016

Getting to know your Mini MISTI (And a Give-away!)

Hello Everyone, Tejal here today and I am so so honored and over the moon to be the one to be bringing this post to you today...

Have you heard??? Iliana, owner and creator of the MISTI, is giving away one Mini Misti EVERYDAY this whole May!! Its MISTI MAY-NIA this whole month!
Some days more than one MISTI is up for grabs!! Isn't that crazy awesome...
That's how amazing and generous she is! Check out her post over here for all the details.. I will be posting all the steps at the end of the post too!


I have been a die hard MISTI fan and supporter right since the day I saw it in action at its debut at CHA and have owned one for over a year now...and now I have the Mini Misti too!

So what better way to show my love for this amazing tool that changed my stamping completely, than do a video review and demo.
No more wasting paper, no more blurry images or sentiments, no more ghosting..and perfect placement.
(You will hear me say the word PERFECT over a 100 times in the next half hour!)

I made a 3 part video series.. to show how to use the Mini Misti and how to get the maximum benefits out of your stamps too!! Scroll down below the videos to see how to win a Mini MISTI everyday!!


Part 1


Here I unbox the Mini Misti, show you what all you get, how to use it for you basic stamping and how to use it for masking with greater accuracy.

Or watch in HD on our You Tube Channel over here..

Part 2.


Here I show you how to use the Multi layered stamps which are so much popular right now..and stamping them perfectly using your Misti. Also how you can make multiples of the same card in a jiffy. Watch in HD on YouTube Here


 As I show you in the video,  I place the stamp in one position and simply rotate the paper, this is exactly how I have made this card. The flowers were masked just slightly. The leaves and berries also stamped the same way. I just had to align it once and keep stamping and rotating the paper.

Part 3

In the last part I show you how to use Cling stamps with your Mini and large cling background stamps with the original Misti.

Watch this on YouTube Here


I do hope you enjoy this basic introduction to the MISTI. I have quite a few more lined up using this amazing tool. If you have any special requests for videos, please do no hesitate to leave me a comment and let me know.

GIVEAWAY!
OKAY..so now on-to how to win a Mini Misti..
----> Bookmark this Post over at My Sweet Petunia
         Follow the post everyday, as the new list of participating bloggers will be updated everyday.
----> Visit each blog and leave a comment to participate.
----> It's Day 12 today and we are the host for today...
----> Share this post on your facebook page settings as public.
---->If you have a MISTI then do share your experience in just two lines with the comment below.
        Leave a comment at this blog post. One comment per person please.
        Winners will be picked one week from today.


Products used in the Videos.
Mini Misti
Original Misti
Grid paper Pad
Altenew Label Love
Altenew Peony Bouquet
Hero arts stamp and cuts Hello
Lawn Fawn Mom+me
 Hero Artrs Basic grey Background stamp (discontinued mostly)
 Lawn fawn dye inks
Versafine Onyx Black
 Stampendous zinnia
 Ranger Dye Inks Electric Lime, Blue Ribbon
Altenew Red cosmos ink set

Till next time,
Happy Crafting! XOXO Tejal

Monday, 13 July 2015

Let's go Inky!

Hey Friends,

How are you all? Neha here. Today, I am going to talk about 2 topics.

                - Different kinds of inks available at crafters corner

                -when to use which black ink & why (as I believe, If you know why 
                  behind anything...you never have to remember when and which...:) )

Dye-based inks 
                 
                        - Dye-based inks are quick-drying and excellent for basic stamping.
              -  It’s pads are  hard felt pad, which means it’s difficult to over-ink 
                 your stamp, so it gives clean, crisp images 
              - perfect for stamping outlines and ideal for those new to stamping.
              - They are more  transparent and thinner than pigment inks.
              - They get absorbed in paper so gives brightest image on white CS. 
                  They don't give good results with dark CS.  
              - They dry quickly so not recommended for heat embossing.
              - They can be permanent/ waterproof upon drying(ranger archival inks) 
                  or non-permanent i.e activated with water
                  even after drying.(eg. distress inks)

I am listing inks from the store which falls under this category with a brief description.

        - Archival quality means fade resistant over a period of time. The inks are acid free, non-toxic and permanent on most paper.

         - On glossy surfaces, inks should be heat set to ensure permanency.
                                - waterproof makes it great for using with watercolors and/or water based markers, acrylic paints.
- Stamp cleaner is required to clean your stamps.

2.) Chalk Inks :


Chalk ink Edger by Prima               &                       ColorBox fluid Chalk inks  


                -  These inks are special kind they are dye inks with chalky pigments.

   - they provide opaque, matt, chalky, lustrous  ink coverage.

   - can be used to stamp even on darker colored card stock

   - These inks share the resilience of pigment ink
      but stamp and blend like dye ink

   - dry quickly on absorbent surfaces but if you work quickly
      you can heat emboss with them

                -  permanent when heat set, they resist smearing, 
                   bleeding or fading even when air dried. 

                - great for stamping and edging and direct to surface techniques.

                -  Works as water colors too.   

3) Distress Inks : 


            - These are water based dye ink.
             -You can use them to create an aged look on papers, fibers, photos 
           -Developed to produce a realistic weathered look

           -It has some chemical agent which delays drying time

            and makes it more blend able

           - Use it with blending foam to create beautiful back grounds.

           - excellent to use it with paint brush as water colors

              to color stamped images.


4) Memento Dye Inks : 


                 -  Tsukineko's Memento inkpads feature extraordinary fade-resistant
                    dye inks that have made them a staple for new 
                    and  experienced paper crafters.

                 - These inkpads capture fine details and offer even coverage.
                   Memento is fast drying on most papers.

                - Also, Memento inks are compatible with Copic Markers.

                - They comes in this due drop size and full size pads too.

                - If you are new to stamping and paper crafting, go for these
                  pocket friendly inks. They last for a long time and comes in 
                  many vibrant colors. They Also comes in full size pads.


5) Hero Arts Shadow, Mid tone Inks, Ombre inks 


Shadow  inks are specially formulated to blend into paper surfaces
 leaving a soft translucent image
 while  Mid-Tone Inks gives rich vibrant image.
The Shadow Ink line is made up of pastel tones and Mid-tones
 are rich vibrant colors.
     Ombre three of the Hero Arts midtone formula dye inks in one beautiful
 ombre  pad to give color gradation while stamping.


6) Ranger Dye Inks:


- These water based dye inks are both fade resistant and waterproof when dry.
-  Acid free. Non-toxic. Gives even coverage.


This is the card I created previously with various dye inks


Pigment inks:


-Pigment based inks are also water based but, unlike dye inks, they contain little

 particles of color. Because of this, they leave an impression that is more 

 vibrant and more resistant to water (once dry) than their dye based counterparts.

- They are fade resistant.

-They also stay wetter longer so they are suitable for embossing.

-Their pads are made of soft foam so be careful while inking stamp to prevent over-inking.

-On the negative side, they can't be used on gloss stock - they smear.


-A stamp inked with pigment ink can usually be cleaned with a wet paper towel but the darker colors 
may require the use of a stamp cleaning solution. 

Products in this category are

Mama Elephant Inks:                                                Ranger Pigment Inks

check my previous post with these inks HERE 


Clearsnap Colorbox Inks                                                            Memento Luxe Pigment inks.


Versafine Inks

Versafine is Tsukineko's unique pigment ink with an extraordinary ability to
 crisply capture finely detailed images.
         It requires separate mention as they are natural oil-based pigment
 ink that dries quickly on matte cardstock delivering great stamping results for fine detail. 
Their pads are hard and made of felt unlike other pigment ink's soft, foam pads.
The ink works with watercolor and markers.
                The inkpad is designed to last 3-5 times longer than regular inks.
In my opinion this is the finest stamping ink.

Solvent-based inks

-StazOn is a popular brand of solvent-based ink, as it has a mild smell and is 
available in many colours.
-Solvent-based inks are quick-drying, archival, acid-free, permanent inks.
-They are designed to use with non-porous and semi-porous surfaces like  acetate, glass, plastic, cellophane, aluminum foil, leather, shrink plastic and even metal.
 - You need stamp special stazOn cleaner to clean your stamps.
 Many reviews says they damage clear stamps.
- As it is  solvent based, ink pads dry out faster and needs re inking frequently. 

Alcohol inks


-These are special dye-based inks designed to give a pretty, polished-stone effect.
-They are quick-drying and permanent, and can be used on lots of surfaces including glossy paper, acetate, shrink plastic, foil and metal.
- Use this transparent alcohol ink to create colorful and dazzling effects on these slick surfaces.
-This acid-free, fade-resistant and fast-drying ink comes in an easy-to-use precision tip bottle for easy application.
You have to use special ink blending tool with felt applicator and blending solution
 to get desired effects. 

-Check the pendants I created last year from washers HERE.


A acrylic  tag for Keys,  stamped with stazon. 


Acrylic tag, coloured from back with blue alcohol ink. Front stamped with Stazon  and printed paper glued on the back.


Acrylic tag painted with  alcohol inks, golden mixative. Silver heart charm was colored with gold mixative.

 Now I will come to the second topic.
-when to use which black ink & why 

-As we saw,  there are two variation of inks 
permanent/waterproof and non-permanent.
-Permanent inks have alcohol in their ingredients which makes them water proof.
-While non-permanent inks has water as their ingredients
 and so they are not water-proof.
-Now, as we know that water and alcohol do not react  with each other.
- If you use a dye ink with a water-based marker, your image would run when you color. This is because dye inks are water-based, and water-based products  will react with each other 
-And same way if you stamp an image with an alcohol-based ink and then color it with an alcohol-based marker, the image will smear. This again is because the two products  have ingredients that will react with each other.
- So use opposite inks and medium e.g for water coloring use Versamark or Archival and for copic or any other alcohol markers - use Memento.

Following are few swatches I made using Memento, Versafine, Archival & StazOn for stamping flowers and  different mediums to colour them. 

For the above swatch, I have used Distress ink for water colouring so you can see memento bleeds if you use with water base medium. Check the crisp  stamped image with versafine & it works with water based medium too.


Above, I have used water color marker... all three except memento works. But detailed stamping with Versafine is incomparable.


For the last one I have used Copic to colour. Memento works best. Archivsl and stazon doesn't as they have same ingredient - alcohol as copic.


You can use Stazon with water color but I wouldn't recommend it as they spoil your clear stamp and leaves black residue even after cleaning. It is ment to use on nonporous surface so let's stick to it...:) .

See how Stazon will mess up with your stamp. The stamp is permanently stained. As you can see on the paper, I tried to clean it with cleaner ( it is regular cleaner not specially for stazon) and stamp off ink but that thing wouldn't budge.  So be careful  while using so specific products.


So if you have memento and versafine you are good to go as far as paper is concerned . No need for stamp cleaners too. 

 There are lots of products available so figure out why exactly you want it. 

READ PRODUCT DESCRIPTION.
Invest in versatile products.
Never buy a thing just because someone is recommending or using. 
Read reviews and make a conscious choice.
And most importantly, enjoy whatever you do!  


Supply used from store:'

StazOn Black Ink