Followers

Showing posts with label Neha. Show all posts

Wednesday, 6 April 2016

MISTI (Most Incredible Stamping Tool Invented)

Hello Friends,


Neha here and I am so excited to be here after a long time. Today, I am showcasing the MISTI (most Incredible Stamping Tool by My Sweet Petunia.) I am sure you all know about it but if you haven't heard of it , it is a stamp alignment tool.  It's been long since they have released it. I never bought it initially as I was skeptical about it. I have been stamping for years and was quite confident that it is not much of a help to me. Meanwhile,  I was watching different videos and started slowly leaning towards it.  Then Shalini brought the upgraded version @ 2499/- ( and i was like...are you kidding me?) .  Finally, I caved in and bought myself this amazing tool.   Oh boy, now I know what I was missing. I am pleasantly surprised at how I am falling in love with it...slowly...steadily...deeply! The more I use it the more I admire it. It is a quite simple tool but it takes the stamping process at a whole new level.  

I have just started using it but there are already many videos and tips out there. I am skipping the introduction part as many of you are familiar with it.

I have four videos to share with you. I am a novice at video making so please bear with me. I was highly inspired by Lydia's (of Understand Blue) videos HERE  . She is super talented artist and  I love to read her posts.


All the stamping on the above card eg. Background, Sentiment and multi colours flowers are done with MISTI. 

Highlights where MISTI magic helped...
1. Perfectly straight script in the background.
2. Happy and day are separate stamps so aligning 'DAY' under happy can be little tricky . But with MISTI , it was so easy.
3. Multi coloured flowers and leaves. This part is impossible without MISTI.
See the following video where I am demonstrating how to do multi colour flowers.


Now can you imagine stamping so many times on exactly one spot without MISTI? The best part is it takes away that apprehension   which we always experienced before we lift the stamp. You don't have to fear the stamping process any more because with MISTI, you can always stamp again and have perfect images every time.

The second card is made with cling layered stamps - Zinnia by Taylored Expression. (Gift from a sweet friend) .They are red rubber cling stamps. Superb quality of stamps but being cling stamp it was impossible to see through and align 3 layers for one flower. 


See how MISTI is helpful here.


For the card I repeated same process with all three flowers and branch. And I was blown away by the results. I have never stamped such a perfect layered flowers before. 


Let's see the next one.


1. Those perfectly aligned border of hexagons wouldn't have been possible without MISTI. There are three nesting border stamps to create that 3 coloured hexagon. See how I did it.


2. The orange peony is done with distress inks. As distress inks are primarily not meant for stamping so they never give even coverage when you use them with stamps. But with MISTI it is possible. I also added those dark highlights with painting directly on the stamp with Tombow markers.


3. Have you ever tried to stamp on die cuts? Well, I  do it but for one decent stamping it takes 2-3 failed attempts. Check here how to get that beautiful, uniform white edges around die cuts without wasting a single die cut. 


Above card is done with  Penny Black stamp ,different Memento Markers and MISTI.
I first stamped flowers and then leaves for multiple times using different shades on pink, red and violet to build those beutiful layers. 


Are you with me ? Now I will share some stamping comparison . I love the sentiments and images in some of the stamps like Jillibean, Fiskars and Kaiser Craft. but being acrylic stamps ( not photopolymer which are the highest quality of clear stamps) they never give crisp impression in one go. Thanks to MISTI now I can stamp twice and get the desired results.


Left side is stamping without MISTI and right side with MISTI. (twice). 


See the difference specially in those tiny lines of shadows. 
Now even with photo polymer stamps, I find stamping sentiment difficult specially when they are very thin and small.


See on the left - how 'many' , 'secrets' and ' i enjoy' are thicker than rest of it. This happens when one end of stamp receive more pressure than other while stamping. Your MISTI can prevent this easily giving you perfect crisp images every time. 


I hope you will find this post helpful to overcome your stamping fear and give it a try to MISTI. 
Thank you for being with me so far...:) Please share your feedback on my videos in  comments.
That is all for now. 
HUGS!

Supply Used :


Sunday, 13 September 2015

Waffle Flower Stamps

Hello Crafty Friends,

How have you been? It's been a while since i tried my hands on any new brand of stamps. 

Today, I am sharing few cards with Waffle Flower stamp set - Riverside. The quality of the stamps is really good and they take  inks very well. Plus the set has many small images which helps in creating a scene.
 Most of them are outline stamps so stamping with waterproof ink and colouring with water colours was an obvious choice. But I went a little off and stamped them on pattern paper, fussy cut all and assembled them on a water coloured background. 


I stamped some trees and fussy cut few to give variation. Sentiment is by MamaElephant.


For the next card I used that little bunny. It is looking at the sky...kinda sad and lost ! Set has sentiment too which says " wish you were here" .


So I  decided to paint the night sky with various distress inks  and stamped few stars & added splatter with Perfect Pearl. I painted the hill, stamped bunny and coloured it with copic. I used cloud stamp as thought bubble to frame my sentiment and hand drew those tiny dots. 


Those pine trees were calling for a Christmas card. So for next one, I stamped two trees with Altenew inks, hand drew lights. I used embossing pen (RANGER-Perfect Pen) on bulbs and clear embossed them.


I used SSS stencil and Mod Podge Clay to mimic snow in the background. Sentiment is from my stash. 


For the next card


I used river stamp (solid image) for building my back ground. I stamped it multiple times with very light inks. Sentiment is a wood veneer by Studio Calico. Simple right?

For next one, I decided to use that tiny jar and fire flies. It is really tiny so I stamped multiple of then in a line, added a strip of gold CS as a shelf & coloured inside of jar with yellow distress ink.


The sentiment ( by reverse confetti) ties the whole card together. 


Lastly, 2 tiny fish, 3 little hearts and a simple sentiment...


...makes this adorable tag.

I have tried to use all those tiny stamps and make distinctively different cards. Hope you will enjoy them. That is all for today...keep crafting!

Supply :


Monday, 24 August 2015

Collage Clay - My way!

Hey Friends,

You all must be knowing that Collage Clay by Mod Podge is the latest addition at Crafters Corner. A while back Shalini sent me the same. Honestly, I was baffled initially that how am I going to use it? But once I saw the consistency,  I decided to use it differently from what it was meant to be. Its texture is very similar to embossing paste. 

For the first card, I used it to make clouds.


I used Koi Water Colours  to paint the sky and allowed it to drip to make it look like rain. 
I used following supply


Used paper smooches die for rainbow & coloured each band with zig clean markers. Adhere it to the white panel. 


I used PTI cloud dies to make stencil & used it to apply clay at the both ends of rainbow. 


I embossed sentiment in copper on a stripe of vellum and painted the RAINBOW part with copics from back. 

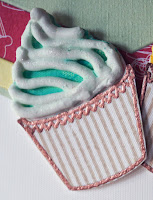
For the next card, I used the thin nozzle to apply icing on my cupcake...;)


Close up


Isn't it yummy? Once it was dry I painted it with distress inks. Added the sentiment to finish it off.

For the next card, I tried two tier cake....:P


I added texture on both tire with thick needle. Let it dry and apply perfect pearl with water to give that gorgeous shimmer.  Added some bling and mounted on BG made with distress ink. 

Ok, enough of cake...ummm...how about some ice cream?


I die cut three scoops and a cone. Embossed the cone with a folder to give some texture. Added colorbox reinkers to white clay for ice cream scoops. Apply on die cut and pat it with spatula for the texture. The consistency of the clay is so beautiful that it will hold the texture even after drying. I added sentiment and a resin cabochon. 


Above card is inspired by the below inspiration picture of  Runway Inspired Challanege #90. This is my all time favourite challenge. I just love to translate all the gorgeous dresses into cards. 


I decided to use some floral stencil with coloured clay for the upper part of dress.


Clay can be easily coloured with reinkers or acrylic colours and it leaves crisp images while stencilling. 

For the skirt of the dress, I used various floral stamps with dye inks and stamped directly on the card base. Mounted the yellow stencilled panel with foam tape. Added a sentiment and heat embossed butterfly. 


For the next project, I tried something different. 

I took a glass and masked it. I applied  blue alcohol ink at the bottom portion. 


I mount a sail boat stamp on a piece of acetate so that I can bend it along the curved surface of glass while stamping. (Black StazOn ink for non porous surface)


I applied white clay with narrow nozzle at very bottom of glass. Added blue glitter  while wet. Allowed it to dry for 24 hrs. Tie some twine on top and add some charm. Your candle holder is ready.


I know it is sloppy but hey...it is my first time at any such thing. So please don't judge the clay by this thing....clay is great...this is just me... ;)...:P


I really hope that you will enjoy this unusual use of clay and give it a try. I wish I could have used more of those cute resin  cabochon. May be next time. 

Do share your projects with us. We love to see them. Hugs.


Supply from the store :


Friday, 31 July 2015

Using tiny stamps from a set

Hello crafty friends,

Neha here. How are you all? Hope you are enjoying the rain. I love this weather. 
Some coffee and lots of crafting...heaven.  

Today, I am focusing on those small neglected stamps which comes in a set. Many times we get tiny stamps like heart, stars, dots or small sentiments along with our main focal point stamp in a set. These are the one which stays mostly unused. Let's ink those side kicks and create some beauties.

For the first card, I am using those three tiny arrows and a sentiment from Penny black Set.


Here is the card.


Pretty simple, isn't it? I stamped those arrows multiple times, in different directions to translate the 'lost' part of the sentiment. Love how it came together. 

For the second card, I have used Loving Words by  Ali Edward. 


I cut a circle with a die from copy paper and used it as a stencil to stamp those tiny flowers. I also masked ,shaded and stamped  a strip at the bottom. I used a sentiment from the same set. Such stamps are great to create your own pattern paper or backgrounds.


For the next two cards, I used tiny lanterns and circle(meant for balloon).


I draw those black strings with black pen and emboss lanterns in gold. Coloured them with different distress inks and added sentiment to finish it.

For the card below, I stamped and embossed that circle on white CS with clear embossing powder. Added  Ken Oliver Colour bursts with lots of water. Allowed it to dry and fussy cut the cluster.


Mount on sea green CS with foam tape & finish it off with some die cut sentiment.


For the next one I masked and colored top of the folded card & added 'thank you' stamp 
multiple times to create some interest, focal point and to emphasise the main sentiment.


For the tag i have used small heart stamp multiple times to form a square pattern. 


So, how was that? Hope you enjoyed it and you will love those tiny ones from your stash. 
And if you do, Please share on Crafters Corner Facebook Page. 

Buy for now!


Monday, 13 July 2015

Let's go Inky!

Hey Friends,

How are you all? Neha here. Today, I am going to talk about 2 topics.

                - Different kinds of inks available at crafters corner

                -when to use which black ink & why (as I believe, If you know why 
                  behind anything...you never have to remember when and which...:) )

Dye-based inks 
                 
                        - Dye-based inks are quick-drying and excellent for basic stamping.
              -  It’s pads are  hard felt pad, which means it’s difficult to over-ink 
                 your stamp, so it gives clean, crisp images 
              - perfect for stamping outlines and ideal for those new to stamping.
              - They are more  transparent and thinner than pigment inks.
              - They get absorbed in paper so gives brightest image on white CS. 
                  They don't give good results with dark CS.  
              - They dry quickly so not recommended for heat embossing.
              - They can be permanent/ waterproof upon drying(ranger archival inks) 
                  or non-permanent i.e activated with water
                  even after drying.(eg. distress inks)

I am listing inks from the store which falls under this category with a brief description.

        - Archival quality means fade resistant over a period of time. The inks are acid free, non-toxic and permanent on most paper.

         - On glossy surfaces, inks should be heat set to ensure permanency.
                                - waterproof makes it great for using with watercolors and/or water based markers, acrylic paints.
- Stamp cleaner is required to clean your stamps.

2.) Chalk Inks :


Chalk ink Edger by Prima               &                       ColorBox fluid Chalk inks  


                -  These inks are special kind they are dye inks with chalky pigments.

   - they provide opaque, matt, chalky, lustrous  ink coverage.

   - can be used to stamp even on darker colored card stock

   - These inks share the resilience of pigment ink
      but stamp and blend like dye ink

   - dry quickly on absorbent surfaces but if you work quickly
      you can heat emboss with them

                -  permanent when heat set, they resist smearing, 
                   bleeding or fading even when air dried. 

                - great for stamping and edging and direct to surface techniques.

                -  Works as water colors too.   

3) Distress Inks : 


            - These are water based dye ink.
             -You can use them to create an aged look on papers, fibers, photos 
           -Developed to produce a realistic weathered look

           -It has some chemical agent which delays drying time

            and makes it more blend able

           - Use it with blending foam to create beautiful back grounds.

           - excellent to use it with paint brush as water colors

              to color stamped images.


4) Memento Dye Inks : 


                 -  Tsukineko's Memento inkpads feature extraordinary fade-resistant
                    dye inks that have made them a staple for new 
                    and  experienced paper crafters.

                 - These inkpads capture fine details and offer even coverage.
                   Memento is fast drying on most papers.

                - Also, Memento inks are compatible with Copic Markers.

                - They comes in this due drop size and full size pads too.

                - If you are new to stamping and paper crafting, go for these
                  pocket friendly inks. They last for a long time and comes in 
                  many vibrant colors. They Also comes in full size pads.


5) Hero Arts Shadow, Mid tone Inks, Ombre inks 


Shadow  inks are specially formulated to blend into paper surfaces
 leaving a soft translucent image
 while  Mid-Tone Inks gives rich vibrant image.
The Shadow Ink line is made up of pastel tones and Mid-tones
 are rich vibrant colors.
     Ombre three of the Hero Arts midtone formula dye inks in one beautiful
 ombre  pad to give color gradation while stamping.


6) Ranger Dye Inks:


- These water based dye inks are both fade resistant and waterproof when dry.
-  Acid free. Non-toxic. Gives even coverage.


This is the card I created previously with various dye inks


Pigment inks:


-Pigment based inks are also water based but, unlike dye inks, they contain little

 particles of color. Because of this, they leave an impression that is more 

 vibrant and more resistant to water (once dry) than their dye based counterparts.

- They are fade resistant.

-They also stay wetter longer so they are suitable for embossing.

-Their pads are made of soft foam so be careful while inking stamp to prevent over-inking.

-On the negative side, they can't be used on gloss stock - they smear.


-A stamp inked with pigment ink can usually be cleaned with a wet paper towel but the darker colors 
may require the use of a stamp cleaning solution. 

Products in this category are

Mama Elephant Inks:                                                Ranger Pigment Inks

check my previous post with these inks HERE 


Clearsnap Colorbox Inks                                                            Memento Luxe Pigment inks.


Versafine Inks

Versafine is Tsukineko's unique pigment ink with an extraordinary ability to
 crisply capture finely detailed images.
         It requires separate mention as they are natural oil-based pigment
 ink that dries quickly on matte cardstock delivering great stamping results for fine detail. 
Their pads are hard and made of felt unlike other pigment ink's soft, foam pads.
The ink works with watercolor and markers.
                The inkpad is designed to last 3-5 times longer than regular inks.
In my opinion this is the finest stamping ink.

Solvent-based inks

-StazOn is a popular brand of solvent-based ink, as it has a mild smell and is 
available in many colours.
-Solvent-based inks are quick-drying, archival, acid-free, permanent inks.
-They are designed to use with non-porous and semi-porous surfaces like  acetate, glass, plastic, cellophane, aluminum foil, leather, shrink plastic and even metal.
 - You need stamp special stazOn cleaner to clean your stamps.
 Many reviews says they damage clear stamps.
- As it is  solvent based, ink pads dry out faster and needs re inking frequently. 

Alcohol inks


-These are special dye-based inks designed to give a pretty, polished-stone effect.
-They are quick-drying and permanent, and can be used on lots of surfaces including glossy paper, acetate, shrink plastic, foil and metal.
- Use this transparent alcohol ink to create colorful and dazzling effects on these slick surfaces.
-This acid-free, fade-resistant and fast-drying ink comes in an easy-to-use precision tip bottle for easy application.
You have to use special ink blending tool with felt applicator and blending solution
 to get desired effects. 

-Check the pendants I created last year from washers HERE.


A acrylic  tag for Keys,  stamped with stazon. 


Acrylic tag, coloured from back with blue alcohol ink. Front stamped with Stazon  and printed paper glued on the back.


Acrylic tag painted with  alcohol inks, golden mixative. Silver heart charm was colored with gold mixative.

 Now I will come to the second topic.
-when to use which black ink & why 

-As we saw,  there are two variation of inks 
permanent/waterproof and non-permanent.
-Permanent inks have alcohol in their ingredients which makes them water proof.
-While non-permanent inks has water as their ingredients
 and so they are not water-proof.
-Now, as we know that water and alcohol do not react  with each other.
- If you use a dye ink with a water-based marker, your image would run when you color. This is because dye inks are water-based, and water-based products  will react with each other 
-And same way if you stamp an image with an alcohol-based ink and then color it with an alcohol-based marker, the image will smear. This again is because the two products  have ingredients that will react with each other.
- So use opposite inks and medium e.g for water coloring use Versamark or Archival and for copic or any other alcohol markers - use Memento.

Following are few swatches I made using Memento, Versafine, Archival & StazOn for stamping flowers and  different mediums to colour them. 

For the above swatch, I have used Distress ink for water colouring so you can see memento bleeds if you use with water base medium. Check the crisp  stamped image with versafine & it works with water based medium too.


Above, I have used water color marker... all three except memento works. But detailed stamping with Versafine is incomparable.


For the last one I have used Copic to colour. Memento works best. Archivsl and stazon doesn't as they have same ingredient - alcohol as copic.


You can use Stazon with water color but I wouldn't recommend it as they spoil your clear stamp and leaves black residue even after cleaning. It is ment to use on nonporous surface so let's stick to it...:) .

See how Stazon will mess up with your stamp. The stamp is permanently stained. As you can see on the paper, I tried to clean it with cleaner ( it is regular cleaner not specially for stazon) and stamp off ink but that thing wouldn't budge.  So be careful  while using so specific products.


So if you have memento and versafine you are good to go as far as paper is concerned . No need for stamp cleaners too. 

 There are lots of products available so figure out why exactly you want it. 

READ PRODUCT DESCRIPTION.
Invest in versatile products.
Never buy a thing just because someone is recommending or using. 
Read reviews and make a conscious choice.
And most importantly, enjoy whatever you do!  


Supply used from store:'

StazOn Black Ink