Followers

Showing posts with label card. Show all posts

Sunday, 4 February 2018

Treat Basket : Season of Love

Good Morning Everyone

How have you been?
Today I bring you some super easy treat baskets to gift to your loved ones. Since Valentines is around the corner and we all love to gift something or the other to our dear ones.


 Isn't it so lovely?? I have made this basket right from scratch and these floral beauties are also handmade. I have used lots of Dress my craft products here.

 Here are two sets {Treat basket and Mini card} that have created. It is super quick and easy to make and perfect to be gifted as token of love.

Dress My craft pattern paper that I have used to make this project are gorgeous Teenie Weenies collection.
The quality of paper is amazing it is super sturdy and thick. 


HOW TO MAKE BASKET -

In order to make this basket you will be needing some basic supplies,

List of Supplies - 
1- Thick piece of Card stock {12x12"}

STEP 1
To make this set of Basket and Mini Card, you will be needing 
- 1 pc of Card stock measuring 5" x 4"
- 2 pcs of Card stock measuring 5" x 2"
-2 pcs of Card stock measuring 4"x 2"

 STEP 2- 
You will be needing 4 pcs of 1" inch strip to join the above card stock together.
- 2 pcs of 1 inch strip x 5" inch in length
-2 pcs of 1 inch strip x 4" inch in length
-4 pcs of 1inch strip x 2" inch in length

All you need to do is score in half these 1 inch strips


STEP 3-
To make the basket band you will be needing 2" wide and 10" inch long piece of strip

STEP -4

Now glue all the pieces adjoining them with help of strips.

And decorate your basket using your favorite supplies from Crafters Corner store.

To make this card I have used 4"x3" inches of card stock and used beautiful DMC Teenie Weenies collection.

I hope you liked this fun easy peasy gifting solution this Valentine season.
And I hope I am able to inspire you.

All supplies used are available at Crafters Corner store.

XOXO
Isha 

List of Supplies- 


Saturday, 18 March 2017

DISTRESS CRAYON REVIEW

Good Morning Everyone !!!

How are you all doing today :D
First of all lemme scream here it feels great to be back here..... yeyyeyye 
I missed so much crafting  and all of you tooo of course... and I am back here after long break, and lets just not waste anymore time and jump straight to the POST...

Today I am going to share with you my take on DISTRESS CRAYON ..


Distress Crayon was launched last year in CHA 2016.. and who doesn't love the distress line of products by TIM HOLTZ. These are water reactive pigment crayon.

"Distress Crayons are formulated to achieve vibrant coloring effects on porous surfaces for mixed-media. The smooth water-reactive pigments are ideal for creating brilliant backgrounds, watercoloring, smudge effects and more! Color directly onto your surface and blend with water then layer with Distress Inks or Stains for more creative possibilities. Available in 10 sets that coordinate with the Distress Palette." - RANGER (website)

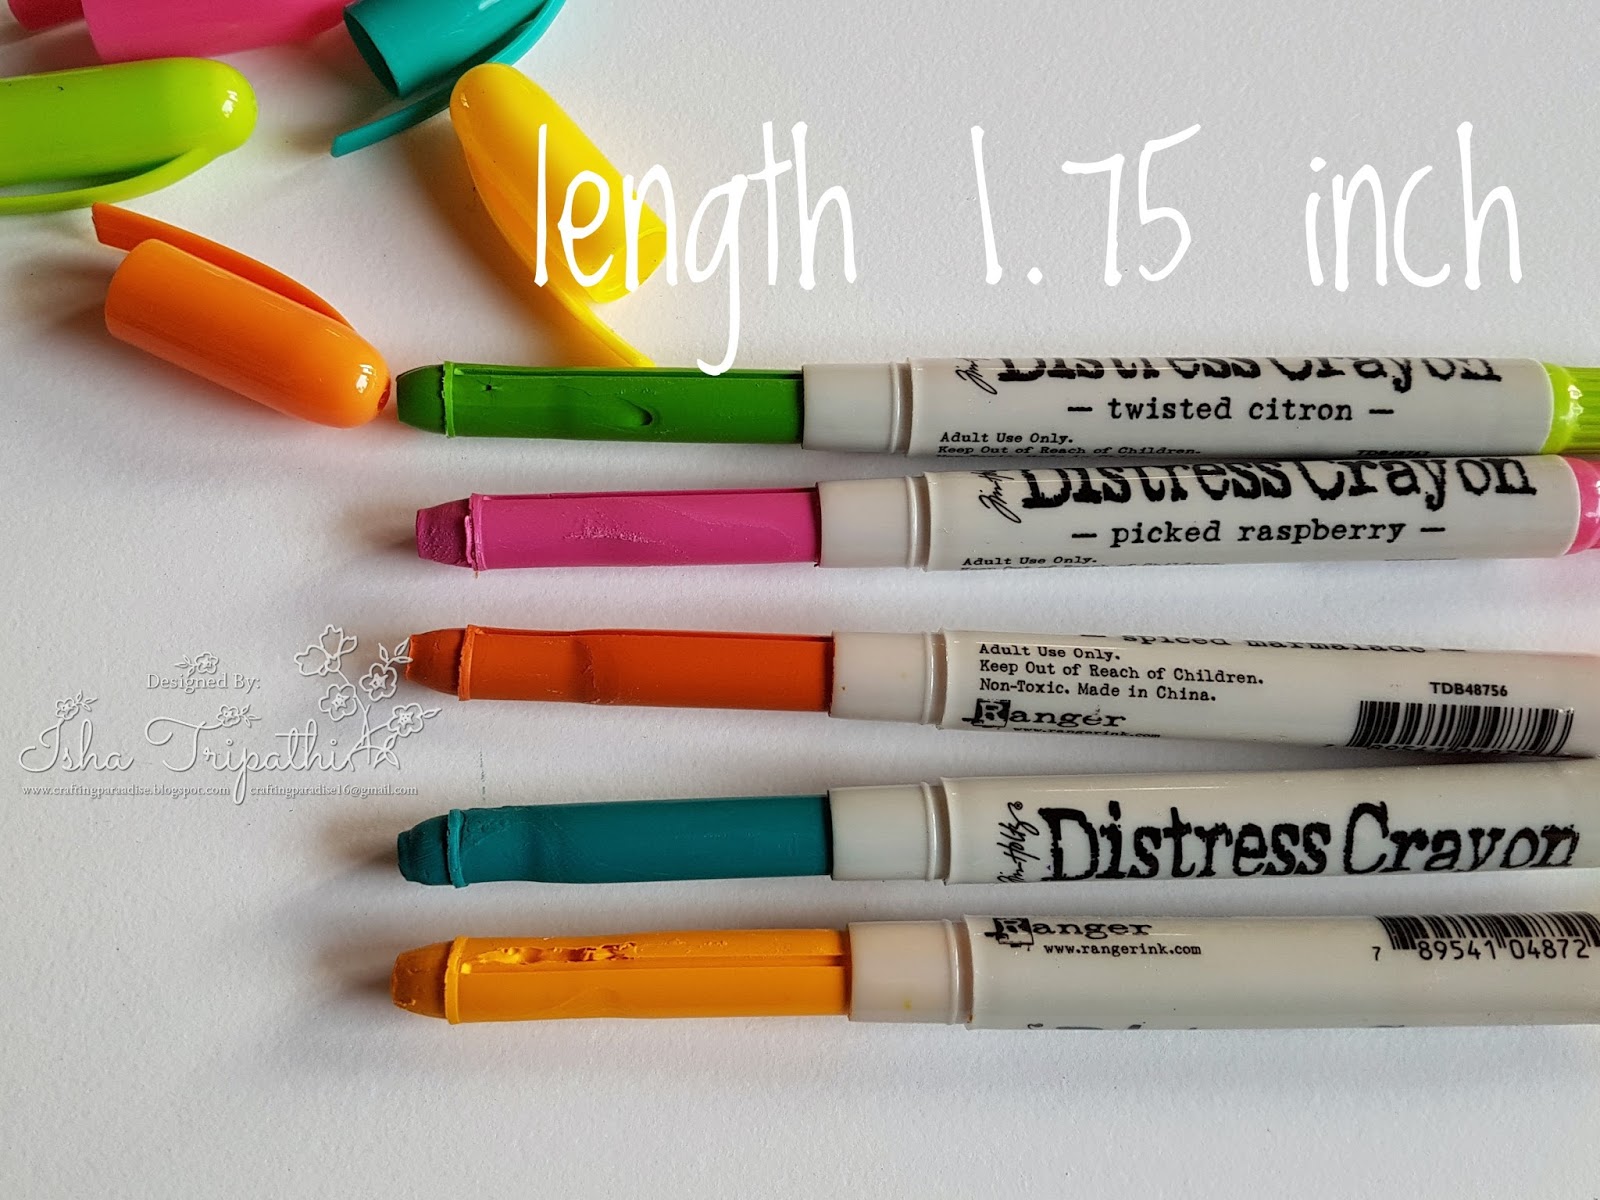
Each crayon pen is about 5″ in length, and comes in a grey plastic retractable body with the cap. The color pallete of crayons is just the same as of other products in the distress line. These are for ‘adult use only’ and are to be kept out of reach of children as clearly mentioned on each of the crayons. 
 When fully retracted out the crayon medium is about 1.75″ in length approximately. 

I believe that its to less in size/quantity as compared to price. That's one minus point for my side.


Whenever we think of crayons, only one thing pops up in mind i:e wax crayon !!!. But distress crayon is nothing like it, they are soft smooth cream like crayon and it is very much similar like lipsticks... as said by TIM HOLTZ. I personally felt they are even more softer then lipsticks.It literally glides on the surface.


When I applied them on the paper i could not wait to try my fingers to smudge these creamy crayons.
Ooops they didn't smudge .... I was wondering why it did not happen... I realised I might have let is set on the paper for too long and pigments got absorbed into the paper and dried off, therefore it didn't smudge.

I tried again, scribbled few dots and immediately smudge them and I got the results they smudged perfectly..... you can spot the difference between the two in the above picture.

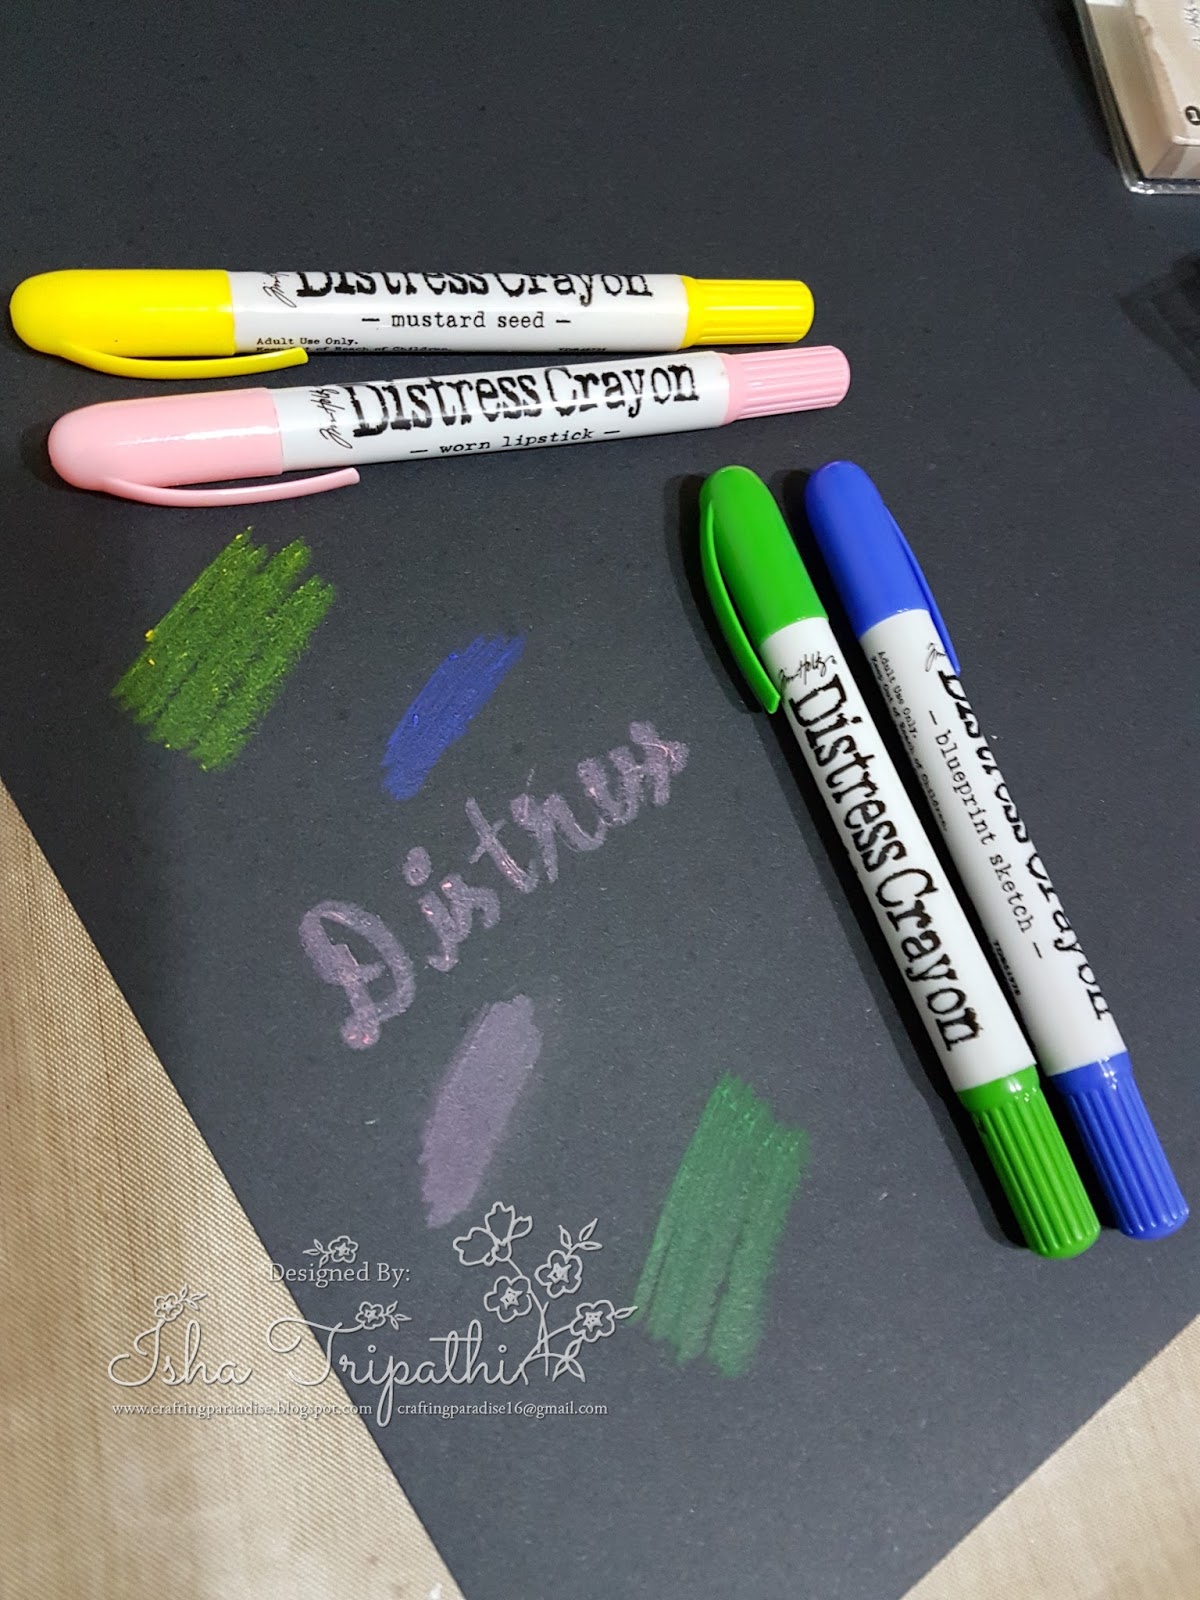
Since they are pigments, I wanted to try them out on Black cardstock.. but somehow was not much happy with the results.You can see yourself how they turn out to be on Black CS.


Another attempt was to try these creamy crayons with gesso.. Since lot us are mix media lover and I was very much curious to see how they works with mix media mediums.....


I scribbled some crayon on the craft sheet and then start mixing it with gesso ... Voila they works well with the same and I was very much happy to see the effect.. so Here goes a big thumbs up to distress crayon.

Playing with DISTRESS CRAYON.....
Since I am big fan of distress products and Tim Holtz, I cannot wait more to play these crayon with water ...  I have randomly scribbled them on white cardstock ... spritz some water and start blending them with my fingers.. and heat set it with ranger heat gun.

Next I tried crayon with stencils... What I did here was I scribbled them directly on the stencil and started smudging with my fingers. You can see below the results .. I loved how the extra pigment is creating a highlighted effect . It really pops up the stencil pattern.


So as of now this is all what I have tried with DISTRESS CRAYON. I personally believe that it is a great product and is perfect for beginners and journaling lovers or anyone who loves to play around with colors. I have made a cute card and tag with distress caryon and I am totally loving these crayons... 

Here is what I have created...


I am loving the bright and creamy colors... I have just used the simple water technique and smudging to create these card and tags.. I have stamped the crazy birds with jet black archival ink and colored them with distress crayon. Sentiment is from dylusions ..and have been hoarding them for quite some time.

Thank you for visiting and reading, hope this post is helpful and you will include the crayons in your next shopping list and try them out too. Don't forget to share your creations with us :) 

XOXO 
Have a nice day 
Isha 

Supplies used- 

Distress crayons
Dress my craft card stock 
Archival ink black 
Ranger heat tool
Ranger craft sheet
Stencils  

Saturday, 13 October 2012

Layered Victorian Card with Jacket


Layered Victorian Card with Jacket

Hi. I ’m Shalini Pahwa… I’m very excited to share this exquisite folded card. Here I’ve used lots of dies, distress ink, stamps, flowers etc. which are all available @ http://www.crafterscorner.in At this store u’ll get all the supplies required for this preparation… (u’ll just go crazy looking at the range….)


 I started with Martha Stewart punch then I’ve used the pattern paper and distress the edges withTim Holtz Vintage photo and  Peeled Paint  and then tore the edges…then I’ve used mulberry flowers… for banner used Spellbinders -ribbon banners …
Inside used  Spellbinders Floral Ovals   here u can see i‘ve used two layers of dies and the flower made my me using EK Success punch-retro flower, Ranger perfect pearls and used the stamp at the centre flower and when again- open the card I’ve used Sizzix Dies Bigz dies—Corner Flourish and again distress the edges and used mulberry flowers and then added the sentiments Stamps…fiskars all around quotes and TPC-Brush Stroke Greetings ( I really like the quality of this rubber cling stamps).
For any product query mail at info@crafterscorner.in

I hope you all will like this card and do comment on it…Enjoy Your Day!!!!!!

Love

Shalini Pahwa
artforte15.blogspot.in