Followers

Showing posts with label Rupa. Show all posts

Thursday, 28 February 2019

Dress My Craft Rice papers and Cadence

Helloo there...

 THURSDAY tutorial after a small break!
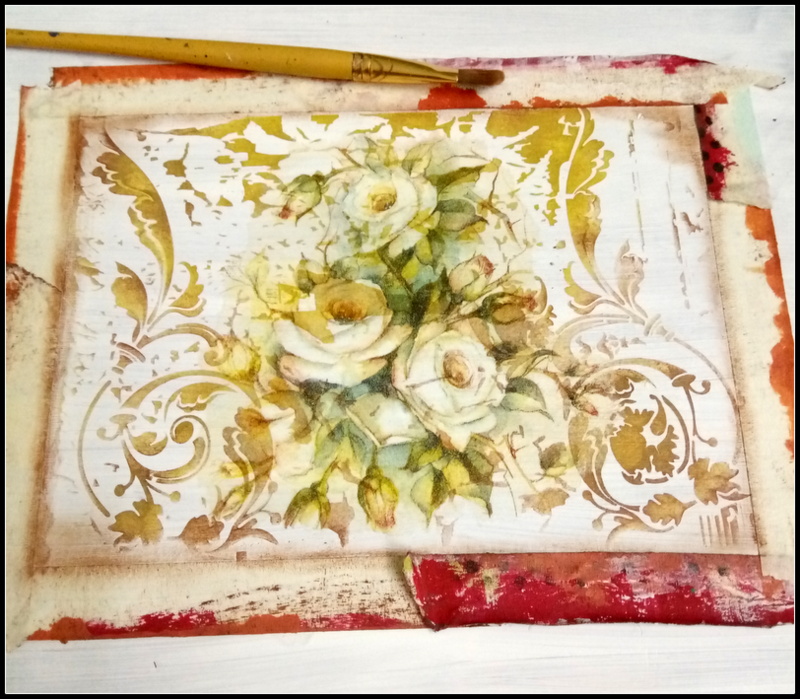
Today I am altering an unused journal/diary using the lovely rice papers from Dress My Craft. I have used the Vintage Princes collection, absolutely stunning.


Along with these I have used lots of products from cadence!

The highlight of this project is the use of Cadence Antique gesso as base coat, then creating a resist layer using wax and then giving a coat of chalk paint on top and finally distressing it!
See all of it here in the video!


The final outcome of the journal is this...


Not only that, I have altered few more books to create a vintage stack of books home decor project!
How does this look...


Here are the list of products from the store..

Dress My craft Rice papers (vintage Princes)
Cadence Decoupage glue
Vintage legend Antique gesso (Bordeaux)
Very chalky paints, Cadence
Dora metallic paints, Cadence
Dora Finger wax (gold), Cadence
Stencils from cadence


Thanks for stopping by.

Until my next creative journey,
Happy crafting and recycling.
Cheers,
Rupa


Thursday, 10 January 2019

Cadence cream foil bond and DMC metallic foil

Hellooo there!

This Thursday I have a video tute on how to give gilding effects to your projects using the Cream foil bond from Cadence and the foil sheets from Dress My Craft!

This gilding effect gives a lovely rustic finish to your projects.

You can use the foil bond(glue) with stencils or do a free hand pattern with a brush or your fingers, allow to dry, stick the foil sheet and pull it...tadaa...you have a lovely gilded effect left on the surface!
Here is what I did with it today!

A desk top accessory which says "BLOOM" using the gilded effect.


There are more pictures in the video below.
The tutorial is here...enjoy and let me know what you think!


I have lot of pictures too in the video where I have used the foil bond on various projects. Do have a look.

That's it for today.

Until my next creative journey,
Happy crafting and recycling.
Cheers.
Rupa

Products from the store

Decoupage tissues
Very chalk paints from Cadendence -October mist
Very chalky paint- purple lilac
Cream foil bond from Cadence
Foil sheets from Dress my craft

Decoupage glue from Cadence

Thursday, 20 December 2018

Crackle glaze and Crocodile crackle, Cadence

Helloo..
This Thursday is all about crackle. There are different types of crackle mediums available in the market and their uses and effects are different too!
 Today I am going to show you all about Crackle glaze which is a ONE STEP crackle medium and the other is Crocodile crackle which is a TWO STEP crackle.
To make it easier, I have a video tutorial showing you the application of both and have tried to handle all queries related to them.
If you still have any doubts, do leave a comment here.

Before you see the video, here is the look at what I made with these 2 products!


Here is how crackle glaze looks like!


This is Crocodile crackle..look like those big chunky cracks!


To know more click on the video link. As always await to hear from you.

With this post I take leave for this year. Wishing you all a MERRY CHRISTMAS and A VERY HAPPY NEW YEAR.

I will see you all after the break.

Until my next creative journey,
Happy crafting and recycling.
Cheers.
Rupa

PRODUCTS FROM THE STORE

Julietta Decoupage napkin

Thursday, 29 November 2018

candle decoupage, candle paints and Dora metallic paints

Hello and welcome to my THURSDAY tutorial.

With the next round of festivities to come, all you all ready to make some festive gifts for your near and dear ones?
Today I have a video tutorial on candle decoupage and ways to spruce up an ordinary candle sing Cadence candle paints and Dora metallic paints on wood.
After watching this video am sure you will be able to make these easily at home for this coming festive season.
So lets start.
Here is what all I have made today!


Here is the video to making these.

Do let me know your comments and feed back and if you have any doubts ,do leave a comment.
Until my next creative journey,
Happy crafting and upcycling.
Cheers.
Rupa.
Products from the store


Thursday, 15 November 2018

Cadence Dora metallic paints

Helloo and a lovely Thursday to all!
 Rupa here and I have a video tutorial on Cadence Dora Metallic paints. These metallic paints along with the herbal sponge gives an amazing texture and I have used this technique to antique an old ceramic vase.
Here  are a few pictures...


There are more individual pictures in the video.

So forget buying exorbitantly priced antique pieces now! Make your own antique home decor piece with the Very Chalky paints, Dora metallic paints and the herbal sponge...all from CADENCE and available at Crafters Corner only!

Here is the video link...


I hope you enjoy watching it and do leave me your feedback.
Thanks for stopping by.
Until my next creative journey,
Happy crafting and recycling.
Cheers,
Rupa


Thursday, 25 October 2018

Cadence Very Chalky paints

Hellooo and a happy THURSDAY to you all!
Rupa here and today I have tuorial on decoupage using napkins from Crafters Corner and whole lot of stuff from Cadence too!

Here is what I have upcycled for this project! Yes, its a packaging carton box!


Here is what it looks like after...


Here is the entire family that helped me in this journey! 


With a wide range of decoupage napkins from Crafters Corner, it was difficult for me to choose, but then I just decided to go with this one as the colors were nice and bold! 

The TUTORIAL in detail...

 First I covered the entire box with white gesso.

Once the box was dry, I have decoupaged the tissue Magnificent Roses on one corner with Cadence decoupage glue.

The very chalky colors from Cadence are true to their name! It comes in these convenient tubs to dip in the brush and is vert thick and highly pigmented. A very little amount of paint, infact diluted a bit gives a lot of coverage! I have chosen October mist and Purple Lilac for this project.

The jumbo stencil from the home decor series is just a boon for big projects, I dint have to move it at all! The stenciling was done in one go! I have used both the colors to give random gradation to the stenciling.

You can see the light and dark tones, as I have used a stencil brush, it also gives a distressed look!

I then distressed the edges with black and brown acrylic paints to give it a worn and used look...you know I like it that way!

For the base of the box, I chose a complimenting color from Cadence Vintage legendAntique gesso, Bordeaux...This highly pigmented and textured gesso id very thick and gives unbelievable coverage. Can be use on wood too. I loved the look of it when it was applied and it just highlighted the tissue so well!

I applied the same color to the inside of the xox and for the inner lid continued the same stencil pattern, It was mush faster than decoupaging a tissue!

I had a few scrap bamboo rings which I covered with chalk paint and used these for the legs of the box.

For final touches, I added a foam bit as handle and covered that too with the antique gesso and distressed the entire piece with black and brown.

Finally, I did some shadow stenciling on the top and sealed the project with Cadence Plus varnish. This is a glossy finish varnish and for some reason I thought this box deserved that in the second life!

Look at the old card board box all shining and full of color and glam using very little products and just a few steps! Agree... I had something in mind for this box for the future!


 Here is what it is being used for now....


Yes, it stores all my Cadence supplies, well atleast most of the small items that I have. This box will be on my table always so I can grab what I need from this and at the same time flaunt this make!

As part of embellishment, I have added some buttons on the handle and have stamped" Create" on apiece of card stock and given it the look of a piece of burnt chip board and hung it from the handle! 


 The sides are all distressed to give it a vintage, worn out look.This box is sturdy and definitely happy with the turnaround in its second life and am glad it has found a place on my table than ending up in the bin!


Let me know your views on this project. Thank you so much for stopping by.
 Here are the list of products from the store.
Until my next creative journey,
Happy crafting and recycling.
Cheers,
Rupa

Thursday, 18 October 2018

DECOUPAGE Tissues from Crafters Corner

Hello all...

Wishing you all a Happy Navarathiri!

 Today being Thursday, am here with a blog post to tell about DECOUPAGE and more!
Decoupage is the art of sticking a print whether it is from a tissue, printout, magazine cutout, specialty papers or pattern papers and then blending it with a back ground to make it look seam less piece!

This can be done on any surface provided you have the right products and I must say, this job to find the right products is now so easy!
The entire Decoupage family is available at Crafters Corner!


Believe it or not, right from a range of VERY CHALKY PAINTS from Cadence, Decoupage glue and now DECOUPAGE NAPKINS too, all available under one roof!

Apart from beautiful designs and a wide range, these 3 ply tissues are available at THE MOST COMPETITIVE RATES at crafters corner! Now that's the icing on the cake, you can keep on buying them now and surely, it is up to you to use them wisely!


I have here a few pictures of projects that I have done using these tissues and with the help of complimenting chalk paints from Cadence, it was a breeze to make these home decor items!
I have upcycled some glass bottles and some soiled tea cups for these projects!

Have a look and you will see wether it is home decor or kitchen decor or what ever theme that you have in mind, there is s tissue for that!


For the kitchen theme I have used Greek Olives, Merlot and Flavor of herbs napkins.


For the tea cup candles I have used Memorable bird and Romantic butterflies napkins!
Chalk paints from Cadence are Sandy brown and October mist.


So grab those tissues now which are also available at an offer for this festive season!
Enjoying playing wit them and create wonderful decor pieces for your homes!

As always am waiting to hear your feed back on these projects.

Until my next creative journey,
Happy crafting and recycling.
Cheers,
Rupa


Thursday, 14 December 2017

DMC Stencils grab bag!

Helloo...
Rupa here this THURSDAY with an upcycled project using the newly launched stencils by Crafters Corner!

Yes...these are DRESS MY CRAFT STENCILS (set of 12) amazingly intricate stencils.


These are A4 size stencils and can be used in many many ways...your creativity, your imagination and these stencils can create some amazingggg projects!
Here is one stencil that I have played with for this entire project! The beauty of these stencils is that there a a lot of elements in one stencil, there is a focal point and in the back ground, there are other small elements too which can be used separately or as a whole!

For today's project, I have upcycled an old wooden stool, a heirloom from my native place which is sure  to be more that 75 yrs!


Well at the end, this looks even more antique and precious and ofcourse a statement piece!


Let's jump start to the process...


I start by sanding the top and then apply a coat of gesso. Once dry, I have used the stencil and done a double shaded stenciling using chalk paints.

Next, using modepodge, I have decoupaged a floral tissue on top of the stenciled area. It amazing how the stencil work is seen thru the tissue!


Here is a close up of the tissue decoupaged on top of the stenciling! I love how vintage it is already looking! 


 I have then masked all the 4 sides and then done some distressing using  brush and paint.

I stenciled some little elements from the stencils on all the four sides and repeated the decoupage of smaller prints on the 4 sides.


Using some home made modelling paste and the same stencil, I have created texture on all the 4 sides. The intricate pattern of the stencil gives a nice, crisp texture!


Once the modelling paste is dry, I mask the sides again and have used chalk paints to created a shaded look .


Time to remove the masking tape and revel the final look! I did some dry brushing to highlight the textures and also to give some age to this project!


Then sealed the entire project with 2 coats of varnish and the stool was ready to make an appearance!


I love how this ONE STENCIL has helped me give this project an antique and priceless look! You can get creative and use the stencil in more than one way! I have combined decoupage with stenciling to create this project and loved the outcome!
Do let me know your thought about this project and GRAB that BAG of STENCILS today!


I will see you see you soon with more inspirations on these stencils!

Until my next creative journey,
Happy crafting and recycling.
Cheers.