Followers

Showing posts with label Art Basics mediums. Show all posts

Wednesday, 23 May 2018

Mini Mixed Media: Fly High (Video Tutorial)

Greetings Everyone

How have you been?
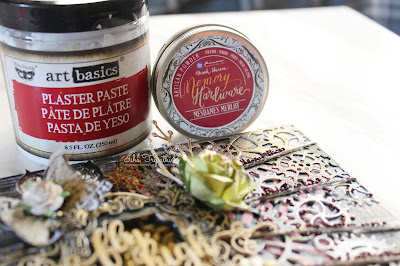
It's me Isha here, Today I have mini mixed media project to share with all and for this I have used loads of Prima Marketing products.
All will be listed down below at the end of the post.

But Before that did you see CRAFTERS CORNER is proud to present you yet another amazing products for the first time in INDIA from CADENCE 

Buy all the latest supplies under one roof at CRAFTERS CORNER.

It's impossible to explain creativity. It's like asking a bird, 'How do you fly?' You just do. Eric Jerome Dickey
Read more at: https://www.brainyquote.com/topics/fly
Let's get back to today's project,

It's impossible to explain creativity. It's like asking a bird, 'How do you fly?' You just do. Eric Jerome Dickey
Read more at: https://www.brainyquote.com/topics/fl
"It's impossible to explain creativity. It's like asking a bird, 'How do you fly?' You just do.-Eric Gerome Dickey"

Take a look


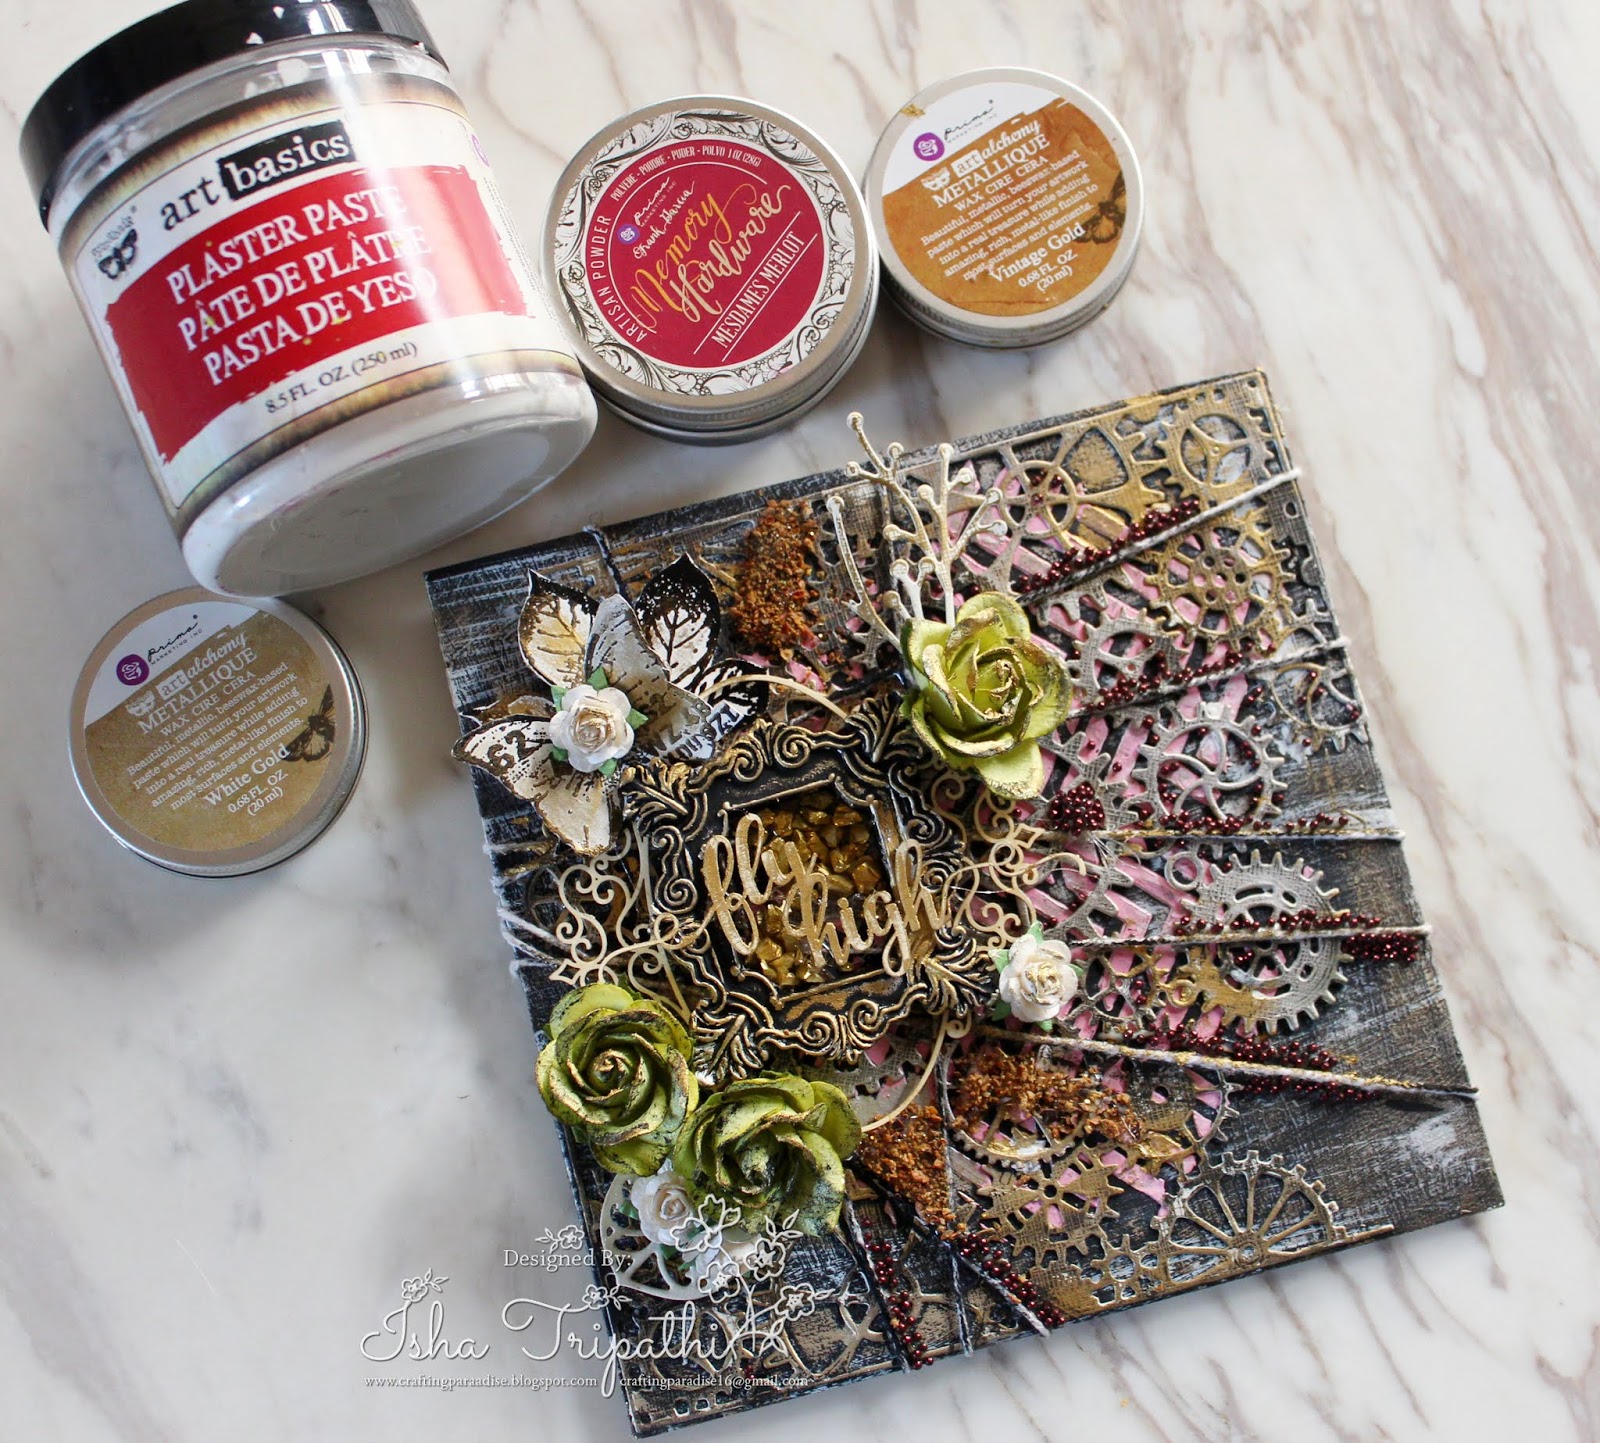
Its super rustic and grungy and with minimum products you can achieve great textures.
I have a video tutorial on how I created the back ground which I will be linking below

                                                                        TUTORIAL


Did you like it ?
Here are some closed shots and details 


I hope I was able to inspire you all.
Keeping checking the space for some amazing inspiration from my fellow team members.

Have a nice day
Happy Crafting
XOXO
Isha

List of supplies:
Prima Art Basics Plaster paste
Mesdames Merlot artisan powder
Antoinette Pink - Artisan Powder
French Sage - Artisan Powder
Liquitex Gesso White
Palette Knife
Mudra chipzeb Elegant Frames - Chipboard Cutouts
Mudra chipzeb Words #1 - Chipboard Cutouts
Black Gesso
Opaque Matte - Modeling Paste
Art Alchemy Wax- Vintage gold, brocade green, silver and white gold
Mulberry micro mini roses
Mulberry flower green
Steampunk gear dies Memory box
Dove craft heat gun

Wednesday, 9 May 2018

Mixed Media Card Set

Greetings Everyone

How have you been...
Today I have Trio card set to share with you all, and it was more of Mixed media
I had fun creating this Trio set.

For this one I have picked up Impasto Paint yellow and apple green, It's such a beautiful color strikingly soft yet stands out pretty loud.
I wanted to give a summery cool and fresh look to this set.

So lets begin how I created this beautiful Trio cards.


STEP 1-
Take a piece of cardstock ( I have taken textured cardstock) measuring 5"x6" inches.
Now stamp using any script stamp set on the edges of the cardstock.


STEP 2-
In second step I have randomly stamped using versamark ink pad and heat embossed using ranger white embossing powder and yellow embossing powder.

STEP 3-
Now I am applying Art basics plaster paste using TCW stencil. In this step once I have applied paste, I have poured Dress My crafts Microfine glitter all over the paste while it was dry and heat set it.

                                Can you see the glitter ?? It looks absolutely pretty in person.

STEP 4-
Now once the paste is all dried up, I have applied Impasto paint with with sponge and spritz lot of water over the top of the paint. Take out excess water with help of tissue paper.
Now heat set the entire base once you have achieved the look you wanted.

 And lastly distress the edges with prima distressing tool. (you may use any )

STEP -5
Now decorate your card with your favorite elements { Mulberry flowers / stamped images/ charms }
I have used penny black stamp and water colored the image using Gansai Tambi water colors.


I have used very minimal elements Mudra chipzeb, stamped images, art stones, punched leave branch and mulberry flowers.
For sentiment I used stampers anonymous Hastags words stamp set from stash.
before pasting the base on final card I have distressed the edges using walnut distress ink from ranger.

I hope you all liked this set and I really hope I was able to inspire you all.
Do keep checking the space for more fun and creative inspirations.


List of supplies -
Gansai Tambi
walnut stain distress ink
Mudra Chipzeb
Impasto Paint
Art ingredients
Mulberry flowers
TCW Stencil

Monday, 16 April 2018

Triangular Mixed Media Canvas- Live Beautifully (with Pictorial)

Hi friends!!
Happy Monday :)

Mixed Media is a beautiful style of art and it is a huge field with so many sub-categories. It is a great way to give a new life to old, discarded things around the house & make something beautiful out of them. In this style of art, multiple media are used to create one piece, for example, acrylic paints, sprays, dye inks, gesso, gel medium etc We usually try to create a lot of texture and dimension using different techniques, products & tools. 

I'd like to share a Triangular Mixed Media Canvas- "Live Beautifully" today. It was a lot of fun to make. For the canvas, I wanted it to have nice, cool, fresh colors preserving some white space so I chose blues with a little bit of yellow. I created dimension by adding chipboard pieces in between all the layers (while adhering them). 

Mixed Media Canvas- "Live Beautifully"

Here are some photos of the canvas:


Pictorial: Step by Step Photos of the Process

1. Applied Prima's Heavy White Gesso to the canvas and then applied Modelling Paste through Tim Holtz Gothic Stencil using a palette knife

2. Altered the color of the flowers by spraying them with Lindys Sprays

3. Created clay embellishments with IOD mould and air dry clay. 
(Tip: Sprinkle some powder in the moulds before adding the clay to make de-moulding easier)

4. Added blue shades of color to the canvas using different mediums, sprayed with water to create an organic look & also created ink splatter 

 5. Heat embossed the Dusty Attic Chipboards

6. Altered the butterfly chipboard by applying heavy white gesso and then sprayed with Lindys Spray
(used this method as I wanted the butterfly to match the color of the flowers)

7. To emphasize the relief/raised surfaces of the clay embellishments, applied some blue paint to them with my fingers and then some white gesso to tone down the color and give them a shabby look

8. Colored some bandage gauze with Lindys Spray

9. Created the composition and adhered all the elements with 3D matte gel. 
Added texture to the canvas with a paste of art stones, 3d matte gel & platinum glass glitter

10.In the end, added a few art pebbles with glossy accents & created white splatter with watered down white gesso. 

(If anything is currently out of stock, please email info@crafterscorner.in to place a preorder)

4. Lindys Gang Sprays- Yellow Hues, Blue Hues
11. Dusty Attic Chipboards- Live Beautifully, ATC frame #3, Flutterbies #1
17. Finnabair- Glass Glitter- Platinum
20. Ranger's Super Fine White Embossing Powder, Lemon Yellow Embossing Powder

Also, if you would like to check out my first three blog posts (in the series of Beginner's Guides), please click on the below topics.


As always, we love to see your gorgeous creations using supplies from the Crafters Corner store, so please do share them with us in our Facebook Group- Crafters Corner Showcase using the apt hashtags #craftwithcrafterscorner #dressmycraft #crafterscornerindia, on Twitter and/or on Instagram. And please remember to like/follow Crafter's Corner Facebook Page, Instagram & Youtube Accounts for updates on sales, giveaways, free tutorials and new product information. 

Hope you have a great day!
Thanks a lot for your precious time :)
Stay Blessed!

Thursday, 23 July 2015

Don't forget to fly!


Good Morning!

Its me Nupur!
back to play..
back to have fun 
and back to create 
another art journal cover.
- - - - - - - - - - -  - - - - -  - - - - - - - - - - - - - - 
The future belongs to the one 
who dares to dream...
all your dreams can come true 
only if you have the courage
the strength
the passion
to pursue them..
Believe in your dreams
Believe in yourself
open your wings and
fly..fly..
fly high 
to achieve your dreams...
Dare to dream
Dare to Believe.. 
Never lose that strength
nor that confidence..
most importantly never ever
forget to fly.

DONT FORGET TO FLY


Based on the size of your journal take a white - heavy card stock
and trim it as per the journal size.
I have trimmed mine to
(5.5" by 8")
( I always prefer creating my art journal cover page on a 
heavy card stock and then matting it on the original journal to keep it more sturdy)

1, 2, 3...
and here we go
Lets ground the surface with the 
Art Basics - Finnabair's clear Gesso.
Using the heat gun, heat the surface until its completely dry.


Using the pallet knife take the Art Basics - Finnabair's White Heavy Gesso
and spread it across the sheet as shown in the image below.


I stencilled the following pattern.
Using the heat gun. Dry it.


Here comes the interesting part,
Colouring, colouring and more colouring
Using the Distress inks by Rangers 
add the colours onto the textured surface
with the soft water brush and the Mini mister.


Stamping, love the personal touch it adds to the project.
The amazing Finnabair cling stamp - Dont Forget to fly is to die for.
I couldn't help myself but use these gorgeous butterfly stamps and the sentiment called for my attention.
Using the Black Archival Ink, I have stamped the images onto the white paper
along with the sentiment and then fussy cut them.


Once you are done stamping, 
its time to colour the beautiful butterflies and the sentiment.
Happy and bright colours 


and here comes some stamping
 Using the Black Archival Ink I stamped few of background textures 
to make the cover stand out.


Tear a page from an old book keep trimming it using your fingers in a way you like
or as shown in the image below and colour it.
and stick it onto the textured cover using the Art Basics Finnabair Soft Matte Gel  


And it is all ready for some sparkle here and there!
All that sparkles makes the heart flatter.
Thats exactly how I feel using the amazing 
Art Basics - Finnabairs Glitter.
 Using the Art Basics Finnabair Soft Matte Gel I mixed the golden glitter 
and then stenciled the amazing pattern
onto the background to add that sparkle.


Last by not the least.
I love splattering. 
Using the amazing Art Basics Heavy Black Gesso
splatter onto the page.
Using the Distress ink, 
darken the edge of the cover used in order to highlight.


Viola! and its ready...

Now paste it onto the Journal cover using the super tacky red tacky tape. 
If you ever get scared about trying you hands at art journalling.
Think about why you are going to start creating it. 
And believe you me, 
you don’t have to have any other reason than, 
“I want to.”
and this will do wonders.

- - - - - - - - - - - - - - - - - - - - - - - - - - - - - - - - - - - - - - - - - - 


Products list:

Art Basics Finnabair Soft Matte Gel
Finnabair cling stamp
Black Archival Ink
Scattered Straw
Mustard seed
Vintage Photo
Mawed lawn
Evergreen bough


- - - - - - - - - - - - - - - - - - - - - - - - - - - - - - - - - - - - - - - - - - 
I hope I have inspired you create!
Have a crafty week!
Thank you for stopping by
...Nupur...

Tuesday, 21 July 2015

Prima Art Basics contd. - It al about the Gels!

Hello everyone!
Jaya here .

 SO today I am going to talk about the gels. There are 2 gels in the Finnabair Art Ingredient line . The soft gels and the 3D gels. 
Lets talk about them in detail.


Soft gels

Two types-


Picture courtesy- Google

Transparent, flexible acrylic medium.Dries with gloss finish

Picture courtesy- Google

                                    
Transparent, flexible acrylic medium.Dries with matt finish

-The soft gels are transparent and flexible acrylic mediums that fry clear and permanent.these are really easy to spread because of their thin consistency.
-These are perfect for using in photo transfer techniques, as an adhesive( dry clear and hold strong) or as a varnish
-Non toxic ,archival safe

What Soft gels can be used for?

-Soft gels are perfect to be used as liquid glue to glue down your embellishments,papers,glitter  etc. You can also use it as a varnish or as a sealer to seal your paints or other mediums.

-It is a good resist medium and gives beautiful resist effects with paints and sprays.


-The soft gels are perfect for image transfer techniques.

-You can create your own mediums with these gels. Just add the pigment powder and you are ready to go with your customized paints. It can also be used to increase the bulk of your paints.


Difference between Soft gloss gel and soft matt gel

The difference between Soft gloss gel and Soft matt gel is basically in the finish of the end product. While the soft gloss gel dries with a gloss finish the soft matt gel has a matt finish to it when it dries. Rest of the properties are just the same and it totally depends on your choice.


Tips when working with soft gels

Always use paint brush,sponges or stencil brush when using the gels. Since they are very light consistency avoid using palette knifes to minimise mess.

Do remember to seal off you image with soft gel after the image transfer is complete. 

Gels are good to be used as varnish or sealer for any project with crack;e mediums.It will prevent chip off's and keep the crackles in place.

Gels resist non permanent medium. Use this to give beautiful resist look to your projects.

Wash your equipments after use using water, soap or wet wipes.


3D Gels

Two types-

Picture courtesy- Google
Semi- transparent, flexible acrylic medium.Dries with gloss finish

Picture courtesy- Google
Semi- transparent, flexible acrylic medium.Dries with matt finish


-These are semi transparent and heavy body acrylic mediums.
-Permanent and resistant to water based mediums when dry.
-Non toxic archival safe.


What 3D gels can be used for?

-The 3d gels add great amount of texture as well as dimension to your projects.They withhold the shape when dry which adds to the dimension of the creation.

-It can ones again be used as an adhesive and holds embellishments and other 3D objects well.

-They also act as resist and can be used in a similar way as the soft gels.They are resistant to non permanent colour mediums after drying completely.

-You have options of creating custom made paste. Try these not just with pigment powder and paints but also with glitter, flakes and beads!


Difference between 3D gloss gel and 3D matt gel

The difference between 3D gloss gel and 3D matt gel is basically in the finish of the end product. While the 3D gloss gel dries with a gloss finish the 3D matt gel has a matt finish to it when it dries. Rest of the properties are just the same and it totally depends on your choice.


Tips when working with 3D gels

Try making your own custom pastes. Use pigments,paints,acrylic colours mixed with some perfect pearls powders, flakes,glitter or beads. Make your pastes and store them in air tight containers for later use. The possibilities are many!

Use palette knife to apply the paste for great dimension. Avoid palette knife when using it to glue down dimensional embellishments.Use your finger instead to control the amount of application.

Always clean your brushes and stencils after use with water or wet wipes.


                  Difference between Soft gels and 3D gels

While the gloss gels labels are marked in blue( Pale blue- soft, Bright blue- 3D) the matt gels are purple/mauve in colour(  pale - light, dark- 3D).

When used as an adhesive while the soft gels are good for sicking papers and light embellishments the 3D gels can be used for heavier and 3D embellishments.

The soft gels are thin in consistency and cannot hold form therefore good as varnishes and sealer while the 3D gels are good for dimensions and textures.

Application of soft gels is with paint brushes,stencil bushes or sponges while of 3D gels is good with palette knife. 


For products visit Crafters corner-

Prima Marketing - Finnabair Art Basics Soft Gloss Gel 8.5oz

Prima Marketing - Finnabair Art Basics Soft Matte Gel 8.5oz

Prima Marketing - Finnabair Art Basics 3D Gloss Gel 8oz

Prima Marketing - Finnabair Art Basics 3D Matte Gel 8oz

Tim Holtz Distress Ink Re-Inker .5oz

Prima Marketing - Art Ingredients Mica Flakes 1oz


That's all from me today. Cya soon.
Happy crafting!