Followers

Showing posts with label Altered Canvas. Show all posts

Thursday, 23 November 2017

Miniature Mixed Media Canvas


Hello My Dear creative souls,

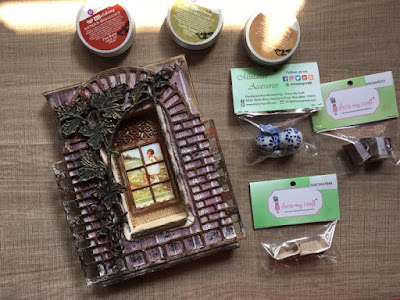
Today I would like to show you a mini canvas created especially for Dress my craft Ceramic miniatures. I always love to try something different. Here is my another project, Miniature Mixed Media Canvas. I loved it!!! I really had fun with these cute minis.


Of course i took few tutorial pics 

lets start from beginning
1. I took 5X7" reverse side of canvas, Dusty attic chipboards, and one pattern paper for BG 

2. Here i used 3 different design of Dusty attic chipboard. From that one is negative side of Arch window Dusty attic cut.
I used 3D liner for IVY leaf design. 

3. Then i paint black gesso on chipboard cuts with sponge. not brush  

4. Prima wax are giving perfect result after black gesso. So i like to use those paint with my finger. I dont have much collection of wax. I would like grab more...:-) 

5. Then Start decorating with Dress my Craft minis, flowers and pollen.  


Then Finally 


I really appreciate you drop by and hope you all have a great day!
Hugs
Suz
 
Supplies Used
 
Dusty Attic Chipboard Cuts
Mulberry-flowers-leaves/micro-rose-buds
Mulberry-flowers-leaves/micro-roses
Craft-toppings: Art stones, Spanish Moses
Polish-wax Prima Marketing
Gel-medium-spatula: Black and White Gesso
Adhesivestape Plaid Craft Mode podge
Pollens-fillers
Miniature-mug-with-handle
Miniature-terracotta-deep-dish
Resin-cabochons/colored-sparrow
Resin-cabochons/dove-bird

Sunday, 4 September 2016

Mixed Media Reverse Canvas Garden

Hi lovely crafters! 
 Today I have a reverse canvas to share with you! 
Finally I found some time to create something just for you in my favorite topic "secret garden" . It was just enough to spark my mixed media project back into action! And so I grabbed out all my mediums, my fave chipboard goodies and played... here's the result! 
I used only the best products to complete this project. All the embellishments are either Prima, Dusty Attic, or Kaisercraft etc. I made this canvas back to have beautiful dimension and texture that can be seen and touched.  

I want you to think about what the coming of spring means to you? Is it a colour burst, or maybe flowers? Whatever I would like to show you this beauty 

I like the springtime when birds are coming back to build up their nests and I was inspired to create this garden reverse canvas. you can see the corner place, nest with egg :-)

I hope you like what I have created... I had lots of fun making a mess with this one! I have a step by step video tutorial also for you on how I created the background, and how to use moss collection for gardening . 
Here is a quick little step by step video to show how I made this Garden canvas


List of supplies
Liquitex Light Modeling Paste

Thursday, 18 June 2015

Easy Mixed Media canvas tutorial with Ken Oliver Crafts Color Bursts


Hello Friends!
This is Jaya here.

Hope you all are keeping an eye on the new products in the Crafters corner store. If not, then do not forget to check them out. I got the Ken Oliver Crafts color bursts in my DT package and believe me they are awesome! 
Very economical and there are various possibilities with them..I am so excited to share my experience with you all. 

I have had a few queries as to how I do my canvases.. So I thought I will put up for you all a very basic, very easy to follow canvas tutorial using the Ken Oliver Crafts color bursts. 
When I began with making canvases I started with something like this so... to all those people who want to start with mixed media .. Here you go. Give this a try and you wont regret :)


This is what I made


TUTORIAL-


 Step 1- 
Take a stretched canvas/ canvas board or a hardcover which you would like to alter.
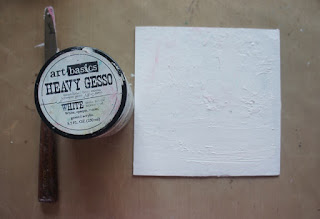
 Apply some Prima heavy white gesso on it.


Step 2-
 Use any stencil of choice and spray through it. I mixed some Ken Oliver Crafts color bursts- Utramarine blue with water in a misting bottle and sprayed through the Heidi swapp stencil- Lattice


Step 3-
 I stamped the centre of the canvas using the Prima texture stamp and Versamark watermark ink


Step 4- 
Heat embossed it using the most favourite tool -Rangers heat it tool


Step 5- 
Use another stencil and give some texture using Prima modelling paste. I have used the Prima Bubble stencil here.


Step 6- 
Now using some more of the Prima heavy white gesso merge all these textures a little. I love using the Prima gesso for their consistency. Creamy and easy to apply .


Step 7- 
This is optional. You may add more texture using the Art ingredient glass beads. I used the Crystal ones here. Apply it directly on the wet gesso and texture paste and let it dry before the next step. You may speed up the process with a  Rangers heat it tool


Step 8-

Now comes the fun part. The Ken Oliver Crafts Color Bursts. These inks are meant for porous surfaces and since I applied gesso to my background here and there these inks will spread differently in these areas. I used the Ken Oliver Color burst- Ultramarine blue and Pthalo Green here.


Step 9-
Once my background is dry i assemble my embellishments and the beautiful chipboard. 


Step 10-
I adhere some Prima Art ingredient- Mica flakes granite to a few areas.


Step 11-

Splatter with Prima heavy white gesso and Prima heavy black gesso and the canvas is done!


Final look!


How did you find the tutorial? Isn't this really quick and easy .
 Try it out yourself and me know. 

In the next post I will be sharing more about Ken Oliver Crafts color bursts ..various techniques you can try with them.

Supplies used-

Prima art ingredient- Glass beads
Prima bubble stencil
2Crafty Chipboard- beautiful
Prima modelling paste
Rangers embossing powder- Seafoam white
Embellishments- Flowers
Canvas board 

Have a great day!
Hugs


Thursday, 6 June 2013

Artsy Canvas with an overdose of flowers.:-)

Hello Folks,

This is Pallavi and today is my turn to showcase a project using distress paints and templates.I decided to alter a canvas.There are a ton of layers of paints,textures,some sprays from my stash,stencilling ,stamping and loads of flowers.I had proclaimed on my personal blog that I will be staying away from flowers for some time.Ha,I must have been out of my mind.Heh heh

Here's how the canvas turned out.


Told you! I went overboard with flowers.:-).If you have seen my previous canavas on my blog,you might comment that I have been using the same colours.You are right.I have been making do with the few paints I have and so need to buy more distress paints.I am loving these!So blendable and a lovely finish.

Here are a few closeups


Supplies from the Store

Distress Paints : Broken China, Picked Raspberry, Peeled Paint and Picket Fence: These paints are not updated on the website yet,but Shalini has them in her stock.

Fleur De Lis Doily Template

Modelling Paste

Mulberry Flowers

Spellbinder Embossing folder - Flora

Glossy Accents

Zing Silver Glitter Embossing Powder

Zap Embossing Heat Gun

Hope you like the project.

Happy Crafting,

Pallavi