Followers

Monday, 26 September 2016

Decoupage Part 2 with Anita Kejriwal


Hello everyone... It's Anita here!!
How is everyone doing?? I hope everyone is having a good time creating their favourite projects. I am, at present addicted to Decoupage. A wonderful craft indeed, decoupage not only helps to create beautiful home decor items but is also useful to re -cycle old items and furniture etc.
We are going to use the most popular Folk Art Home Decor Chalk paints by Plaid craft and other products like wax to make our new project for today.
I have also created a video tutorial for this.
Another new product that I am going to share with you all is the Deco Mache Paper.


It is a wonderful paper especially for decoupage and is so thin ---just 22gsm!!! that once adhered to the surface , it looks that it has been painted on the surface itself.
So in my video , I will show you how to do decoupage with Deco Mache papers.
The good news is that Crafters Corner has all the products that you need for this project. And not only that , they are at the price. Plus there is a 10% discount store wide so you get them at more cheaper price.


In my first video here... I  have discussed about Chalk Paints and its uses. Today, I will focus on two more products -Clear wax and Antiquing wax. from Plaid Craft


What is Home Decor Clear wax and Antiquing Wax??

FolkArt Home Decor Wax is a brushable, waterbase, non-toxic, paraffin-infused wax finish used to seal and protect painted surfaces. Allow paint to fully dry 24 hours before applying wax. Clean brushes while wet with soap and water.

How many types of FolkArt Home Decor Wax exist?

There are three different types of FolkArt Home Decor Wax: Clear Wax, White Wax and Antiquing Wax. All waxes provide a protective velvety smooth finish for your projects. When properly applied, Clear Wax will protect your surface without adding color. White Wax gives your project a beautiful white washed or faded finish. Antiquing Wax adds a vintage or antiqued, time-worn look with a warm, chocolate brown, color. FolkArt Home Decor Chalk can be added to the waxes to create your own custom-colored waxes. 
So if you want to give a nice sheen to your projects and also protect it from dust and moisture, then these two products are your solution. It does the same work as Mod Podge as a sealant however it is not a glue like Mod Podge. You can also give a new shine to old furniture, frames etc, by using clear wax or antiquing wax. A nice whitewashed shine can be given by using the white wax.

Why do I need to buff the wax?

After applying the FolkArt Home Decor Wax, it should be buffed to polish and seal the surface. The more you buff, the more you will raise the sheen of your finished project.

Is it same as Varnish?

No both are different. Varnish is for outdoor use. whereas, Wax is not suitable for outdoor projects. With wax , you need to buff the item but do not have to do so with varnish. 

How should I clean my project surfaces after FolkArt Home Decor Wax has been applied? 

Wipe project surfaces with a soft cloth moistened with warm water and mild soap to clean
---------------------------------------------------------------------------------------------------------------
Here is the tray that I made with the above products. Please feel free to ask me about these products. 


I hope you liked this video. I have tried to share this beautiful art with you using the best raw materials. So go ahead and do try this out. Remember to going on a shopping spree at Crafters Corner.


Materials used 


Do leave a few words. I love reading your comments.
Till then happy crafting !!!


Sunday, 25 September 2016

Money Envelopes!


Hello everyone! 
Welcome to Crafters Corner Blog! The festival season is about the begin and the easiest form of Gifting is Money envelopes! We all use them all the time! I just love making them So I thought why not make some Gorgeous envelopes for today's post? I've used a mix of Dies, Punches, Mulberry flowers , metal charms and not to be missed our latest Glass Cabochons! They look absolutely amazing! 

So without much ado lets get started! 
Well Here's the fist one I've made! Isn't it pretty? Keep scrolling to learn how to make it! 


I started of by taking a die cut of the Gorgeous Prima Marketing Doily die and distressing it lightly with Stormy Sky distress ink 

Now add this to the base. 

Next taking a small oval die cut from the Spellbinders floral ovals set I pasted it on top of the 1st die cut and added the lovely cabochon on top of it 


Next I used some Gorgeous mulberry flowers from our store along with some leaves i die cut using a cheery lynn die. For the final touches I've used metal dragonflies from the store along with some crystals! 


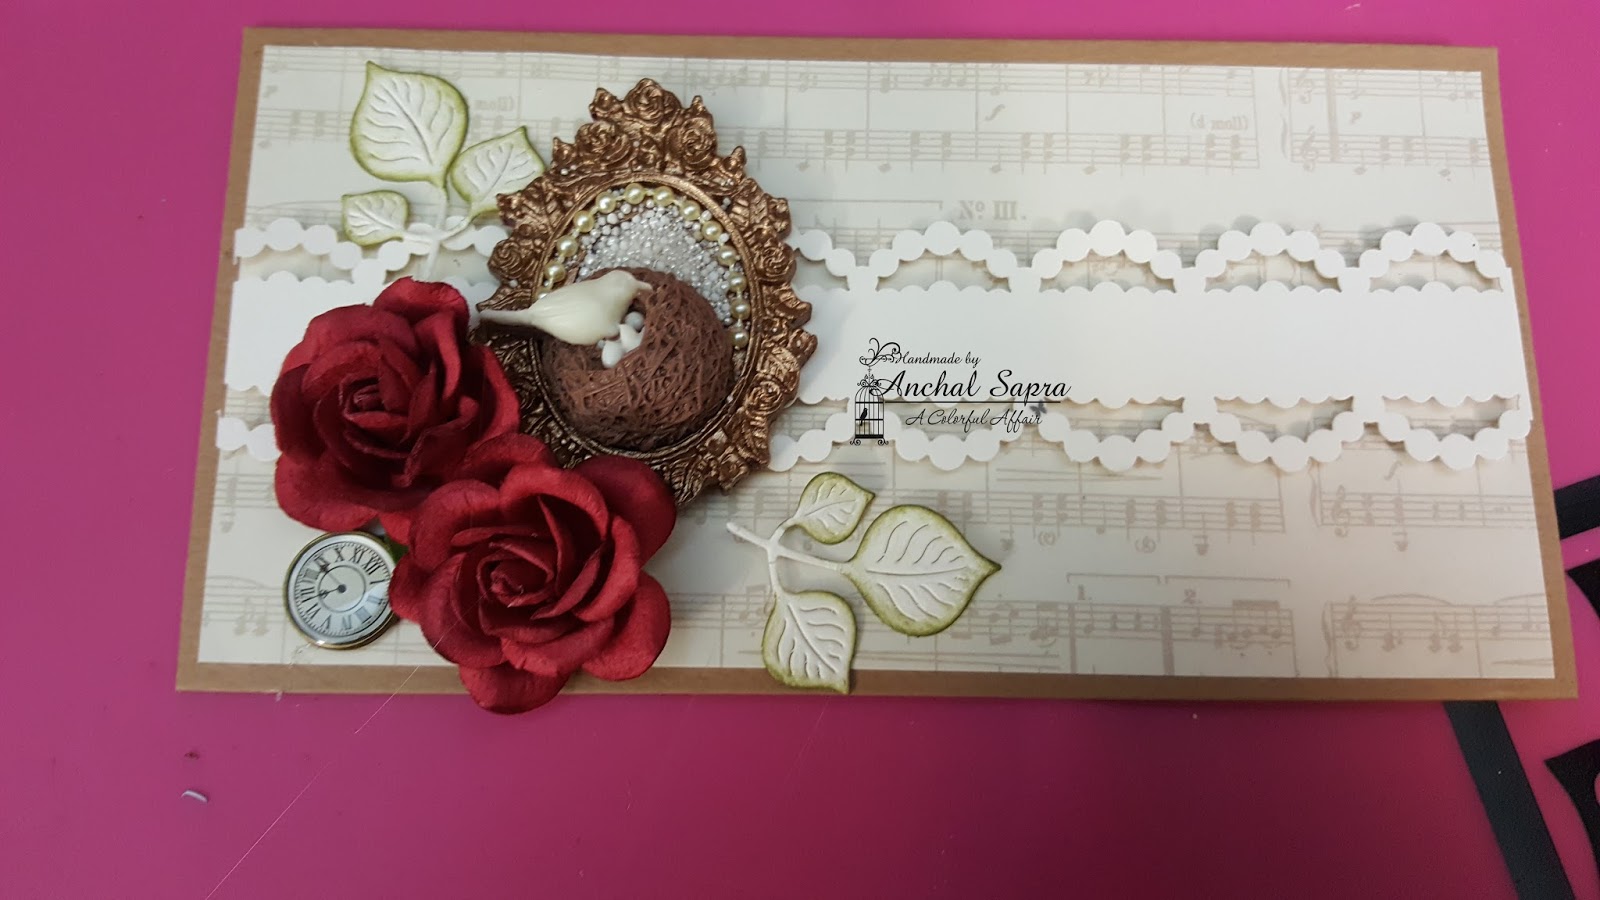
For the next envelope I started by painting one of these frames with Prima Artalchemy Stempunk copper paint. It looks soo pretty! 

Next I pasted this piece on some cardstock so the inner window has some base for the little detailing we are adding! I am using this pearl string from our store along with the prills! These prills are amazing they look look cute and are great for flower centers and mixed media too! 

Start by sticking the nest on the bottom end of the frame. It fits perfectly! 

I've added a thin line of Glossy accents for the pearl string 

You might need a tweezer to fit the string. Let it dry completely before you go to the next step. 

Next add glossy accents to the inner area of the frame and add prills. Shake off the excess and your piece is done! 

I've border punched a strip of Cardstock using this super cute punch by Martha Stewart 

I added it to the base , aligned my frame and added my flowers with some die cut leaves and a metal charm! 

Next i've added these resin flower frames and for the center I've used these amazing glass pearls by Prima! these are high quality pearls perfect for making jewellery! You must try them!
For the finishing I've added some lace from my stash and you are done! 


Next I've taken this super vintage looking glass cabochon from the store and added it to this resin frame from our store

Next I've taken the smallest die die cut from the Spellbinders Decorative Labels 8 die set and added this frame to it. 
Next I've taken an oval die cut from Spellbinders floral oval die and distressed it lightly with tattered rose distress ink. This is such a pretty colour I absolutely love it! 

Now comes the wow part! To add some glam I covered the oval with Art glitter glue and then sprinkled Clearsnap's Pralines & Cream glitter on top of it. This is such a pretty colour of glitter! Goes with all kinds of projects be it vintage, grunge or brights! Its such a must have! 

See this is how it looks! Isn't that PRETTY!?

Adding the die cuts and layering them with foam tape 


Next added some mulberry flowers and die cut leaves. For the finishing I've added the super cute resin bow! And we are done! 

Hope you all enjoyed today's post! 
Hoping to see you all make some pretty envelopes! 
Please feel free to ask any questions. Thanks for stopping by!
Hugs 
Anchal Sapra 


PRODUCTS USED