Hello everyone!
One of the best ways to make yourself happy in the present
is to recall happy times from the past.
Photos are a great memory-prompt,
and because we tend to take photos of happy occasions,
they weight our memories to the good.
~ Gretchen Rubin
AN INTRODUCTION TO PROJECT LIFE
Project Life is an amazing system,
a very systematic system of recording memories
it is an ultra-simple, über-stylish solution for getting your photos
off your phone and computer, out of boxes, and into albums.
It is a revolutionary system to simplify the process of preserving
your family’s history, your daily/weekly experiences, important days etc
HOW DO YOU “DO” PROJECT LIFE?
WHICH DIRECTION TO WORK IN?
There are many ways , there is no "wrong "or “right” — way to “do” Project Life.
Some people keep chronological albums,
some create themed albums
and some just “go with the flow”,
creating and filling the sleeves as time permits without imposing
a theme or time-frame on their album
Anything and everything you can think of can be documented in Project life
Its fun, no restrictions no limitations...only fun
It is advised to begin with the day to day experience.
Then slowly proceed towards the week by week
If you’re keeping a weekly Project Life album,
the way you tell stories may change from week to week.
That’s okay too
and then deciding how to work with the theme makes it easier for you to document.
Do you want to convey your message using text, handwriting, photos, or stuff?
Or a combination of those things?
If you are not sure and just want to create
you may choose to go on with the flow....
you never know what awaits you...
WHAT’S A LAYOUT/SPREAD/POCKET/INSERT?
A layout is basically a single page designed for a specific event or a memory or a particular time etc.
A spread usually consists of 2 pages for a specific period of time.
A spread - the albums that are kept daily, weekly or monthly.
It is also referred as the left-hand page + the right-hand page together.
Some people may use just one page per week,
Most Project Lifers who document life on a weekly basis put together one spread each week;
if they have extra memories to include they’ll use an insert instead of adding pages to their spread.
But sometimes life is too good a multiple spreads are required for a single week.
If you’re documenting life on a monthly basis, you may use anywhere from one to three or four or more pages to compose a spread.
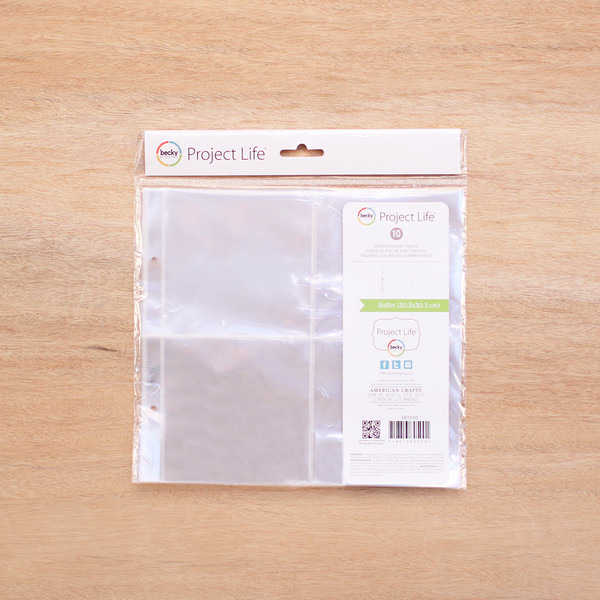
A pocket is a compartment within the page protector.
Depending on the size you have chosen the size of the pockets will vary.
An insert is a page protector that is slipped between the left-hand page + right-hand page of a spread. By default, it’s smaller than whatever size page protector your album uses for spreads. For instance, my Project Life album uses 12×12 page protectors for weekly spreads. If I add additional content to a week using an insert, I do so using some variation of a 6×8, 3×3, or 6×12 page protector.
It measures 6×8 overall, and has two 3×4 vertical pockets and one 6×4 horizontal pocket.
- - - - - - - - - - - - - - - - - - - - - - - - - - -
THE BASIC SUPPLIES NEEDED
Albums
There are several sizes that you can choose from
12x12 inches
8x8 inches
6x8 inches
4x4 inches
Mini Albums
Page Protectors or Photo Pocket pages
Based on the size of your album
or if you choose to preserve them without the albums
there are varieties of these you can choose from.
Cards Set
This kit contains 40 pieces:
(4) 4” x 6” Title Cards;
(4) 4” x 6” Journaling Cards,
(32) 3” x 4” Journaling Cards
All cards are double-sided.
Mini Kits
This Mini Kit includes 100 total cards:
(10) 4” x 6” Title Cards
(10) 4” x 6” Journaling/Filler Cards
(80) 3” x 4” Journaling/Filler cards
All cards are double-sided.
Core Kits
The Core Kit usually includes 576 cards,
(depending on the collection - 500+)
(468) 3” x 4” Journaling/Filler Cards
(36) 4” x 6” Journaling/Filler Cards
(56) 4” x 6” Title Cards
(8) 3” x 4” and (8) 4” x 6”
All cards are double-sided
Value Kit
This kit contains
(no.of cards based on the collection chosen)
(30) 3” x 4” Journaling/Filler Cards
(8) 4” x 6” Journaling/Filler Cards,
(7) 4” x 6” Title Cards,
(36) Chipboard Shapes
- - - - - - - - - - - - - - - - - - - - - - - - - - -
BASIC TOOLS KIT
Photo Fuse tool
The Photo Fuse Tool allows you to add additional photo pockets
to your pages create any size + shape pocket you want on a page protector,
divide your pockets into smaller sections, seal embellishments inside of pockets,
and more! It really is a tool that allows for maximum flexibility and creativity!
Set included Fuse tool, metal ruler stencil, stand, fusing tip, and cutting tip.
Fuse Sleeves
The sleeves to hold your journalling, pictures etc
Journalling pens
Use these pens to write a special message on a photo, journaling card, title card, and more!
Pens are acid free, fade proof, waterproof, and non-bleeding.
Contains 18 pens total - 2 each of black precision pen in three point sizes (.01, .03, and .08);
2 each of brown precision pen in two point sizes (0.3 and 0.5);
1 each of blue precision pen in two point sizes (0.3 and 0.5);
1 each of red precision pen in two point sizes (.03 and .05)
and 1 each black slick writer in two different tip sizes (fine/medium)
Project Life Date Stamp
Document the date on your photos or Project Life cards with the Date Stamp.
This twelve-month rotary stamp is easy to use and includes years 2006-2016.
- - - - - - - - - - - - - - - - - - - - - - - - - - -
THE BASIC EMBELLISHMENTS
Basic Cards + Cardstock
Designer Paper
Designer Dividers
Envelope Pages
Photo Overlays
Stickers
Thickers
Washi Tape
and much more
Any project needs some fun, some glamour,
and not to forget some personal touch
Don’t be afraid to be creative
Its your time to explore and incorporate
This is pretty much it for you to get started with Project life
* (Information and images have been compiled from the internet)
- - - - - - - - - - - - - - - - - - - - - - - - - - -
Dont forget to check out the awesome
Project Life supplies at Crafters Corner.
- - - - - - - - - - - - - - - - - - - - - - - - - - -
Thank you for stopping by
...Nupur...