Followers

Friday, 3 August 2018

Pretty Gifts with DMC products

Hey Everyone, Suzna here......Today i have 2 DMC projects to share with you. Now DMC have wide range of different products. I love love these ...... :-*

So the 1st one is Glass jar decor : Actually this jar i bought from shopping mall, not costly but its cute one, and this jar is actually for storing the spices. But crafters who are interested in altered art :-) ....is it? 
This jar decoration, its very simple. I just fill with some cute DMC stuffs and Prima Marketing flowers. Use glue gun for gluing. Please check the link below of this post, so you can easy to find out 


DMC product 


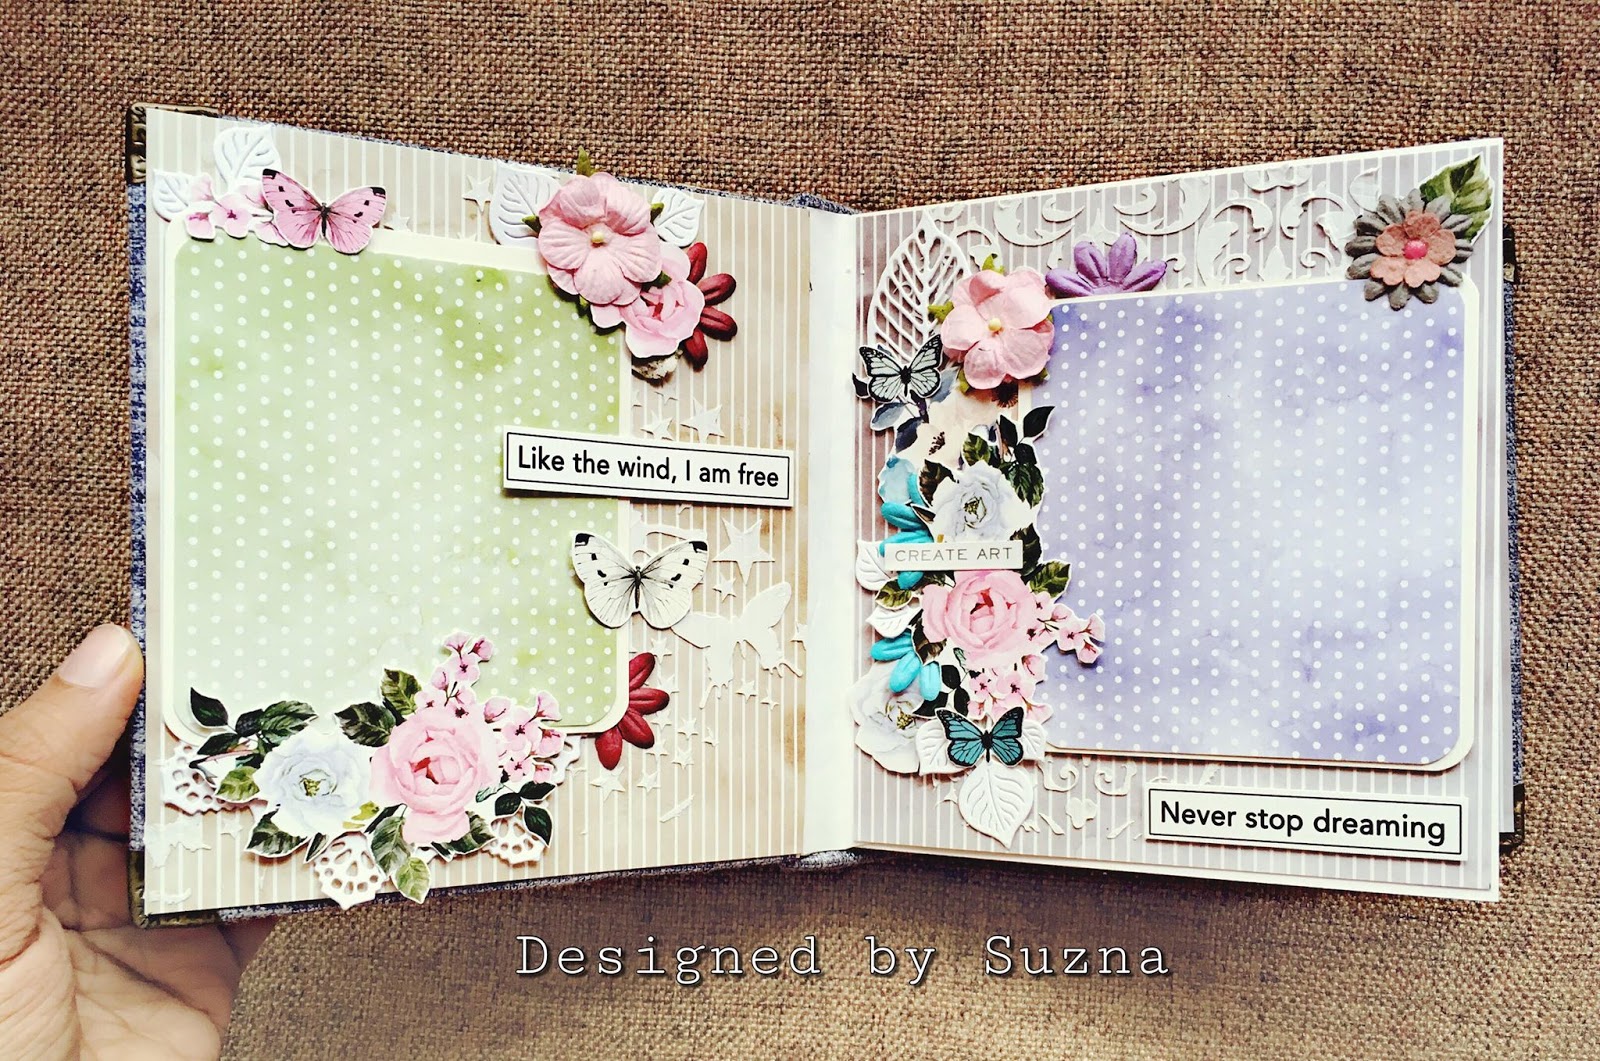
My second one is a small Scrapbook, This project i uses the simple and beautiful DMC paper pad "Dots n Strips", and Floral symphony motif sheets. Why i choose this paper? Bcoz i need to highlight the textured stencil design. Same time this Motif sheet's fussy cut images help me to decorate more. 


First i made a scrapbook base: Size 5X6 inch : just 4 piece of white chipboard


These are my arrangements: Base sheet, fussy cut pieces and die cut leaves. 


First part: Texturing with stencil


2nd part: Designing, layering the six pages. Its not easy, actually i'm trying many combinations, and once it fix..i start gluing.


Finally Like this :-)


Gluing the pages to the base: I prefer red tacky double side tape. And layering i choose form tape. Check the below links, Crafters corners have very nice and thin form tapes in different width( like 6mm to 2mm)



Cover Design: I have used one pair earrings, Fussy cut image and Butterflies from Dots n Strips motif sheets


I hope you have enjoyed this creation. 
Thank you for stopping by 
Hugs 
Suzna
Supplies Used

Little Hat Purple
Prima Marketing Stencils
TheCraftersWorkshop Stencil
Paletee Knife
Liquitex-light-modeling-paste-acrylic-gel-medium-8-ounces
DMC DotsNStripes 6X6 paper
Floral-symphony-motif-sheet-19443
Craft-toppings Flower pearls
Miniatures-accessories miniature-red-cup
Miniatures-accessories Red roses
Miniatures-accessories/mini-pink-plush-teddy-bear
PrimaMarketing Flowers
Mulberry-flowers-leaves rose-buds-red
Miniatures-accessories miniature-wicker-flower-basket
Miniature-printed-vase--3
Charms-embellishments medium-bottles
Adhesivestapes-tools/3d-foam-tape-18mm
Paper-craft-tools Scissors.
Fashion-accessories
Dots-n-strip-motif-sheet


Thursday, 2 August 2018

chippy paint effect with Cadence

Hellloooo and a very warm welcome from Rupa here!

 I was on a break and so happy to be back here and share my projects and tutorials with you.

I am going to working with CADENCE products and show you lots of DIY's on home decor and textile...isn't that exciting...I am loving the DT kit that came my way with all the yummy products.

So for today I have a home decor project, a quick and easy one with just a few products from Cadence, some recycled stuff, ofcourse and here we go....

Sit aback and relax and watch the pictorial as I describe this CHIIPPY PAINT home decor project!


How do you like it???

This is what I started with... I had this lovely vintage tin gifted empty by a friend, lol! I wanted to showcase it as a planter with a difference and so this project was born! I also made a stand for this with wood scraps and as you can see the products I have used are the BETON EFFECT relief paste, DORA PERLA GOLD RELIEF paste and the ARTIST CANVAS stencil from DMC and some paints from my stash...that's it!


Step1- I painted the frame with a teracotta color chalk paint from my stash and let it dry.


Step2- I used the DMC stencil and the Beton paste and did stenciling in random places.. The beauty of the paste is its full of fibre and gives a nice texture and dimension.


 Step3- I added some green acrylic colors to the paste to get some moss and applied that too randomly! The paste took to colors with ease and no time I had moss growing in my stand, lol!


 Step 4- I did some dry brushing with black paint to tone down the colors and to give the stand a weathered look. I emphasized the nooks and corners with black brushing and also ran over the died moss and stenciling.

Step 5-Then came the beautiful GOLD relief paste...this is like butter with granules!
 What a lovely gold it is, immediately lifted the look and enhanced the project and took it to the range of an antique piece!

Look at the gold butter...yummm!


 I allowed the relief pastes to dry naturally...yes it did test my patience but it was worth the wait! I further aged the stand with more black dry brushing and on the gold paste too, so that it looked old!


Have a look at some the pics...the final result is that of an antique, vintage, weathered, chippy painted stand!!! I AM LOVIN the look...it looks even more natural in real!


The combination of the Beton paste and the Gold relief paste is the main reason for this look!


And this how this whole project looks...I am happy I could give the vintage planter its due home with these Cadence products.


I couldn't stop clicking pictures, it was actually difficult to get the best angle and side!


That brings us to the end of this simple DIY home decor project and I hope you will give it a try. These products are a  definite buy buy if you love the vintage, grungy weathered kind of looks.
I appreciate your being on this page today and would love to hear your feedback and comments!
Until my next creative journey,
Happy crafting and recycling.
Cheers.