Hello dear ones! and welcome! I can't believe it is already the last month of 2016! My New year cards are not all done yet. Everyone are having a winter theme creation of this month. This season is my favorite time of year! I hope everyone had a wonderful Thanksgiving with your families! I did something a little bit different, a mixed-media textured winter miniature cottage using a mix of various material like MDF, Card stock, paper, acrylic paints, Laser cut chippies, mediums and Snow flack paste .
Have a look at this.... so small... so cute
But I like to say ~ you have to make a mess to make pretty! :)
Many of you expressed interest in a tutorial for making doll-houses.
It's a little crazy around here today, so please forgive me if this tutorial seems a bit hurried. It really is just a matter of cutting, gluing and adding.
Here goes . . . .
I'll show you how to make a version of this house. This is just basic idea
I'll show you how to make a version of this house. This is just basic idea
1, Take thick card stock or thick chart paper. Cut like rectangle shape. If you are using card stock, you need 2 rectangle pieces
2. Cut out the shape,
3, Use Cobblestone stencil with texture paste for stone effect
4, The next step is to break out the hot glue gun.
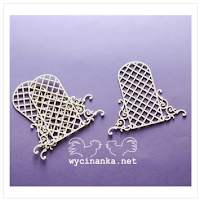
I like to glue on the windows and doors next. It's much easier to do for framing the window. I choose Wycinanka cut out for cross window. Details are shared in last of this post.
I like to glue on the windows and doors next. It's much easier to do for framing the window. I choose Wycinanka cut out for cross window. Details are shared in last of this post.
In this pic can see the effect, Color i took acrylic brown
5, Attaching 2 ends of cardstock with stapler
6, Roof: As we did same technique, attaching one side of cardstocks 2 ends with stapler.
7, Make it as a cone by cutting excess part
8, here is the way attaching the 2 part. Use glue gun for fast and easy attaching
9, I dont know what should i called this paper, But you will get from local craft store. This is best one for arranging roof part.
10, Cut the tiny pieces like this and attach on roof with glue gun
How is this Cool idea...Is it? ;-)
Now it's time to talk about the base.
For small houses I like to use MDF square plaque 7" X 7". Its perfect cute for this
11, I marked the few portions in plaque for attaching cottage, stencil work on ground...etc and After stencil work i painted moss effect plaid-craft paint. Mixing of two shade to get dark green
Select colors for ground part as you like
12, Next step is arranging mini garden... take dry plants, tiny flowers, beads etc
13, Icing of Gardening ;-)
I took Aleen's glue with flower soften for Garden boarder.
Use brush for excess powder
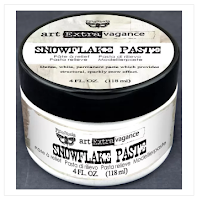
14, Last and final step for this little winter cottage, take the snow flack paste, randomly add on roof and some other portion too as you like
Here's the little finished house.
This is the view Santie Claus sees when he's coming in for a landing. :)
I hope everyone is enjoying the winter season!
If you decided to make a few, I would love to see them!
Thanks for stopping by!
Suzna
Supplies used


Wow...So cute ...and just love the tute Suzna...will try this one for sure...
ReplyDeleteLove
Richa
Thank you so much, i'm so glad to hear like this :-)
DeleteWow!! so awesome. Ty for sharing. Hugs
ReplyDeleteThank you Gayatri
DeleteThis is brilliant Suzna...love everything about it....simply wowww :)
ReplyDeleteThank you
DeleteOmg only u can do this Beautifully done such a awesome work
ReplyDeleteWow!! It's Awesome! Gorgeous details!
ReplyDelete