
Hello everyone!
Hope you all are doing well!
Today I will be doing a tute on how to create the backgrounds of these tags!
Aren't they pretty?
Lets get started! Its gonna be a long post with lots of pictures and information so sit back with a nice cold drink and enjoy the post!
I will start from the easy backgrounds going to the more detailed ones.

The 1st basic product that you all should have is the craft sheet! Its excellent for distressing as it makes so much easier to blend colours without leaving patches. Its heat proof and protects your surface while using the heat gun. A complete must have.
I've die cut the tags using the Tim Holtz tag die. I have uploaded one picture with all the supplies used for making one tag. Hopfully i did fit in everything :P
Lets get started!


 Now I've used 2 tiny pieces of tacky tape at the back of the mask. This will help me securing it to my tag as I use distress inks.


 To add some more colour I've distressed the entire tag using my fav colour Victorian Velvet.


 I am using a stencil by Tcw, Burlap background stamp by Just Rite- This is an awesome stamp! It make it so easy to stamp your own pattern paper with this!


 Next I've secured my template and using a finger dauber I'm inking the tag using Walnut Stain distress ink.
 This is how it looks. I continued moving around my template till i was satisfied with the look.

 Now my fav step! Using the Distressing tool by Prima! I love the way it creates that edge. Adding the Grunge shabby look to the paper.

 To make the edges more prominent I've inked them with Walnut stain.
See!! I forgot to fit in few supplies in the main picture :P
These kaisecraft stamps are awesome! They are bold and make the perfect tags and bookmarks!


 I've distressed the entire Tag with Scattered Straw. When using a no. of inks on one tag always begin with the lightest colour. It make the blending easier.
 Next comes some Mustard seed.

 Some Spiced Marmalade and Rusty hinge adding the darker tones over the lighter ones.
 Next I've used some peeled paint. And lastly some peacock feathers over it.

I've not blended the center as i will be stamping next.
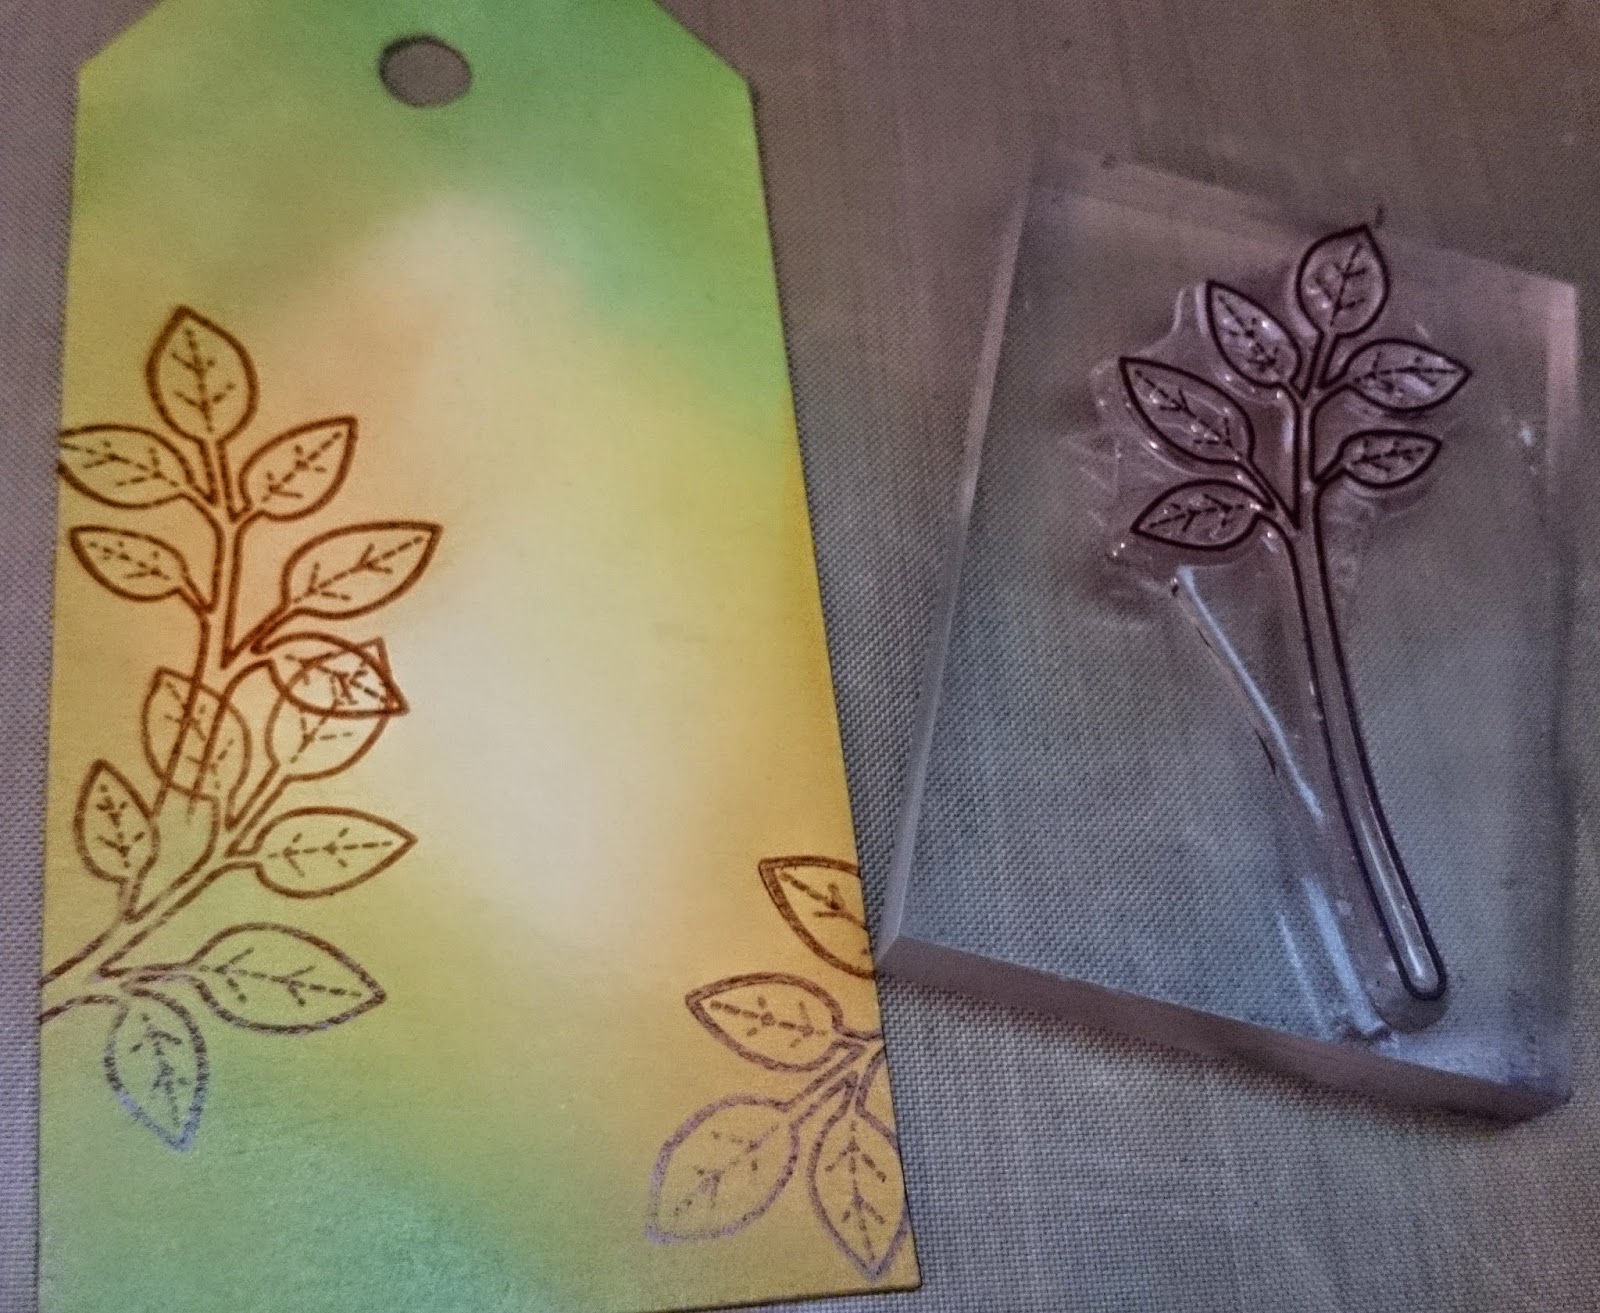
 I've used the leaf and small flower stamp from Just Rite Home Tweet Home Stamp set.

 Next I've stamped Silhouette 11 stamp by Impression Obsession using Black Archival ink.
 Now using some cute sentiments from the Technique Tuesday Loving Words stamp set. I stamped them with versa mark and used Ranger white embossing powder I Heat embossed them.
Lastly I've used the Art is Template by TCW with some molding paste. I forgot to click a picture of it.


Hope you all are doing well!
Today I will be doing a tute on how to create the backgrounds of these tags!
Aren't they pretty?
Lets get started! Its gonna be a long post with lots of pictures and information so sit back with a nice cold drink and enjoy the post!
I will start from the easy backgrounds going to the more detailed ones.
The 1st basic product that you all should have is the craft sheet! Its excellent for distressing as it makes so much easier to blend colours without leaving patches. Its heat proof and protects your surface while using the heat gun. A complete must have.
I've die cut the tags using the Tim Holtz tag die. I have uploaded one picture with all the supplies used for making one tag. Hopfully i did fit in everything :P
Lets get started!
For the 1st tag I will be using 2 Distress inks- Pumice stone (my fav colour) and Black soot. The cute butterfly stamp is by Impression Obsession we have it in our store. You'll find its link in the list of products at the ed of the post. I will be using Archival ink here. I just love it. It gives a perfect crisp impression from flowers to sentiments to these silhouette stamps the impression is crisp! An excellent ink pad.
To begin with I have distressed the entire tag using Pumice Stone Distress ink .
Next I inked the stamp and stamped my tag, I continued stamping till i had filled my entire tag with the print.
It looks pretty right? A perfect way to create pattern paper on your own!
I inked the edges with Black soot and there my background is ready!
For the embellishment I've used Chole stem Die, The Post card die cut is from the Tim Holtz Die cuts pack! I so love the pack its very economical and has a gr8 variety of die cuts. The black swirls are by prima! I am addicted to these swirls :p I think you all know it by now hehe!
Moving to my 2nd tag now.
I am here using 2 of my fav products. The Gold embossing paste and the Brick template. The colours of Distress Inks used for this tag are- Dusty Concord , Picked Raspberry and Peacock Feathers.
I inked the tag in sort of stripes and then blending in.
Next I placed my template over my tag and to hold it down I've used some washi tape from my stash. Once my tag was secured I added the Golden Embossing paste. Make sure you give a medium coat not too thick not too thin. As the gold embossing paste absorbs a lil colour from underneath and shows a slight tint which looks very pretty!
A small tip= The best and only way to maintain templates is to clean them as soon as you finish using them as usually the medium used dries and sticks to the template.
Here's a picture of the tag once it was dry. Doesn't it look lovely!
For the embellishment I've used an Oval die cut from Radiant Rectangles die set by Spellbinders. I've stamped a sentiment from Just rite using archival ink. I've not loaded this one with embellishments as I really loved the way the background looked!
Tag3!
For the next tag I will be using the new Balze Bits TCW masks. We have got a lot of variety of these in our store. They come in a 6*6 size and are super cute!
The Distress inks I am using here are - Antique Linen,Chipped Sapphire and Broken China
I started with distressing the entire tag with antique linen.
I placed the mask in the corner and distressed with Broken China
This is how it looks!
Now i will repeat the same step moving my mask to the other corner and distressing with Chipped Sapphire.
It looks pretty!
Next I inked up the edges with Chipped Sapphire.
For embellishing this tag I decided to use the Heartfelt Creations Sun Kissed Fluer stamp and die. I've inked the flowers using the colours of the tag. The die cut is Spellbinders Label 7 and the sentiment is from Just Rite. Will link up all the dies and stamps used at the end of the post.
4th tag
Well quiet a no. of supplies in this one!
I've stamped my tag with the Burlap Background stamp and Distressed it in bits using Forest Moss and Rusty Hinge.
See!! I forgot to fit in few supplies in the main picture :P
These kaisecraft stamps are awesome! They are bold and make the perfect tags and bookmarks!
For the embellishment of this tag I've used the pretty Metal Charm Chandelier available in our store.
Well now the last tag! Tag-5!
Lots of distress inks here. Some heat embossing too!
Lastly I've used the Art is Template by TCW with some molding paste. I forgot to click a picture of it.
Lastly I've inked the edges with Black soot.
For the embellishment of this tag I've used some punched flowers.
Pheww! All done! Hope you all enjoyed the tute. Do leave some love. Incase of any query do leave a comment would be happy to help!
And Dont forget to enter in this months Challenge#17 Stamp.Colour.Cut hosted by my fellow Dt Riti Poddar.
Have a good day!
Hugs
Anchal Sapra
PRODUCTS USED
50)Tacky Tape
Oh my word!!! That is one post packed full of beautiful tags...thanks for showing a step by step of each one...soo pretty!!!
ReplyDeleteAnchal !!! I have no words to express how beautiful the tags are !!
ReplyDeleteU have done an amazing tutorial darling and will try them all....keep up the good work and keep inspiring us
lovely tutorial... thanks for sharing it
ReplyDeleteWow!! All the tags are so beautiful! ! Tfs tute!!
ReplyDeletelovely tute... tanks for inspiring.. :)
ReplyDeleteThanks for the ideas.... loved each one. beautiful
ReplyDeleteEach and every tag is so beautiful, Anchal. Thank you so much for sharing the step by step oh how to make them. Loved your ideas! :D
ReplyDeleteWOWZERS !!
ReplyDeleteBeautifully explained & presented Anchal....
Each & every step is crystal clear.
A must-see post for all the beginners...
Thanks for sharing such beautiful techniques
Riti :0)
Wow.All the tags are wonderfully done.It must have taken so much work to make tutorials for so many tags!Awesome job!
ReplyDelete