Followers

Showing posts with label Dimensional magic. Show all posts

Saturday, 24 February 2018

Mixed Media Canvas & Layouts: Guest Design Post by Preeti Datta

Hi folks!

Preeti Datta (aka Dutt Preety) here. Good Morning :) 
I am thrilled & honored to be back on the Crafter’s Corner Blog as a Guest Designer. 
Very grateful for this opportunity. Thanks a ton to Shalini di & the whole team at Crafters Corner.

I will be sharing 3 projects today; a Vintage Themed Mixed Media Canvas & 2 Mixed Media Layouts. 

I’ve used Dress My Craft's gorgeous products: Stencils, Glitters, Beads, Papers, Flowers & other craft supplies from the Crafter's Corner store

Let's get started. 

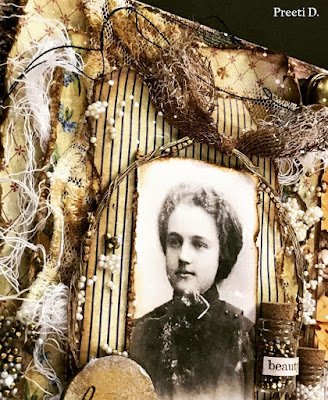
1. Vintage Mixed Media Canvas- "Dream"


Here are some close-up photos to reveal the intricate details :- 


Collage of the Process Photos: 


Synopsis of the Process: Prepared the canvas (10 by 8 inches) with Prima's Heavy White Gesso and added texture through DMC's Swirls & Couture Fashion stencils & Prima's modelling paste. Created the composition in the background with laces, then added color with Lindy's sprays. For more texture & details, did background stamping with a Prima stamp & Potting Soil Archival Ink, added DMC's pearl micro beads, golden antique beads, DMC rainbow glitter using Prima's 3d Matte Gel, made a wire embellishment with DMC's golden antique beads & prepared the Dusty Attic chipboards by heat embossing them & adding some DMC rainbow glitter chunks to them. Also, added tiny glass bottles with DMC's pearl micro beads, golden antique beads, stickers, thread, antique brads & rolled up book paper cigars. For creating the layers, used papers from DMC's Teenie Weenie Paper pack, fussy cut elements from DMC's motif sheets, added gauze & lace. In the end, created ink splatter, distressed the edges of the canvas with Vintage Photo Distress Ink & added a little shine using Inka Gold & Prima waxes.

2. Mixed Media Layout- Celebrate


Here are some close-up photos of the layout:


Collage of the Process Photos:

Synopsis of the Process: Prepared the base with Prima's Heavy White Gesso & then applied Prima's Modelling Paste through DMC's Alphas Stencil. Added color using ink sprays & distress inks/oxides. Added more interest to the background by stamping with archival inks & sponging on distress oxides through DMC's Thumb Print & Couture Fashion Stencils. Then prepared the elements for layering & embellishments by using DMC's Dots N Stripes Paper Pack & Motif Sheets. Further, gathered all the elements for layering like flowers, die cuts, laces, twine, gauze, DMC's 3D Fairy flowers (altered the color by applying gesso and then coloring with sprays) pollens etc and created a composition. In the end, added texture & shine to the flowers and in places around the layout, using DMC's Pearl Micro Beads, DMC sequins, Little Hearts, Rainbow Glitter, Microfine Glitter Powder & Rainbow Glitter Chunks using Prima's 3D Matte Gel. 

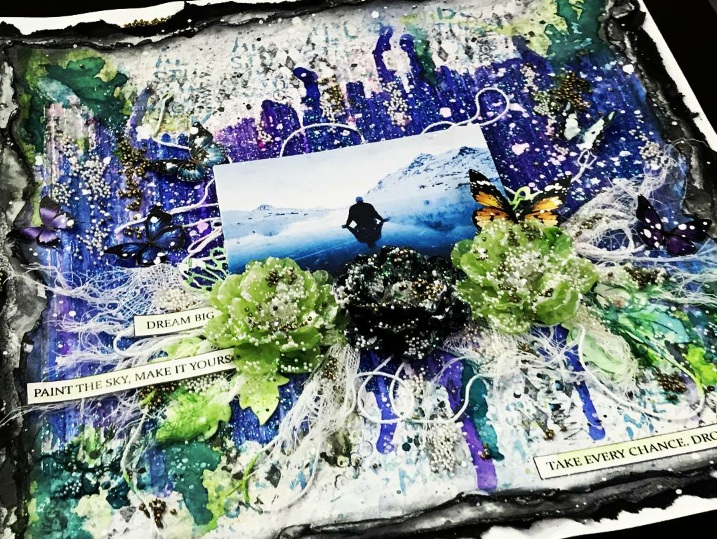
3. Mixed Media Layout- Dream Big


Here are some close-up photos of the layout:


Synopsis of the Process: Prepped one of the Pattern Papers from DMC's Hydrangea Lawns Paper Pack with Prima's Clear Gesso and applied Prima's Modelling Paste through DMC's Thumbprint Stencil. Then added  DMC's Rainbow Glitter & Microfine Glitter Powder to add sparkle to the background. Sprayed on a spray sealer (to bind the glitter to the layout better) then deckled the edges of the paper & adhered it to other deckled & distress edged papers to create a layered 3-D look.  For the main composition, used DMC's 3D Fairy Flowers, twine, gauze & die cuts. Fussy cut the butterflies & titles from DMC's  Motif Sheets. Did background stamping & added color to the background with ink sprays. Added texture & shine to the flowers and in places around the layout, using DMC's Pearl Micro Beads, Golden Antique Beads, DMC sequinsRainbow GlitterMicrofine Glitter Powder & Rainbow Glitter Chunks using Prima's 3D Matte Gel. In the end, created white ink splatter. 

That's all for today :) 

In case, you'd like to check out my first GD post where I shared 8 Simple Mixed Media Cards (using DMC stencils & glitters), please click HERE.

I'm very grateful to Crafter's Corner for this experience. I had so much fun playing with the supplies. I highly recommend that you check out their website, HERE and also, their brand- Dress My Craft for it’s Stencils, Glitters, Sequins, Flowers, Pattern Papers, charms, miniatures etc They have a plethora of cool options to choose from. Buy a few to try them out, experiment and see the quality for yourself. I'm sure you'll love them :) 

Please don't forget, there is a great deal on DMC stencils via a Grab Bag Offer,wherein you can pick up all 12, A4 sized DMC stencils at a discounted price, please click HERE to check it out. 

Have a great weekend!
Thanks a lot for your precious time :)
Stay Blessed
Preeti Datta
Blog
Instagram

Wednesday, 26 April 2017

Sequined Superman !!

Good Morning Everyone


Today I am sharing a Book- Box card which I have made on superman theme, and it is to be gifted to someone who is fan of Superman...
Without wasting time, let's get started..
Mind you it’s a picture heavy post and will mention the list of supplies used in the end of the post.

I have used loads of images of superman which I have googled and downloaded.. I am sorry if in case I missed giving any due credit to anyone.. these images were downloaded from free printables.

Let’s move ahead on the project, I have used loads of dress my crafts sequins and Mod podge to make this project.

This is a huge book box card, measures 12x12 inches in size.


That's how the binding looks like...


On the top of the card I mean the cover I have made a big shaker element, which holds loads of sequins, all from Dress my crafts Crafters corner.


 I cannot get enough of the beauties .. some more pictures from different angels..

How to make shaker top- 

-Taken two 1/2 inch strips, measuring 8 inches length 
-Another two pieces 1/2 inch strip of heavy Cardstock 3'7/8 inch 
-double sided foam tape,
-Glitter foam sheets 

Step 1 - make box with double sided tape first 
Step 2 - add card stock strip above the layered foam tape
step 3 -  Add another layer of double sided tape on Black card stock strip 
Step 4 - Add all the elements you want inside the box.

I have added the superman cut out and dress my crafts sequins inside it. And 

Step 5- finally covered the same with acetate sheet.
Step 6- Lastly added the foam glitter strip to cover/ hide the foam tape to complete the look.


I have fussy cut this superman logo and added on the band and have attached Velcro to make this closure band.


Moving inside the box card, tdaaa
here is how it looks when we open the box...


On the base I have done some stamping, heat embossing and decoupage...

This actually reminds me of comic book page and I totally love way how it turned out.


I have used Dimensional Mod podge to make Faux epoxy stickers..


So here we come to an end of my project.
I hope you all liked it :) Don't forget to leave some love.

XOXO


Supplies used -
Black card stock
Mod podge dimensional
Mod podge gloss super thick
Memory box cityscape die
Pattern paper from stash
Tombow glue multi
MS border punch
Dress My crafts sequins
double sided tape - foam/ tacky tape

Wednesday, 9 September 2015

Mod Podge Dimensional Magic


Good Morning Everyone

How are you all doing ?? I hope you all are enjoying the new creations, tips and techniques around the corner. I am back with yet another post on Mod Podge series and the product that I will be talking about is Mod Podge Dimensional Magic.


Mod Podge Dimensional Magic is super versatile product to work with, Create faux mosaic, quilt and other textures with added dimension. Dries clear and allows the full color of the surface below to show through. Works with Mod Podge, acrylic paint, dyes, pigments and more. Stay put formula won’t sag or run. Perfect for jewelry, paper crafting and accenting home decor items. It has two variants one with silver glitter and golden glitter.

I had fun playing around with this product and my favorite part was creating my very own stickers and embellishments. Its a super picture heavy post. Let's get started. 

Project One : BOTTLE CAP 


Supplies used : Mod podge dimensional magic 
Bottle Cap 
Cabochons, Podgeable shapes, Pearls 


Simply add some pearls your favorite cabochons and cover them with a good layer of dimensional magic. 


Viola this is how it looks when it is completely dried. Allow it to dry for more then 24 hours and you are ready to use your embellishment. 


Project 2 : How to make your own EPOXY ENAMEL DOTS


I hope you can see that ... yes that's a Bindi - our Famous Indian accessory. You can use different size of Bindi's for making your own DIY enamel dots.


I have used the multi pack of bindis of my mom and see this is how it looks when covered with Dimensional magic. You can use these dots on your cards.

Project 3: How to make your Jewelry 

Supplies Used: 

Charms, Podgeable Pendants and Dimesional Magic and some pattern papers


Apply some mod podge on base and paper and paste it inside the base. Add charms and some glitter balls and cover it with Mod podge Dimensional Magic.


Viola we are done. You can use this as embellishment to decor your projects, may be on scrapbook charms or neck piece.

Key Chain Pendant 


For this Pendant I have used Elements earth texture and dimensional magic. I have simply added these gold earth textures and covered it up with Dimensional Magic.


And have added these pearls balls and we are done.:) Store has huge variety of cabochons so grab them before it goes out of stock.

I have tried Dimensional Magic  on MDF cutouts. I have applied light one layer of dimensional Magic  and added pearls over it. And finally covered the entire piece with Mod Podge Dimensional Magic.


Once it is completely dried I have used the MDF diecut  to make this keychain.


And lastly I have made this cute little dangler key chain for my bag. I have used this podgeable shapes and used my childhood picture of me and my brother :)


How to make Faux Epoxy Sticker 


I have taken a die cut and covered it completely with dimensional magic. Allow it to dry completely for over night and your are ready to use.


For this I have used a stamped sentiment  and covered it with Dimensional Magic, and here I have my very own Sticker. 

I hope you all liked today's post and it helpful.

Have a nice day 
Love 
Isha 


Supplies Used :
Pearls