Hello crafty Friends...
This is Riti Poddar here today with two tutorials...Since we at Crafter's Corner are focusing on Stamping & it's different techniques, I'm here today with "Resist Stamping/Embossing Technique"
It's a fun technique with which you can create various backgrounds for your projects. I have had a lot of fun doing this for you all !! I hope you enjoy the tutorial.
it's going to be a long one...so sit back & enjoy !


Supplies Used :
Goodbye Static Pad
Versamark Ink -
Gelatos
Ranger Heat Tool
Ranger Craft sheet
Self Healing Mat
Distress Markers
Distress Inks
Chipped Sapphire
Tumbled Glass
Broken China
Salty Ocean
Walnut Stain
Victorian Velvet
Mustard Seeds
Wild Honey
Black Soot
Peacock Feathers
Distress Crackle Paint
Walnut Stain
Tarnished Brass
Antiqued Bronze
Memento Ink
Tuxedo Black
Summer Sky
Prima Chalk Edgers
Versa Magic Dew Drop Ink
Mango Madness
Red Brick
Red Magic
Archival Ink : Jet Black
Ink Blending Tool
Mini Ink Blending Tool
Ink Blending Foam
Mini Ink Blending Foam
Sponge Daubers
Ranger - Clear Embossing Powder
Hero Arts Stamp
Friend Definiton
Old Letter Writing
Impression Obsession Stamp - Silohuette 18
Inkadinkado Stamp - Flourish
Fiskars Stamp 8"x8" - Lasting love Quotes
Magnolia - Tilda with Dot Bow
Prima Doll Stamp
Justrite Stamp - Celebration Labels One & Bracket Borders One
For All You Do Vintage Labels Three
Prima Stencils 8"x8" - Damask
Justrite Custom Dies by Spellbinders
Vintage Label 7
Spellbinder Die - Locking Loops
Classic Circles
Lindy's Stamp Gang
Starburst Sprays:
French Lilac Violet
Cactus Gold
Hottie Patottie Pink
Frosted Forget-Me-Nots
LSG Embossing Powder
Desert Moon Turquoise
Resin Embellishments :
Roses Carved Oval Frame
Vintage Lady Cameo
Charms - Key
Mulberry Flowers
Prima Pearl Scrolls
Adhesive Backed Pearls
DCWV Pattern Paper : Butterfly Garden
Martha Stewart - Doily Lace Border Punch
3-in-1 Butterfly Punch
Sizzix - Caged Bird Die
Cheery Lynn - Daisy Strip
Mono Multi Liquid Glue
Glossy Accents
Tim Holtz - Tonic Scissors
Cutter Bee Scissor
Sakura Gelly Roll Glaze Pen
Quickstik
MS Scor Board
Guillotine Paper Cutter 13"
Phew!!! Wasn't that quite a long list of supplies !!
Check out our store at www.crafterscorner.in for many many many more supplies.
We keep having New Arrivals everyday...so be sure to check them out before they go outta Stock..
and the best part is the Prices are very Low !!! So go & fill your carts !!
I hope by now you all must be ready with your entries for the Current Challenge #17.
"Stamp.Color.Cut"
If you haven't entered in our challenge...Now is the time...only 2 more days to go !!
So hurry up...& Enter to get a chance to win a Cute Stamp Set by Penny Black !
I hope you all have enjoyed my tutorial.
Please do leave some Love in the comment section below.
Feel free to ask if you have any queries..I'll be happy to answer them !
Have a Fabulous Weekend & a crafty one !
Hugs,
Riti
This is Riti Poddar here today with two tutorials...Since we at Crafter's Corner are focusing on Stamping & it's different techniques, I'm here today with "Resist Stamping/Embossing Technique"
It's a fun technique with which you can create various backgrounds for your projects. I have had a lot of fun doing this for you all !! I hope you enjoy the tutorial.
it's going to be a long one...so sit back & enjoy !
(P.S. Click on the pictures for a Bigger picture ! )
Simple Emboss Resist Stamping !
Step 1: Wipe your card stock with the 'Good Bye Static' pad well. This will help in getting rid of any moisture, finger Prints, lint etc which might be there on the paper. Tap off the excess.
(P.S. Be careful not to touch the surface once you have used the GB static Bag)
Step 2 : Take a Background Stamp & ink it with Versamark Ink & stamp on your cardstock.
Use a clear Embossing Powder & Use your heat tool for embossing !
Step 3: Once you have embossed, wait for 5 minutes until your card stock surface is dry.
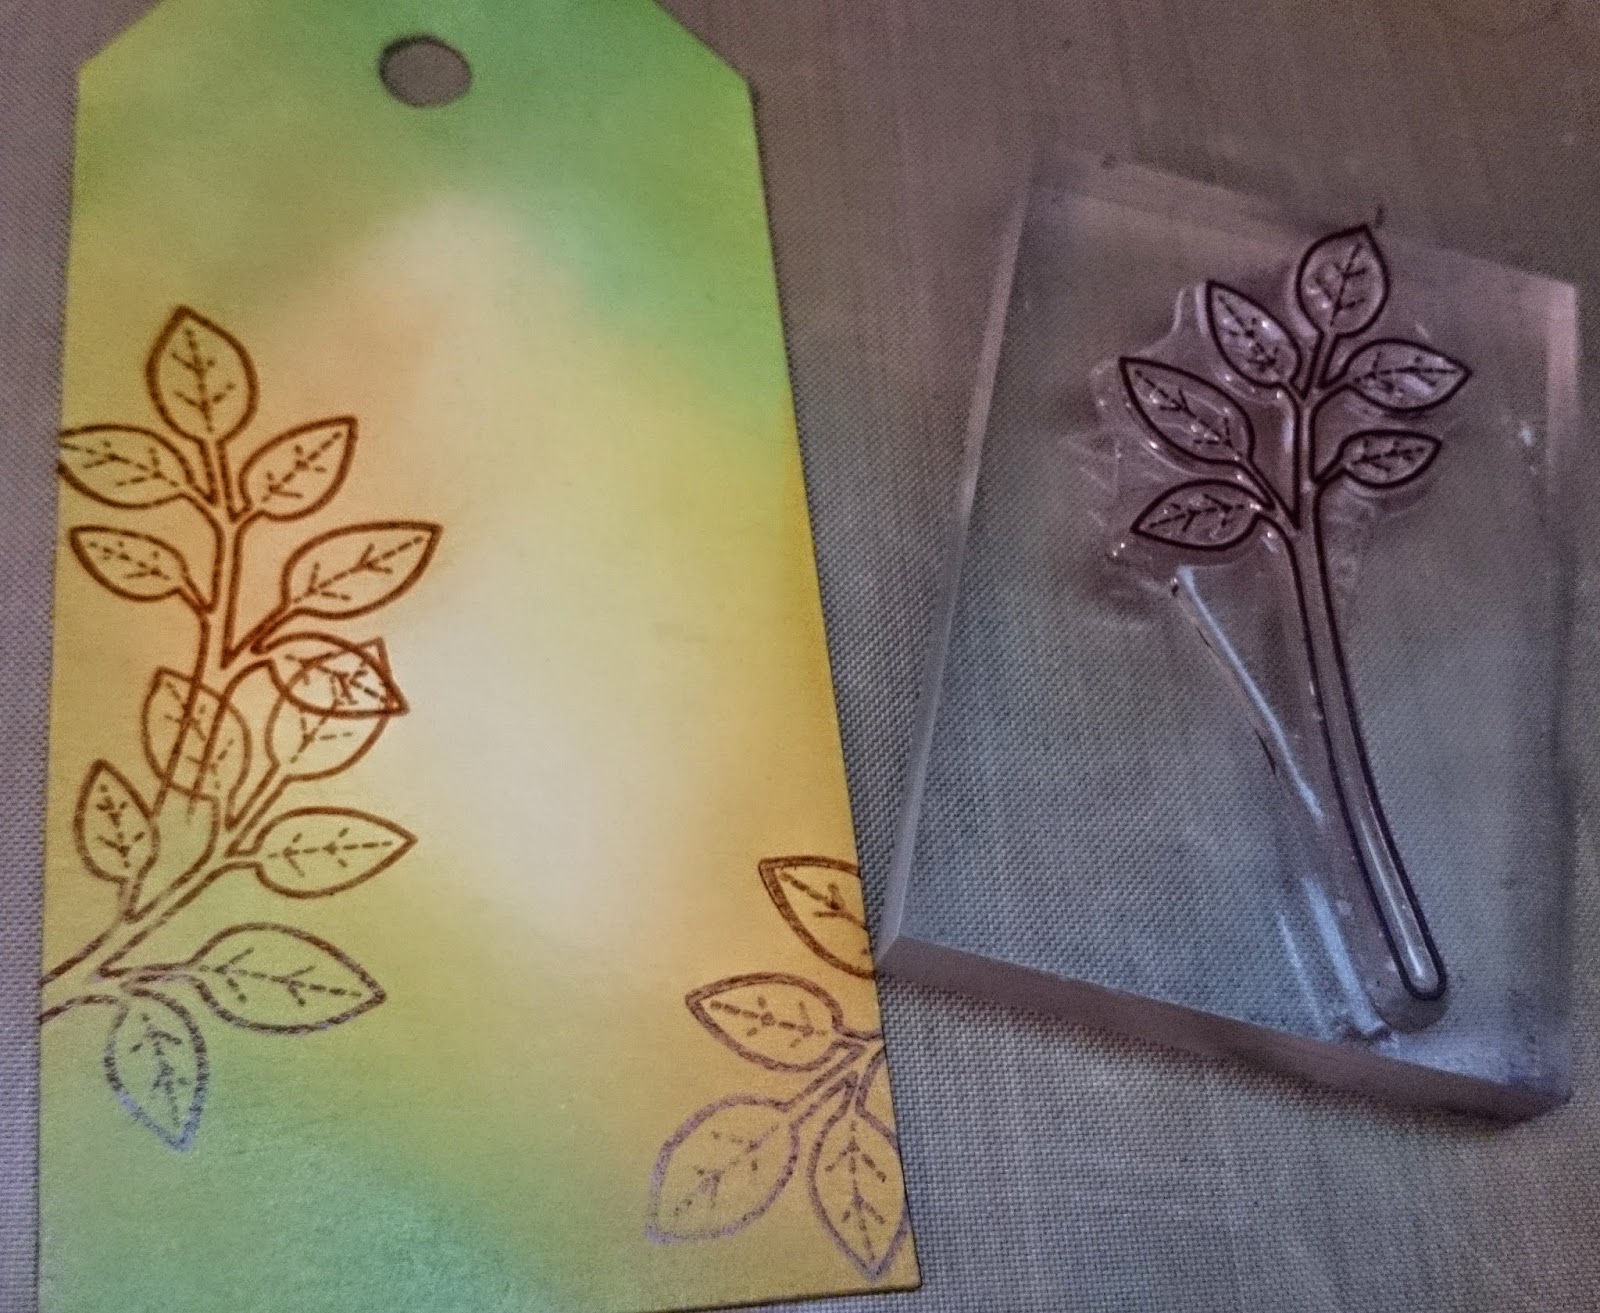
Step 4: Choose your desired colors of Gelatos & rub on your embossed card stock as shown above
or in any other pattern as you wish.
(P.S. You can use any other medium to color such as Distress inks, paints, etc)
Step 5: Blend in the colors with your finger & then Wipe off the excess with a wet tissue/baby wipe.
You will now see that the Embossed Background has resisted the colors !
This is a Simple Embossing Resist Technique !
Step 6: I have used my Die cut to cut out a label from the embossed card stock.
Take a look at the final Card :
Similarly I have used my Distress Ink Pads for the card below..
_______________________________________________________________________
It's Time now for Our Second Tutorial !
Yes !! It's Double the fun......with
"Double Emboss Resist Technique"
...so lets get started !!
Step 1: Use your Memento Inks/Archival Inks to stamp your background.
Here I am using a Flourish Stamp & the Blue Summer Sky Memento Ink.
Step 2: Next I stamped some text back ground randomly using a darker shade of blue ink.
Step 3: Now for my next design I have chosen a Prima Stencil instead of any stamp.
I have covered the entire card stock with the stencil & inked it with Versamark Ink.
(P.S. When using your stencils make sure you use the ink pad liberally.)
Step 4: Now it's time to emboss. I have used my Fav. Lindy's Stamp Gang Embossing Powders.
These are two-toned Embossing Powders just like the Sprays..& the results are just fabulous.
We have a whole lot of shades in the store!! Grab some of your favourites & create magic.
Step 5: Use your Heat Tool to emboss the powder. You'll see the two-toned effect once the powder melts. Doesn't it look gorgeous !! I love it !!
Step 6 : Bring out your Lindy's Stamp Gang starbursts & get spraying!!
I have sprayed the background using 2 colors.
Step 7: Dab the excess with a wet tissue/ baby wipe & dry off with your heat tool.
And a Gorgeous Background is ready to be worked on !!
It looks just faaaabulous in Real Life !!
Love all that shimmer...
Here's my Card using this Background...
This is not all my Friends...
I have yet another card using the Double Emboss Resist Technique...
for this card I have used 2 Stamps..instead of 1 stamp & 1 stencil.
Goodbye Static Pad
Versamark Ink -
Gelatos
Ranger Heat Tool
Ranger Craft sheet
Self Healing Mat
Distress Markers
Distress Inks
Chipped Sapphire
Tumbled Glass
Broken China
Salty Ocean
Walnut Stain
Victorian Velvet
Mustard Seeds
Wild Honey
Black Soot
Peacock Feathers
Distress Crackle Paint
Walnut Stain
Tarnished Brass
Antiqued Bronze
Memento Ink
Tuxedo Black
Summer Sky
Prima Chalk Edgers
Versa Magic Dew Drop Ink
Mango Madness
Red Brick
Red Magic
Archival Ink : Jet Black
Ink Blending Tool
Mini Ink Blending Tool
Ink Blending Foam
Mini Ink Blending Foam
Sponge Daubers
Ranger - Clear Embossing Powder
Hero Arts Stamp
Friend Definiton
Old Letter Writing
Impression Obsession Stamp - Silohuette 18
Inkadinkado Stamp - Flourish
Fiskars Stamp 8"x8" - Lasting love Quotes
Magnolia - Tilda with Dot Bow
Prima Doll Stamp
Justrite Stamp - Celebration Labels One & Bracket Borders One
For All You Do Vintage Labels Three
Prima Stencils 8"x8" - Damask
Justrite Custom Dies by Spellbinders
Vintage Label 7
Spellbinder Die - Locking Loops
Classic Circles
Lindy's Stamp Gang
Starburst Sprays:
French Lilac Violet
Cactus Gold
Hottie Patottie Pink
Frosted Forget-Me-Nots
LSG Embossing Powder
Desert Moon Turquoise
Resin Embellishments :
Roses Carved Oval Frame
Vintage Lady Cameo
Charms - Key
Mulberry Flowers
Prima Pearl Scrolls
Adhesive Backed Pearls
DCWV Pattern Paper : Butterfly Garden
Martha Stewart - Doily Lace Border Punch
3-in-1 Butterfly Punch
Sizzix - Caged Bird Die
Cheery Lynn - Daisy Strip
Mono Multi Liquid Glue
Glossy Accents
Tim Holtz - Tonic Scissors
Cutter Bee Scissor
Sakura Gelly Roll Glaze Pen
Quickstik
MS Scor Board
Guillotine Paper Cutter 13"
Phew!!! Wasn't that quite a long list of supplies !!
Check out our store at www.crafterscorner.in for many many many more supplies.
We keep having New Arrivals everyday...so be sure to check them out before they go outta Stock..
and the best part is the Prices are very Low !!! So go & fill your carts !!
I hope by now you all must be ready with your entries for the Current Challenge #17.
"Stamp.Color.Cut"
If you haven't entered in our challenge...Now is the time...only 2 more days to go !!
So hurry up...& Enter to get a chance to win a Cute Stamp Set by Penny Black !
I hope you all have enjoyed my tutorial.
Please do leave some Love in the comment section below.
Feel free to ask if you have any queries..I'll be happy to answer them !
Have a Fabulous Weekend & a crafty one !
Hugs,
Riti