Followers

Showing posts with label Mini furniture. Show all posts

Monday, 20 March 2017

The Baby Projects


Good morning, everyone! Welcome to Crafters Corner blog.
I hope you had a splendid weekend…I just returned from a small weekend myself …and what better way to return than with a cute project share? Today, I have a gorgeous baby theme project to share with you. Here’s a look at my 4 completed baby projects:  


So, I am not going to bore you with every detail. Just going to give you the basic idea and few tutorial pics. I mainly used Kaisercraft peek a boo collection papers, and for embellishments are as usual like flowers, miniaure metal charm, stickers were the paper, laces, ribbon etc.


I really enjoy how this project came out. I think it is very pretty, fanciful and fun, just like a project about these silly sweet and beautiful gifts for our kiddos.
Let start one by one
1. Mini baby room 


I really like using Mount board as it is so easy to work with
Mount board: This Neutral Mount Board is a must have for all kinds of scrapbooks and 3D shadow boxes.. You can create any size of shadow box with the help of the same. It is best to be used for the back of mixed media layouts. 


Its 2000 gsm strength makes it very special . 

I Just simply cut 4 piecse as for my design, and i sticks together with Aleene's glue and you can use stick pins in it to secure it while it dries and use masking tape. 


And i start decorate with papers, lace etc


White color or soft color laces design are perfect for baby theme project


Middle of the room wall i added the lined designed paper ( i dont no proper name of this particular paper)    


In fact, I liked how these corner legs looked so much that I added it 4 edge.


This Prima Acrylic color gives very soft pink shade.


Then arrange the miniatures, How easy this project, is it? 


2. Gift box  
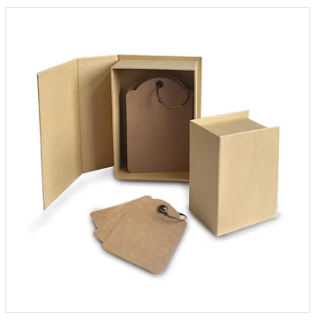
This box I made using Graphic 45 Book Box covered with same pattern paper from kaisercraft


I painted all the edges of box with white gesso

Glue the design papers inside and out side, and if we add lace, its get more decorative


Adding emplishments, flowers etc 


This is the perfect and easy project for gift purpose :-)


3. Shadow box  
I really love to create shadow boxes and altered art…so here is my take on a baby boy room 

I painted whole box with mix of acrylic and gesso
white and blue acrylic + white gesso


These are my few lace collections which used in this project.


Adhere paper to box, added laces, fussy cut images, flowers, miniature metal charms, resin frames etc 


4. Mini Album 
I am normally doing mixed media, altered art, miniature but I really enjoying learning album making myself. I dont have tutorial pic of this next time i will share my experience in album   


Want to try these projects out? 
Visit Crafters Corner and order online today

Thank you for having a peek & have a great day…
Huge 
Suzna 
Supplies Used:


Saturday, 22 October 2016

DOLL HOUSE DINING ROOM

Hello Everybody! What a week!!! Hope you all are enjoying the fantastic posts by my fellow DT's they are doing a fab job!
I did want to take a quick second and thank all of you who left so many, many awesome comments on my last blog post
Today I am here to share a very everlasting dreamy whimsical project for you all!


The festival season going on us, I thought I would share this fun and easy to make doll house room box for gift giving to your little ones... When Shalini ask me to make a gift, my mind went immediately to this. And i challenged myself to make this.
I pretty much stuck in making this. I finally finished Yahooo. It was a blast to design and create!!  


Top view of my box
I decorate 3 sides of box, in that one side can keep photo

For more about this box, see the video here.  


These are the paper which i used to decorate outer of my box.

Here is some tutorial pic of gift box
1. Neutral Mount Board is best for 3D boxes.. You can create any size of box

2. I use masking tape on the edges. For making this box, need two layer of chipboard sheet

 3. First base i simply wrap with normal gift paper. This is the top portion, and glue the 2nd base on top of this sheet

 4. I Glued 2 bases together

 5. I joined the sides of my box ( chipboard sheet ) with Dupont Tyvak paper. Stick the side walls on the first base

 5. Add magnet on side of chipboard with masking tape

 6. Top cover, just like how we create in explosion box, But here not only paper . You can see the chipboard on my pic. And make sure that the cover fits correctly over the walls of the box


7. Arranging Ribbon, i choose two soft colors

 8. Simply glued with glue gun


Now its come inside part


9. Main products are Craft and you new born baby paper collection and MDF dining room furniture 
For finishing touch i add this white paper on center of wall

This is the way we getting furniture. 


 2 sheets of MDF furniture

 10. Use sand paper on edges to get smooth effect

11. To start with I have applied Gesso to all the piece of both sheet and joined with glue gun.


13 For Dining table and chair i choose soft pink shade ( mixing gesso with Prima marketing Lipstick mica powder )

12. Curtains are made by gold coin cover with lolly pop stick
I choose violet color
13. Arranging flowers and pot


14. Filling glitters on glass bottle

Here is some more close ups

 15. I already shared, how i'm making stand in my last post, or if you want the details check here Miniature-dresser-room
 This little ted with basket, it was a cute keychain
And i'm just tried with candle...how does it come. Lol, flames never come in miniature way


I really love these mini's and all it's incredible goodness! The papers i used are simply outstanding. soft color touch, I love working with them.

That's it for today


Once again, Here's to a Wonderful Healthy Happy crafting to you all!!!  
Thanks for the interest in my pattern! Y'all Rock!  
Suzna 


Supplies used