here. Hope you had a pleasant weekend :)
In simple words, Die Cutting is essentially a way to create multiple, identical shapes out of different materials. There are basically 2 types/categories of machines, either manual die cutting machines in which human effort is required to make the dies cut through the material or digital/electronic die cutting machines in which electricity is used. Under each of these categories, you will find many options and choices of machines manufactured by multiple companies. Die cutting machines can often cut through various materials, like paper, cloth, leather, vellum, thin chipboard, burlap etc and the specifications of each machine differ. While using manual die cutting machines, we need dies. Dies are made of steel and come in many shapes, when these are put through the machine, with the use of pressure, they cut through the material. Whereas, in digital die cutting machines, these are connected to a computer and the shapes cut are determined by the software. There are also, electronic die cutting machines, which use dies but are run with the help of electricity, so no human effort is required to crank the dies through the machine.
What are Dies?
Dies are made of metal and come in various shapes, they have a raised, sharp area for cutting. They are used in die cutting machines to cut through materials. Using these, we are able to get multiple, identical copies of the same shape (shape of the die). There are 2 main types of dies, steel rule dies and wafer thin dies.
Steel Rule Dies:
These have a sharp blade and can be used to cut through thicker materials or to cut multiple layers of cardstock at the same time. They are bigger, heavier and more durable. The blade is protected with foam for our safety. Sizzix Bigz Dies are a good example of Steel Rule Dies.
Some Examples of Steel Rule Dies (Sizzix Bigz Dies)
(simply click on the images to explore/shop)
Wafer Thin Dies:
Wafer thin dies as the name suggests are thin and the blade is not so sharp (as steel rule dies). It is when pressure is applied in the die cutting machine that these are able to cut through the material. These are easy to store, lighter and the most popular kind of dies available in the market. There are literally thousands of shapes/designs for almost any occasion. There are two main types of wafer thin dies: thinlits and framelits.
Thinlits:
These are wafer thin dies that yield shapes that can be used on their own to add to a project or to create a shape that can be converted into a 3-D item. These can cut out an element that is a stand alone item, with no coordinating stamp set needed.
Some Examples of Thinlit Dies:
(simply click on the images to explore/shop)
Framelits:
Framelits are wafer thin dies which cut out shapes that frame stamped images, they create windows or nest with others to create frames. Many companies like MFT, Altenew, Lawn Fawn, Heartfelt Creations, etc sell coordinating sets of stamps & framelits so that no fussy cutting is required to cut the stamped images.
Some Examples of Framelit Dies:
(simply click on the images to explore/shop)
Die Cutting Sandwich
In both, Manual Die Cutting Machines and Automatic Die Cutting Machines (which use dies and run on electricity) we use a "Die Cutting Sandwich", this is different for each machine and varies according to the die being used/material being cut etc. Basically it involves the way in which the platform, cutting pads, dies, material to be cut (paper/cloth/burlap etc) are all layered (like in a sandwich) so that it can pass through the machine.
For example:
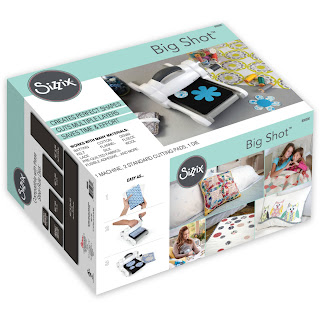
1. When using a Sizzix Big Shot Machine with a Sizzix Bigz Die, No platform is needed, the sandwich (top to bottom) is -> 1st cutting pad+ cardstock+ Bigz Die+ 2nd cutting pad
2. When using a Sizzix Big Shot Plus Machine with a Framelit die, the sandwich (top to bottom) is :
1st cutting pad+ Framelit Die+ Cardstock+ 2nd Cutting Pad+ Big Shot Plus Adapter A+ Big Shot Plus Platform
Some Useful Die Cutting Accessories/Tools
(simply click on the images to explore/shop)
Cheery Lynn Design's Big Shot Adaptor Plate is needed to get clean cuts from intricate dies. It acts as a shim and can be added below the cutting pads in the die cutting sandwich.
(simply click on the images to explore/shop)
Spellbinder's Tool N One has a needle end and a brush end, both of which can help poke out small paper bits out of the die cut and die.
(simply click on the images to explore/shop)
Quick Release Die Paper can be used between the die and the cardstock while die cutting, to help get rid of small bits of paper, that often stubbornly stick to the intricate dies
(simply click on the images to explore/shop)
The die brush rolls away small bits of paper from the die cut/die and the foam pad provides a good cushiony surface to poke out the bits of paper.
Sizzix has this with a magnetic pick up tool (to help pick up metal dies) and
Kaisercraft also has a die brush and foam pad combo.
(simply click on the images to explore/shop)
Since cutting pads face a lot of wear and tear, and over time, get bent out of shape, having a spare pair of cutting pads is often helpful. They are available in the
standard size (transparent) or with different colors like
grape or
mint or in bigger sizes like the
Extended Cutting Pads.
How to make these Decisions:
1. Whether to Buy a Die Cutting Machine ?
2. Which Machine Does One Buy?
With the number of options available out there and also with the introduction of newer machines every few months, we as consumers can be left quite confused, as to what to buy? and also, whether one should even buy a machine or not. This is a one time investment, it is not like buying an inkpad or a pack of cardstock, so ofcourse, one wants to be sure before taking the plunge. Here, I will try to enlist a few factors you should consider before making your decisions and perhaps they will help you in making better and more informed choices.
1. Research- There are many new machines and dies on the market now compared to a few years back, so it is a good time to be in the crafting space because we have lots of options to choose from. So we need to research about the options by going to the company websites, checking out the specifications of the machines, watching youtube demos, asking fellow crafters, teachers, store owners about the same and to become well versed with what is out there. It is just like buying a TV or a washing machine or a laptop for yourself, you will always research before you spend money.
2. Budget- Budget or exactly how much we can or want to spend is one of the most important factors which determines all shopping behavior. And that will vary for everybody. But the good thing about it is that now, there are die cutting machines available to suit all kinds of budgets. So even if you are a beginner with a smaller budget, there are options available. (
Big Shot &
Side Kick Starter Kit)
3. Your Needs, Requirements & Purposes - Next, you need to consider, what are your crafting needs. Are you a beginner who likes to make cards as a hobby? or are you a professional crafter who sells albums ? or are you interested in holding workshops or in making kits for students etc Will you be using it mainly for paper crafting or jewelry making or quilting? What kind of materials will you be cutting? What size of dies will you be using most often ? The requirements of all these people will be different because they will use their die cutting machines in different ways. Some may use it once a week, perhaps over the weekend, when they get time to make cards and some may need to use the machine every day, many times to create hundreds of die cuts. So your choice needs to be based on these individual requirements. Often, once a person becomes serious about crafting and does it often, s(he) may need more than one machine because one is not going to suffice. For example, I am a hobby crafter as of now and I own 2 manual die cutting machines and soon I will get an electronic one as well. I have 2 manual machines because I use the smaller one on the little table where I sit and craft and it is easy for me to operate it while sitting and the other one is kept on the big table and I use it to do bulk die cutting like when I need 10 or more die cuts from multiple dies.
4. Space- Die Cutting Machines take up space and you need space for their cutting pads, platforms etc also. The size of each machine differs so you'll have to see which one suits your crafting space. But to my mind, this is not the most important factor, because when I was purchasing my Big Shot Plus, I concentrated more on the performance, durability and strength of the machine.
5. Time, Energy & Strength- How much time are you going to be able to spare ? Do you have pain in your hands or some sort of health issues where you can't put too much pressure on your hands? Simple die cuts like a stitched rectangle or an oval frame take a few seconds to crank through the machine and poof! you have your die cut but some intricate dies require time because one needs to crank them through the machine a few times before a clean cut is yielded. So you will have to see which machine will suit your needs. Perhaps you may find an automatic machine where the pressure can be adjusted and electricity is used, more suitable for your needs as compared to a manual machine.
6. Additionals- Over time & with use, the cutting pads get bent out of shape and they need replacement. How often will depend on your usage. For example, I used mine for 1 whole year before I decided to change them. They are not cracked or broken, just bent out of shape. Therefore, I decided to use a new pair. Once you get a manual die cutting machine, you will need dies and there are so many options and gorgeous designs out there, that inevitably, you will get hooked to getting a few new designs, every so often. So these are the additionals that one needs to invest in over time.
Some Must-Have Dies in Your Stash:
The dies one needs/wants will again depend on your style of crafting and budget but by and large, here are some types of dies, which I feel, most of us would require.
1. Basic Shapes, Stitched, Scalloped & Stitched Scalloped
(simply click on the images to explore/shop)
Almost all crafting companies that manufacture dies make the basic shape dies, in the plain shapes, scalloped shapes and stitched versions. I think to start with, we all need circles, rectangles, ovals and squares. These are nesting "framelit" dies which can be used to create panels, frames or windows. Additionally, there are fancy stitched designs like with xxxx's or /////'s or oooo's or wonky stitches etc as well and cool shapes like triangles and hexagons etc too. Some popular companies that make these dies are MFT, Lawn Fawn, Hero Arts, Sizzix & Spellbinders.
2. Words/Sentiments/Titles
(simply click on the images to explore/shop)
Word Dies can be used as sentiments or titles on projects and they can also be used for background work. For example, using the negative of a word die cut can yield a great stencil, which when sprayed through can make for an interesting mixed media background. Also, die cuts can be adhered to the background repeatedly for the "faux embossed" look. Sizzix has a few word die sets which are great for beginners as you get a lot of words in 1 set and its great value for money.
3. Floral Designs, Butterflies and Flower Making
(simply click on the images to explore/shop)
All crafters need a few floral & butterfly shape dies. The die cuts can be used as embellishments and also for flower making. Choose a few according to your own aesthetic sensibilities. Some popular companies that make beautiful floral dies are Heartfelt Creations, Cheery Lynn Designs and Spellbinders
4. Decorative/Lacy/Flourish Designs
(simply click on the images to explore/shop)
It is useful to have a couple of decorative/lacy patterned dies. Since there are tons of options out there, it would be easy to pick a few that can be used by you in different ways. These give a
classy, elegant look to paper crafting projects.
5. Background/Cover Plate Dies
(simply click on the images to explore/shop)
These are big sized dies which are often more expensive. They are usually the size of a standard card (4.25 by 5.5 inches). These can be used as is, in the background and also parts of these can be used to create embellishments. Having at least a couple of these is quite useful.
Some Tips/Tricks/Suggestions & Pointers for Die Cutting:
1. Keep your machine on a solid, firm and stable table where there is enough space to keep the dies, platform, cutting pads etc alongside and the machine remains stable and does not rock or move while die cutting.
2. Do not force anything through your die cutting machine. If the sandwich is not going through the machine, check it again.
3. Try to stretch your supplies by using dies for embossing. Using wafer thin dies with the Enlarged Embossing Pads enables us to emboss the shapes of the dies onto cardstock.
4. If the die does not cut through on the first pass, try to rotate it 45-90 degrees and then pass it through the machine again a couple of times, this way, it hits the rollers differently, and so different amount of pressure is applied, this often leads to a successful cut.
5. How easily a die cuts through the material depends on your cutting pads (how straight they are), how new the machine is, how new the die is, the design of the die and the thickness of the material being cut.
6. Using good quality dies is always a safe bet to help maintain your machine & avoid unnecessary hassles.
7. Storing dies especially the ones with small parts (that can be easily misplaced) onto magnetic sheets is a good idea.
8. Most of the Manual Die Cutting Machines are meant for personal usage, they are not really meant for die cutting in bulk, so one must use these carefully.
9. To avoid too much bending of the cutting pads, it is good to change their placement. One on top sometimes and on the bottom at other times. This evens out the bent surface a fair bit.
10. If your cutting pad breaks or has a crack, do not continue to die cut using it. It is time to replace it. If you continue using the broken one, it can harm the machine.
11. If your machine breaks down or stops working. Do not panic. It is perfectly okay. After all, it is just a machine and not the end of the world. There are many videos on youtube to help with repair, there is a great blog post on the Crafters Corner blog, HERE, in which Dr. Sonia shows a pictorial on how she mended her Big Shot machine.
12. If you have purchased your Sizzix machine from Crafter's Corner, in case, the machine breaks down, they offer spare parts, so you can email them for further assistance.
13. If you are serious about crafting and can afford it, it is always better to go for a bigger and better option because as your needs increase, you will be able to cater to them using the same machine whereas if you get a small machine, you will inevitably have to buy a bigger one later as well.
Some Examples of Popular Manual Die Cutting Machines
(simply click on the images to explore/shop)
Some Examples of Popular Electronic/Automatic Die Cutting Machines
(which use dies and are run on electricity)
(simply click on the images to explore/shop)
Some Examples of Popular Digital Die Cutting Machines
(which are connected to a computer)
(simply click on the images to explore/shop)
For a beginner, I would recommend the Big Shot Machine (or the Big Shot Plus/Foldaway, if you can afford it), getting a few basic dies and starting your crafting journey. Slowly, you will gather more dies, as it takes time to build your stash. But it is important to start somewhere and buying a die cutting machine really changes your crafting experience and takes it to another level. The number of possibilities and options you can exercise with your own machine are endless.
That's all for today. I hope some of the information shared will be helpful.
Also, if you would like to check out my first three blog posts (in the series of Beginner's Guides), please click on the below topics.