
Hellooo...
It's THURSDAY and am here with my plaid play for this week! When it's a mile stone birthday or a wedding anniversary you do want to make something special and if its worth a display at home you want to be doubly sure that it catches every body's attention!
Today I have upcycled 2 bottles with some romantic chalk paints, Imperial and River walk (they do sound romantic, don't they???) teamed it with a collage frame.
Here is a look at the complete family on display...
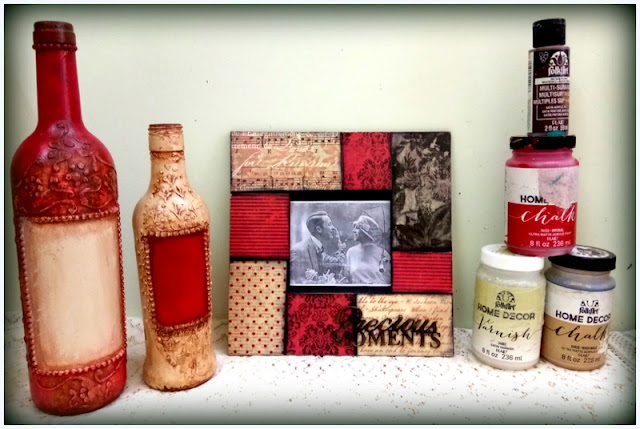
If you like it...do scroll further to see the entire work in progress! I had a great time making this and I hope you do too !
The process
 I started by coating the bottles with gesso and then doing some texture work on it. I have stuck some adhesive pearls and also hand drawn some texture using texture paste through a cone.
 Once dry, I gave the bottles a coat of River walk, chalk paint. I love the beige color. it is so vintage already!
 As the base color dried, I took some multi surface paint, Bark brown and applied it around the textured area. Immediately spritzed some water and wiped it using a rag cloth. This gave some depth to the textures area and ofcourse made it more vintage!
 It was time to take out the red! Look at the vibrancy here...love the IMPERIAL. I coated this in the central patch, allowed it to dry and distressed the inner edges with brown again.

 I followed the same technique but reversed the colors in the other bottle.
 Here is how both the bottles look after a coat of satin varnish. Not done yet, they wanted company! So decided to make a picture frame to compliment these bottles..
 I took out paper scraps in tones of red, black and beige and cut them to small patches to fit the frame. Once I liked the collage, I went about adhering it with mod podge,. The base of the frame was given a coat of black and I gave some spacing between the paper tiles, which gave it the mosaic look.
 That's the frame done! I have a chipboard sentiment that I tinted with the wood tint and gave a metallic brass highlight.

It's THURSDAY and am here with my plaid play for this week! When it's a mile stone birthday or a wedding anniversary you do want to make something special and if its worth a display at home you want to be doubly sure that it catches every body's attention!
Today I have upcycled 2 bottles with some romantic chalk paints, Imperial and River walk (they do sound romantic, don't they???) teamed it with a collage frame.
Here is a look at the complete family on display...

If you like it...do scroll further to see the entire work in progress! I had a great time making this and I hope you do too !
The process
 I started by coating the bottles with gesso and then doing some texture work on it. I have stuck some adhesive pearls and also hand drawn some texture using texture paste through a cone.
 Once dry, I gave the bottles a coat of River walk, chalk paint. I love the beige color. it is so vintage already!
 As the base color dried, I took some multi surface paint, Bark brown and applied it around the textured area. Immediately spritzed some water and wiped it using a rag cloth. This gave some depth to the textures area and ofcourse made it more vintage!
 It was time to take out the red! Look at the vibrancy here...love the IMPERIAL. I coated this in the central patch, allowed it to dry and distressed the inner edges with brown again.
 I followed the same technique but reversed the colors in the other bottle.
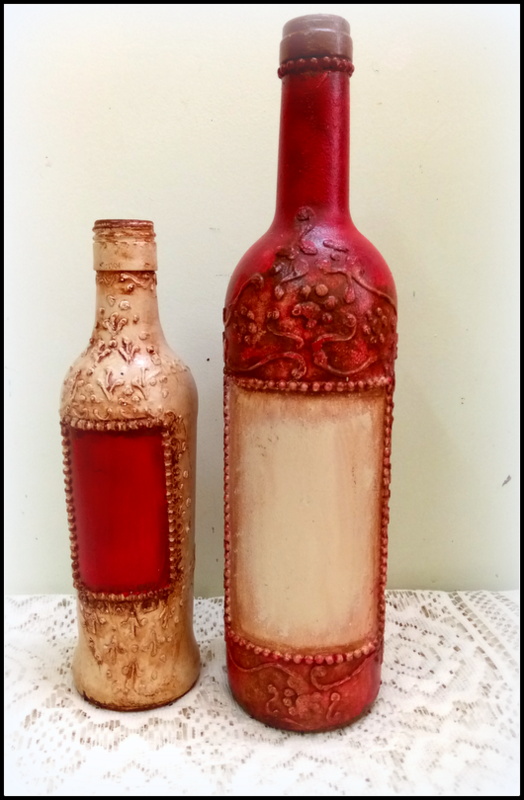 Here is how both the bottles look after a coat of satin varnish. Not done yet, they wanted company! So decided to make a picture frame to compliment these bottles..
 I took out paper scraps in tones of red, black and beige and cut them to small patches to fit the frame. Once I liked the collage, I went about adhering it with mod podge,. The base of the frame was given a coat of black and I gave some spacing between the paper tiles, which gave it the mosaic look.
 That's the frame done! I have a chipboard sentiment that I tinted with the wood tint and gave a metallic brass highlight.
The frame and the bottles were given a coat of Home decor satin varnish and now they were ready to pose as a family.

I hope you enjoyed the tutorial today and experiment with the wide range of chalk paints available with Crafters Corner. Whatever be the occasion, there are colors to match.
I will see you next week with another plaid play, meanwhile do let me know your views on this project.
Until my next creative journey,
Happy crafting and recycling.
Cheers,
Rupa
Products from PLAID


