This is Mallika here .
Today I am here to share a tutorial on how to use your scraps with mod podge .
My scrap shelf is filling day by day with loads bits of paper and I had no idea how to finish them off . Its heartbreaking to throw them away .
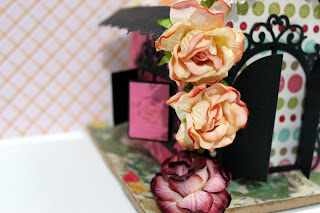
I decided to make a decor piggy bank with it using Mod Podge .
Now I will start with step by step instruction .
It is divided in two parts .
Part 1 - Making the base
What basic stuff you need ?
- Mod podge - Matt / Glossy Finish { I am using matt }
- Paint Brush
- Scraps of Paper
- Scissor
- Heat Gun { Ranger }
- Tweezer
Step 1 -
Chop your scraps randomly , it will look like confetti in huge size .
Step 2 -
Take any base , It can be a box , plate , organizer any thing for that matter which you want to alter .
I have taken a base of my mdf Piggy Bank .
Step 3 -
Start applying modpodge with help of your Paint brush on small portion of base .
Step 4 -
After applying mod podge , start applying the bits of paper randomly with modpodge . Mod Podge acts as a wonderful sealant .
Keep on applying randomly , making sure there is no mdf base peeping .
Step 5 -
For the base , I wanted to give a look of grass . I selected my green colored scarps and followed the same steps above .
Please don't worry about the neatness , as once it dries the whole effect is beautiful .
Step 6 -
Take a big piece of paper and apply to the walls . Dont forget to modpodge it .
Step 7 -
Take your heat gun and make it dry . You can leave it for natural air dry too . I am one person with almost nil patience .
Part 2 - Decorating the Base
This part totally depends upon the supplies which you have .
I will mention here the supplies which have used to finish this wonderful piece .
- MS Doily Lace Punch
- Chateau Gate by Heart felt Creation
- Distress Inks - Vintage Photo , walnut stain , Wild Honey , Frayed Burlap
- Laces from my stash
- Mulberry Flower
In this tutorial my main focus was to give you all an easy idea on how to use your scraps . The embellishing of the item totally depends on the way you want to do it . Sky is the Limit .
If you have any questions feel free to mail info@crafterscorner.in
You can even write in the comment section below .
Regards
Mallika


REALLY NCIE IDEA mALLIKA...!
ReplyDeleteThankyou khush ! Do try this out .. i m sure you will make wonders
DeleteThis is a FAB idea, Mallika.. :) I am amongst those to save even the tiniest of scrap left from a project.. and am always in a lookout for a way to use them!! this post is really useful for me.. Thanks for the tutorial..
ReplyDeleteShruti
I feel great that i could be of help
Deletewow this is stunning .love the way you used your scarps.
ReplyDeleteThankyou di :)
DeleteIts beautiful
ReplyDeleteWow ! Interesting use of scraps !
ReplyDeletelooks really good, thanx for the tute.
ReplyDeletehttp://kalasirjana.blogspot.in/
a very good use of the scraps, it's got my mind going on what I can cover with my scraps !!!!
ReplyDeletePaula
This is so awesome Mallika baby.I love how you embellished it.I love the die cut you used,the window and doors.Very cute.
ReplyDeletethis is such an adorable idea as we all crafters are very miser to throw even our scraps.....this is fab...
ReplyDeleteThats useful , a great way to get rid of precious scraps :)
ReplyDelete