Hellooo...
It's THURSDAY and am here with another Plaid play for today. This time its a pictorial, so sit back, relax and enjoy the tutorial.
I have up cycled a shoe box this time and played with the new HYDRANGEA LAWNS paper pack from DMC to alter this box along with Chalk paints from Home decor, Plaid.
Are you ready???
This is the shoe box before the makeover...


Lets move on to the process....
 I started by giving a coat of black gesso wherever necessary.
 Next I applied candle wax on areas I wanted the distressed look, especially the edges.
 I then applied the crackle medium from Home Decor on the rim and allowed it to dry. I have given a generous coat of the medium!
 As the crackle was drying, I took Sheep skin chalk paint and did dry brushing where I had applied the black gesso.
 Next came Yellow crochet...I did dry brushing of the same.
 It was time to use up the lovely papers from DMC paper pack. It was a difficult choice which one to choose...but then I was quick enough to select this horizontal pattern which was perfect for the sides of the box. I used Mod Podge gloss to adhere the same.
 Once the paper was stuck, there was a lovely distressed border around the edges. I used the scrapping tool to distress further where i had applied the candle ax. This reveled the black layer beneath. I love this distressed look and would like to emphasize that this tool can be used for distressing on card board too!
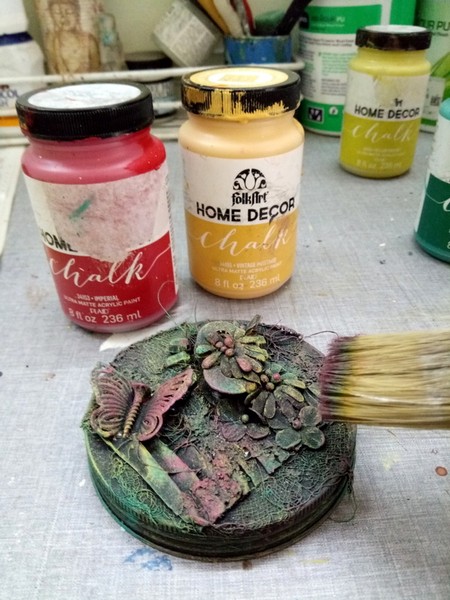
 It was time to apply the top coat where the crackle medium was applied. Its amazing how the cracks appear magically when the top coat is applied. here I have used Sage. It just compliments the paper so well!
 A closer look at the cracks and the distressed edges!
 It's stencil time! I had this Paris stencil in my stash and with sheep skin and the stencil brush, i managed this task in minutes!
 An aerial view of the stencil work. The distressed edges gives a beautiful shabby chic finish to the lid. Agree????
 I then added a metal handle to the lid and also a rope handle to the sides. This makes it easy to carry the box now! The black corners for the lids are foam pieces given a distressed look. This helps to cover the ugly openings on the sides of the shoe box.

A few pics of the box all done up! The box when opened has more DMC papers to flaunt! I have one on the inside lid and another scripted one on the base of the box.

It's a perfect setting for the coffee table to keep those little knick-knacks...what say???

I will see you next week with another Plaid play.
Until my next creative journey,
Happy crafting and recycling.
Cheers,
Rupa
PRODUCTS USED
Mod Podge Gloss
Plaid Home decor chalk paints
Plaid scrapping tool
Home decor Satin Varnish
Stencil brush
Plaid Home decor Crackle medium
DMC Hydrangea Lawns paper pack
It's THURSDAY and am here with another Plaid play for today. This time its a pictorial, so sit back, relax and enjoy the tutorial.
I have up cycled a shoe box this time and played with the new HYDRANGEA LAWNS paper pack from DMC to alter this box along with Chalk paints from Home decor, Plaid.
Are you ready???
This is the shoe box before the makeover...

and here it is after a few hours!

Lets move on to the process....
 I started by giving a coat of black gesso wherever necessary.
 Next I applied candle wax on areas I wanted the distressed look, especially the edges.
 I then applied the crackle medium from Home Decor on the rim and allowed it to dry. I have given a generous coat of the medium!
 As the crackle was drying, I took Sheep skin chalk paint and did dry brushing where I had applied the black gesso.
 Next came Yellow crochet...I did dry brushing of the same.
 It was time to use up the lovely papers from DMC paper pack. It was a difficult choice which one to choose...but then I was quick enough to select this horizontal pattern which was perfect for the sides of the box. I used Mod Podge gloss to adhere the same.
 Once the paper was stuck, there was a lovely distressed border around the edges. I used the scrapping tool to distress further where i had applied the candle ax. This reveled the black layer beneath. I love this distressed look and would like to emphasize that this tool can be used for distressing on card board too!
 It was time to apply the top coat where the crackle medium was applied. Its amazing how the cracks appear magically when the top coat is applied. here I have used Sage. It just compliments the paper so well!
 A closer look at the cracks and the distressed edges!
 It's stencil time! I had this Paris stencil in my stash and with sheep skin and the stencil brush, i managed this task in minutes!
 An aerial view of the stencil work. The distressed edges gives a beautiful shabby chic finish to the lid. Agree????
 I then added a metal handle to the lid and also a rope handle to the sides. This makes it easy to carry the box now! The black corners for the lids are foam pieces given a distressed look. This helps to cover the ugly openings on the sides of the shoe box.
Finally, gave a coat of satin varnish to the box, inside out and it was ready to be flaunted! This is the finished box and all set sit on the coffee table now. This can be an accent piece on the table and maybe even a conversation starter...you never know!!!


With that, we come to the end of this tutorial and I thank you for your time to sit through this. I hope to get you scrapping tool soon and this awesome paper pack and may be even a new show for your spouse, lol...and alter that box, NOW!!!
I will see you next week with another Plaid play.
Until my next creative journey,
Happy crafting and recycling.
Cheers,
Rupa
PRODUCTS USED
Mod Podge Gloss
Plaid Home decor chalk paints
Plaid scrapping tool
Home decor Satin Varnish
Stencil brush
Plaid Home decor Crackle medium
DMC Hydrangea Lawns paper pack