
Hello everyone
Its Nupur here today!
There is something in the air today!
Something unusual more of a mixed feelings
Hence I decided to do a little different than usual.
A bright happy day it is!
I choose to work with some grey and
some teal and some black and white.
I am creating
"Be Happy Today!"

I choose the following papers with patterns in grey , teal and Black& white Stripes
(oh these papers are so amazing!)

Using the amazing super sturdy Tonic super trimmer
I have trimmed the following papers according to the sizes mentioned below.
(12" x 12" - base paper)
(6” x 12” – green Patterned paper)
(5” x 12” – grey Patterned paper)

oh the photomatt!
A frame outside your matt is a must.
A jet black paper is so amazing
hence I decided to use it .
(While I am arranging up until the end I use the white photomat
and then replace it with the choosen photomat)

hence I decided to use it .
(While I am arranging up until the end I use the white photomat
and then replace it with the choosen photomat)

Align the 3 papers as shown in the image below.
(There are several ways to arrange these papers)
Using the super red tacky tape - especially 24mm is excellent to stick the papers.
(The red tacky tape is an amazing bubble free solution to stick your papers)
just love them..

It is a good idea to have some interesting words on your layout.

using the amazing and super cool

(These beauties are a must, they are amazing and can do
wonders in beautifying your projects and add those
little emotion touches and boost up your page. )
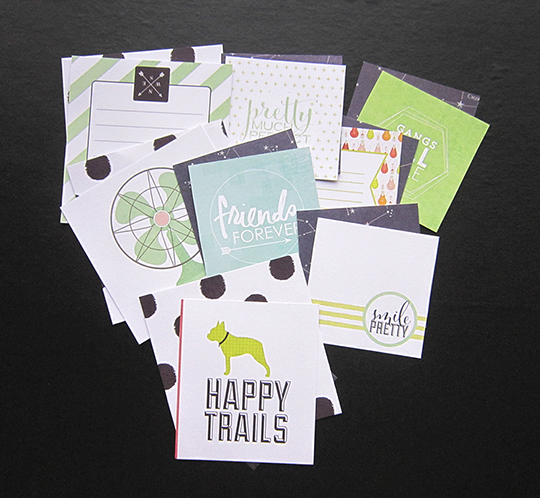
I choose the following elements to work with.
( I am so much in love with the teal)

After having played around with these gorgeous elements,
I landed up with the following arrangement.
(There are several ways to arrange these elements)
I really loved the way this looks.
Hence I settled with this.
Just a bit of splattering and here we goo...
Viola! and its all ready
- - - - - - - - - - - - - - - - - - -
Products List
Cottage Living - Pebbles
Hello Beautiful - Heidi Swapp
September Skies - Heidi Swapp
Hello Today - Acrylic words
Dreamy Ephemera Die-Cuts - Heidi swapp
Enamel Dots & Shapes - We R Memory Keepers
- - - - - - - - - - - - - - - - - - -
Have a crafty weekend!
Thanks for stopping by
...Nupur...


