Followers

Showing posts with label Neutral - Enamel dots. Show all posts

Wednesday, 24 June 2015

Pretty!


Hello Everyone!

We cannot stop the winter or the summer from coming. 
We cannot stop the spring or the fall or make them other than they are.
 They are gifts from the universe that we cannot refuse. 
But we can choose what we will contribute to life when each arrives.
Gary Zukav

Spring being my favourite,
I love to create happy and floral layout
especially when its a dull and gloomy day
I sit by my craft table
and start building the lovely spring day again
all ready to experience and re-live the same moment.
onc such remembrance is this floral layout.
Pretty!


This amazing paper collection Hello Beautiful by Heidi Swapp is to die for. 
I love the pinks and the teals with a bit of black the florals patterns and graphical patters. 

Hence I choose the following papers to work with today.


Being a blue day, I choose to work with the floral pattern being on the top.
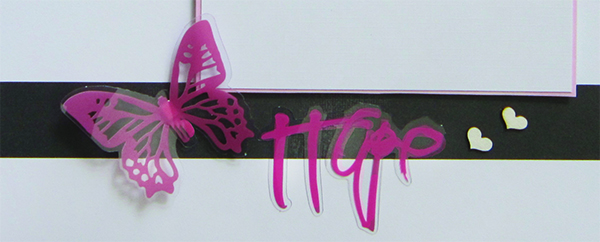
Using the amazing The theme being hope, I choose the following paperswith floral elements with pinks and grays.
(oh these patterns are amazing!

Using the amazing super sturdy Tonic super trimmer
I have trimmed the following papers according to the sizes mentioned below.
(12" x 11" - top paper)


(7" x11" - centre)
(12 x 12"- bottom)
no need to trim


Lets begin assembling now.
Using the super red tacky tape - especially 24mm is excellent to stick the papers.


Align the 4 papers  as shown in the image below.
(There are several ways to arrange these papers)
(The red tacky tape is an amazing bubble free solution to stick your papers)


Viola! now its time for the icing.
using the amazing and super cool
(These beauties are a must, they are amazing and can do 
wonders in beautifying your projects and add those 
little emotion touches and boost up your page. )
I choose the following elements to work with.
( I am so much in love with the pink and teal)


After having pasted the following papers its time to make the photo matt.
I trimmed the white paper with 3.5 inches by 5inches and gave it a backing with the gorgeous pink paper from the Heidi Swapp collection to make it sturdy and attractive
Again the bubble free 6mm red tacky tape to stick the photmatt.
Having added a bit of gray and teal papers make the photomat standout.


Fussy-cutting one of my favourite part. 
I love florals, hence I choose the following paper to extract some gorgeous flowers out.


After having fussy cut the flowers its time to arrange the floral cut pieces as shown in the image below.
(There are several way to arrange it)
I found this one very interesting.
Using super tacky red tacky tape and the 3d foam tape I pasted the following flowers
Viola, now its ready for the icing!


I was playing around with these gorgeous elements,
and landed up with the following combinations.
(There are several ways to arrange these elements)
I really loved the way this looks.
Hence I settled with this.


Viola! and its all ready 

- - - - - - - - - - - - - - - - - - - - - - - - - - - - - - - - - - - - - - - - - - - - - - - - - - - -


The Products List:
Heidi Swapp - Hello Beautiful
Neutral Shapes - enamel shapes
- - - - - - - - - - - - - - - - - - - - - - - - - - - - - - -


I hope I have inspired you to create 
Have a crafty week
Thanks for Stopping by
...Nupur Patel...


Wednesday, 10 June 2015

Hope!

Hope is the thing with feathers 
that perches in the soul and sings the tunes 
without the words and never stops at all.
- Emily Dickinson


Hello everyone!

Its something unusual today,
a quiet morning,
still breeze, 
grey feel,
with a cup of coffee I think 
sitting by my window
and the very first word that strikes me is "HOPE"
Hence I decided to create a layout on Hope!


This amazing paper collection by Heidi swapp is to die for. 
I love the pinks and the teals with a bit of black and the florals patterns. 


The theme being hope, I choose the following papers
with floral elements with pinks and grays.
(oh these patterns are amazing!)
Decisions, decisions, decisions!
Which paper goes at the top?
Which paper goes at the bottom?
Which paper dwells in between?
(after a bit of thinking...)

Using the amazing super sturdy Tonic super trimmer
I have trimmed the following papers according to the sizes mentioned below.
(12" x 12" - Base)
no need to trim
(11.5" x 11.5"- Centre)
(11" x11" - Top)
I loved the floral pattern paper to be on the top.


Lets begin assembling now.
Using the super red tacky tape - especially 24mm is excellent to stick the papers.


Align the 3 papers in the centre as shown in the image below.
(There are several ways to arrange these papers)
(The red tacky tape is an amazing bubble free solution to stick your papers)


After having pasted the following papers its time to make the photo matt.
I trimmed the white paper with 3.5 inches by 5inches and gave it a backing with the gorgeous pink paper from the Heidi Swapp collection to make it sturdy and attractive
Again the bubble free 6mm red tacky tape to stick the photmatt.


Viola! now its time for the icing.
using the amazing and super cool
(These beauties are a must, they are amazing and can do 
wonders in beautifying your projects and add those 
little emotion touches and boost up your page. )
I choose the following elements to work with.


I was playing around with these gorgeous elements,
and landed up with the following combinations.
(There are several ways to arrange these elements)
I really loved the way this looks.
Hence I settled with this.
The  Neutral Shapes  are just magnificent,
with the little icing, if added a cherry it enhances your project even more. 


The Wycinanka - Chipboard hearts are so gorgeous, 
I loved it original colour and the texture hence 
I decided to use it and add little earthy feel to my layout
I have pasted the sentiment and the using .


and its ready!
I must say scrapbooking is the best way to preserve your memories.


- - - - - - - - - - - - - - - - - - - - - - - - - - - - - - - - - - - - - - - - - - - - - - - - - - - -

The Products List:
- - - - - - - - - - - - - - - - - - - - - - - - - - - - - - -

I hope I have inspired you to create 
Have a crafty week
Thanks for Stopping by
...Nupur Patel...


Thursday, 14 May 2015

Hello Baby!

Hello Everyone!

A new baby is like the beginning of all things - 
wonder, hope, a dream of possibilities. 
(Eda J. Le Shan)

Welcoming a new born is one of the beautiful thing.
In order to document one such beginning ,  
lets create a "Hello Baby layout" 


The Kraft textured paper from Co-ordinations is awesome.I love the texture. 
The Happy and bright Paper Pops from Darice are amazing to play around with. 
I choose few of them as per the shapes and the sentiments as well as the elements on them.


After having choosen the Paper Pops  it was time to create the embellishments.
Hence I narrowed down the pops choosing which one goes on the top
 and which one remains at the bottom.
Using the 3D foam tape I stuck the pops one on top of the other
Viola the poppers are ready.
The Red Tacky Tape is a very useful tape when it comes to pasting without bubbles.
Hence I use it all the time.


After having the pops ready it was time to add the banner.
(without the banner there is no fun in the celebration)
I choose few of the co-ordinating Paper Pops and sliced them into halves.


After having sliced them, using the 3D foam tape tape 
I stuck them on top of the other.
Viola  the banner is all ready to go on the layout.
Using the super tacky Red Tacky Tape I pasted the banner onto the layout.


Adding few additional elements is always a good idea,
Hence I thought to use the white lace die cut and ribbon along with few buttons and
 ofcourse the amazing Neutral enamel Shapes and Dots by We r Memory Keepers.


and here it is...all ready to go on the layout.


Using the Concentric Tags# 3 - Go Kreate dies
 I have die-cut the following tag and then 
stuck the Vellum sentiment over it using the super tacky glue.
Using the bright and happy paper pops from Darice, 
I picked the pink butterfly to beautify the tag by fussy cutting it
These Neutral Enamel shapes are a great add on to the project.


The heart shaped enamel called for my attention, 
so I decided to replace the one of the butterfly with the Neutral Enamel shapes.
and the tag is ready....
Using the super red tacky tape you can paste it onto your layout.


All ready and here the "Hello Baby " layout is ready!
- - - - - - - - - - - - - - - - - - -


The Products List:

Paper Pops - Darice - Core'dinations Party Mixers - Brights
Vellum - Darice - Core'dinations Quotes & Titles - Celebrate
Kraft - Darice - Core'dinations 80LB Canvas Cardstock 12"X12"
Neutral - Enamel dots and shapes - We r Memory Keepers
Go Kreate Dies - Concentric Tags #3

- - - - - - - - - - - - - - - - - - - - - - - - - - - - - - -


I hope I have inspired you to create 
Have a crafty week!
Thanks for Stopping by
...Nupur Patel...