
I hope everyone is well. and I believe the following directions are clear...in my previous miniature projects.
I don’t have a background in interior design, but have been a creative person my whole life. This project came about after I had finished shadow box vintage room (1yr b4). I really enjoyed it, and wanted to continue creating these crazy miniatures, but wasn’t sure how to go about it.
Many crafters seem to be afraid of making miniatures from scratch. I actually think they are quite easy, if not a little time consuming.

Nowadays we are getting many style, different materials like metal charms, resin, mdf, fabric etc miniature embellishments. Why we don't create our own small space?


Let 's discuss the tips of this miniature project,
I really like using Mount board as it is so easy to work with. No power tools needed, it sticks together with Aleene's glue or glue gun and you can use stick pins in it to secure it while it dries and use masking tape.

Mount board : This Neutral Mount Board is a must have for all kinds of scrapbooks and 3D shadow boxes.. You can create any size of shadow box with the help of the same. It is best to be used for the back of mixed media layouts.
Its 2000 gsm strength makes it very special .
I let it dry a bit and then decided I did not like all the sharp edges so took the sandpaper to it and hacked them off.

Four sides i used 2 board together for more thickness


Table no:1 The same board i used to make 3 drawer table


cut fringes into the oval about 2 cm and glue the tread end on cardstock strip

By putting the thread over the first fringe, under the secon, over the third etc. Repeat this step upto just before end of the paper.

Then i paint the whole basket with white gesso. After drying cut the balance paper part.

Table no.2

Cut the lolly pop stick, wrap with cream paper (cardstock) and glue on rectangle cut piece mount board

How is it? so easy right....?
Next step: Collect more miniature stuff as much as you can

Start decorating

For soft color background embellishing i use purple color paper
The BG design from Prima marketing metal die : crochet doily


Color pencil or marker: Use toothpic

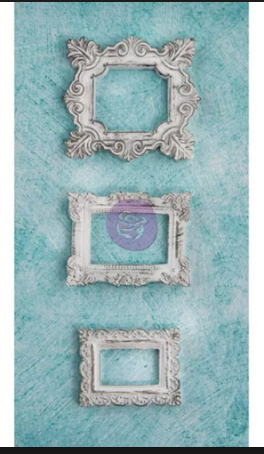
Side wall hanging frame


Framing sentiments with Wycinanka laser cut design


Floor Mat : I used finnabair fabric pack

Organizing mini fabric stash


Supplies used
Neutral Mount Board

Bottle Caps Assorted Sizes, 8/Pkg


Prima marketing White Gesso


Finally.......


Sorry, this was a long photo heavy post. I couldn't make a video. Well, that was it for today...there is so much to do I'm not sure what to do next...:-)
I hope you all have a great week,
I look forward to following your projects.
Have a great Day
Suzna
Supplies used
Neutral Mount Board


Prima marketing White Gesso


beautiful project! love the use of the miniatures :)
ReplyDeleteSuper creative Suzna. Your attention to detail is commendable. I am sure you can build a miniature house from scratch now.Awesome. ..keep going.
ReplyDeleteThank you so much Rupa, your appreciation , encouragement means so much to me
DeleteSuper and simply amazing! !!
ReplyDeleteThank you Sonia :-)
DeleteVery very creative Suzna...
ReplyDeleteBeautiful project :-)
Thank you Sampada :-)
DeleteSo creative and very well explained! Love these cute miniature! Fantabulous!!!
ReplyDeleteThank you Vinita for ur kind words
DeleteSooo cuuute :) I adore miniatures
ReplyDeleteThank you Maria
DeleteSo so creative...love each and every element of this shadow box.
ReplyDeleteThank you Deepti for your sweet comment
Deletethis is so adorable dear...love your miniatures
ReplyDeleteThank you Roshni 😊
DeleteLovely as usual
ReplyDeleteThank you Neeti
DeleteAbsolutely amazing!
ReplyDeleteThank you Gretchen Wilson
DeleteSo well made and detailed . Awesome job !!!
ReplyDeleteThank you
DeleteThis is amazing as usual.
ReplyDeleteThank you Alpna
DeleteThis is brilliant :) love how you painstakingly put everything together, perfect detailing <3 thank you for the tutorial dear..
ReplyDeleteThank you for your endless support dear
DeleteThis is amazing!! thanks so much for the step by step!!
ReplyDeleteThank you Soisin
DeleteStunning project!! Love how you handle those minis!! You must have a lot of patience!! :)
ReplyDeleteThank you Karthika for sweet comment
Delete