
Hello everyone!
Welcome to Crafters Corner Blog! The festival season is about the begin and the easiest form of Gifting is Money envelopes! We all use them all the time! I just love making them So I thought why not make some Gorgeous envelopes for today's post? I've used a mix of Dies, Punches, Mulberry flowers , metal charms and not to be missed our latest Glass Cabochons! They look absolutely amazing!
So without much ado lets get started!
Well Here's the fist one I've made! Isn't it pretty? Keep scrolling to learn how to make it!


I started of by taking a die cut of the Gorgeous Prima Marketing Doily die and distressing it lightly with Stormy Sky distress ink

Now add this to the base.

Next taking a small oval die cut from the Spellbinders floral ovals set I pasted it on top of the 1st die cut and added the lovely cabochon on top of it

Next I used some Gorgeous mulberry flowers from our store along with some leaves i die cut using a cheery lynn die. For the final touches I've used metal dragonflies from the store along with some crystals!


For the next envelope I started by painting one of these frames with Prima Artalchemy Stempunk copper paint. It looks soo pretty!

Next I pasted this piece on some cardstock so the inner window has some base for the little detailing we are adding! I am using this pearl string from our store along with the prills! These prills are amazing they look look cute and are great for flower centers and mixed media too!

Start by sticking the nest on the bottom end of the frame. It fits perfectly!

I've added a thin line of Glossy accents for the pearl string

You might need a tweezer to fit the string. Let it dry completely before you go to the next step.

Next add glossy accents to the inner area of the frame and add prills. Shake off the excess and your piece is done!

I've border punched a strip of Cardstock using this super cute punch by Martha Stewart
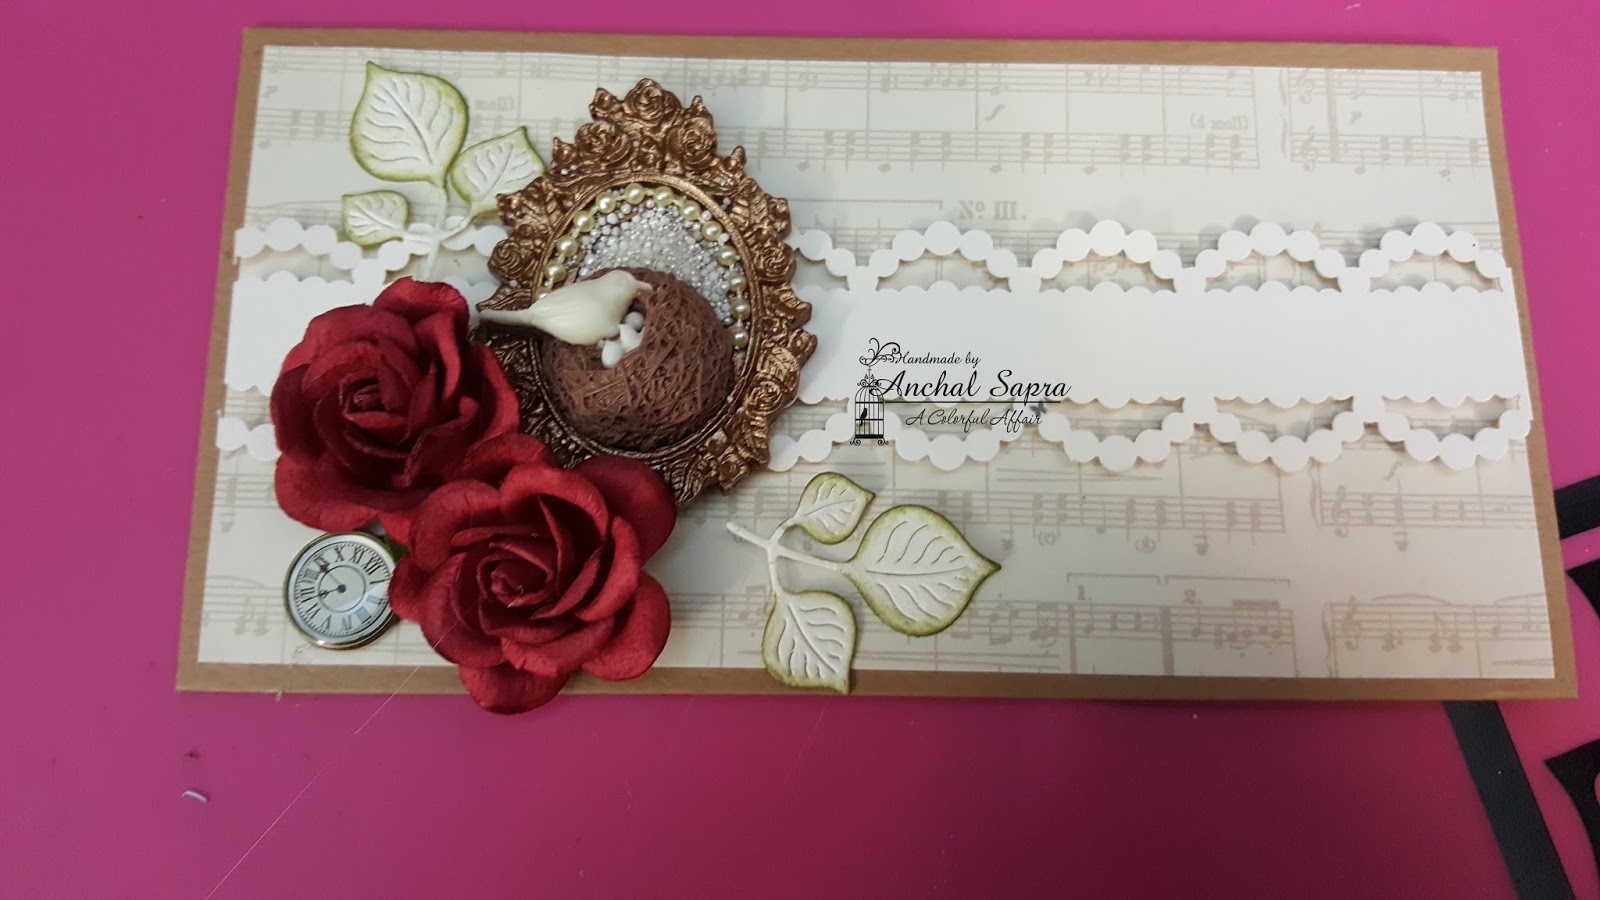
I added it to the base , aligned my frame and added my flowers with some die cut leaves and a metal charm!

Next i've added these resin flower frames and for the center I've used these amazing glass pearls by Prima! these are high quality pearls perfect for making jewellery! You must try them!
For the finishing I've added some lace from my stash and you are done!


Next I've taken this super vintage looking glass cabochon from the store and added it to this resin frame from our store

Next I've taken the smallest die die cut from the Spellbinders Decorative Labels 8 die set and added this frame to it.

Next I've taken an oval die cut from Spellbinders floral oval die and distressed it lightly with tattered rose distress ink. This is such a pretty colour I absolutely love it!

Now comes the wow part! To add some glam I covered the oval with Art glitter glue and then sprinkled Clearsnap's Pralines & Cream glitter on top of it. This is such a pretty colour of glitter! Goes with all kinds of projects be it vintage, grunge or brights! Its such a must have!

See this is how it looks! Isn't that PRETTY!?

Adding the die cuts and layering them with foam tape

Next added some mulberry flowers and die cut leaves. For the finishing I've added the super cute resin bow! And we are done!
Hope you all enjoyed today's post!
Hoping to see you all make some pretty envelopes!
Please feel free to ask any questions. Thanks for stopping by!
Hugs
Anchal Sapra
PRODUCTS USED
23 Red roses
24 Peach roses
Such pretty and classy creations Anchal!!
ReplyDeleteSoo pretty ...love the step by step instructions with pictures. Thanks for spending so much time and effort in explaining :) great job !
ReplyDeletePretty Envelops. The way of embellishing the envelops is awesome.
ReplyDeleteGreat job anchal.
ReplyDeleteAwesomeeee!!!
ReplyDeleteAwesomeeee!!!
ReplyDeleteall are awesome. thanx for sharing how to use different products
ReplyDelete2222goood
ReplyDelete