Followers

Showing posts with label Resin Embellishments. Show all posts

Sunday, 9 April 2017

Reverse Canvas Shadow Box Frame

Hi everyone... today I have a reverse canvas to share with you! I love creating these, they always turn out different and have a mind of their own I'm sure.
It is filled with lots of lovely Prima Marketing products, Montchamp Imperial - Resin Frames (I totally love this), art stones, flowers, bloom sprays etc Every thing mixed with on canvas back :-). Dusty attic chipboards and Rose Quartz papers designs give more cute.   


I started by removing staples and rearrange my canvas with pattern papers. Then i apply clear Gesso on paper side & rest of all part applied white Gesso. Gluing (used gel mediums) with art stones in different place of canvas frame. Starts spraying on all sides. When everything was dry, I used a stamps on random area with distress brown shade ink and let it dry naturally. I used Scrapberry's ribbon on 2 sides of canvas sheet and i simply colored Dusty attic chipboard with distress green shade ink.

 Here is the video tutorial


Some more close ups


I hope you like it
Hugs 
Suzna


Supplies Used
Rose-quartz-double-sided-paper-pad-A4


Mulberry-flowers-leaves: Prima Marketing


Charms-embellishments Prima Marketing


Prima Marketing Sprays


Prima Marketing Art stones


Ribbons-bows-twines ScrapBerry


Medium-spatula Prima Marketing


Dusty attic Chipboards


Sunday, 25 September 2016

Money Envelopes!


Hello everyone! 
Welcome to Crafters Corner Blog! The festival season is about the begin and the easiest form of Gifting is Money envelopes! We all use them all the time! I just love making them So I thought why not make some Gorgeous envelopes for today's post? I've used a mix of Dies, Punches, Mulberry flowers , metal charms and not to be missed our latest Glass Cabochons! They look absolutely amazing! 

So without much ado lets get started! 
Well Here's the fist one I've made! Isn't it pretty? Keep scrolling to learn how to make it! 


I started of by taking a die cut of the Gorgeous Prima Marketing Doily die and distressing it lightly with Stormy Sky distress ink 

Now add this to the base. 

Next taking a small oval die cut from the Spellbinders floral ovals set I pasted it on top of the 1st die cut and added the lovely cabochon on top of it 


Next I used some Gorgeous mulberry flowers from our store along with some leaves i die cut using a cheery lynn die. For the final touches I've used metal dragonflies from the store along with some crystals! 


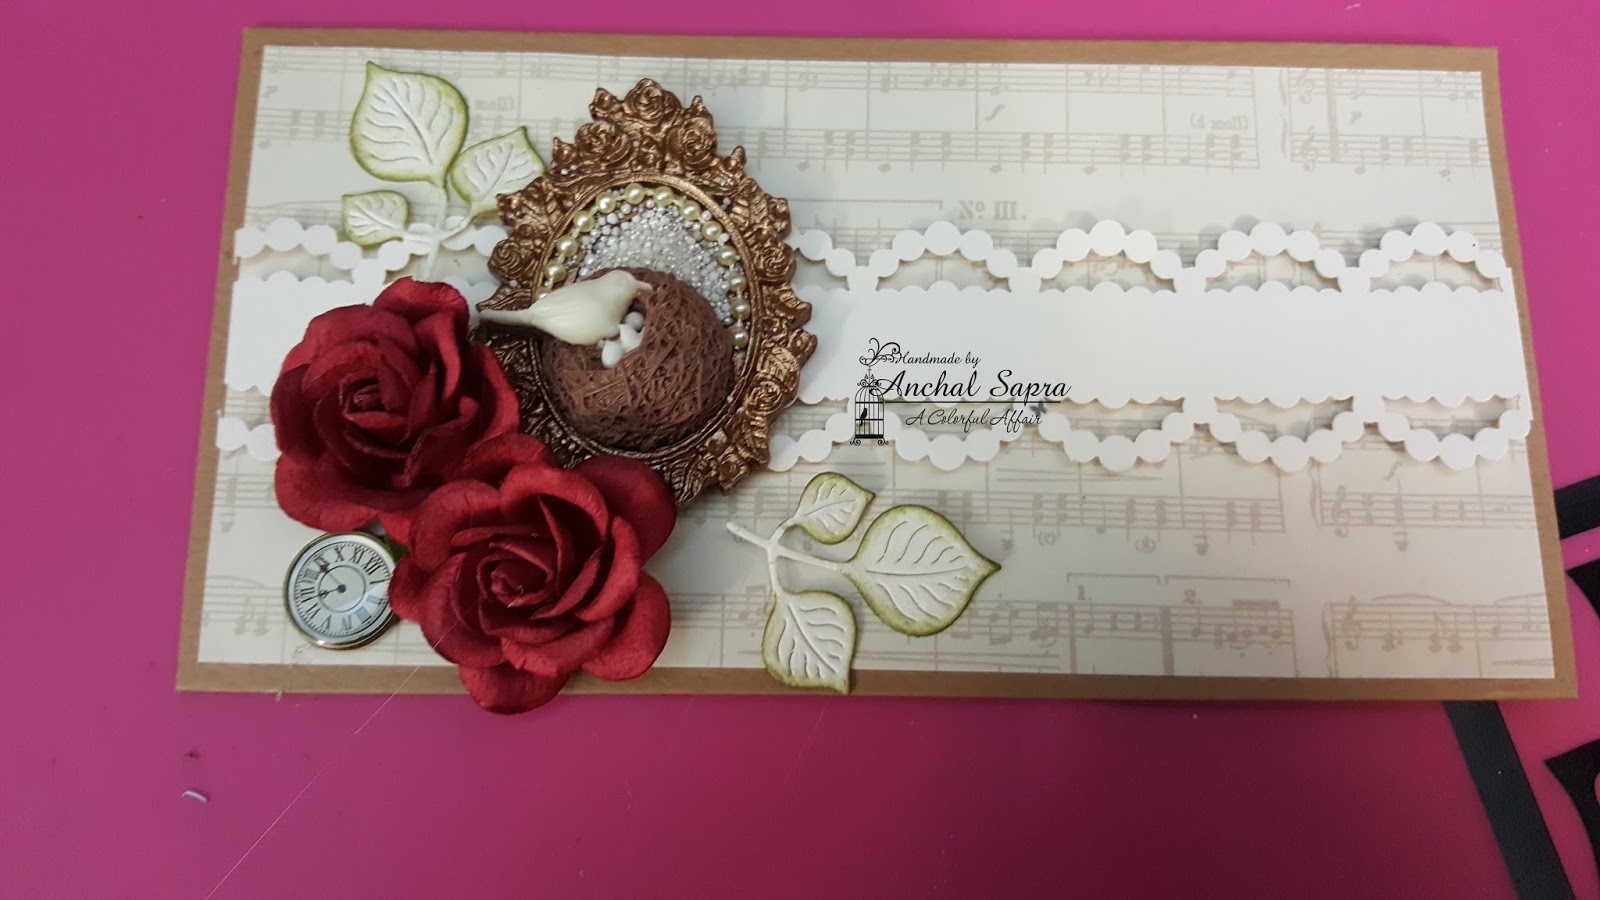
For the next envelope I started by painting one of these frames with Prima Artalchemy Stempunk copper paint. It looks soo pretty! 

Next I pasted this piece on some cardstock so the inner window has some base for the little detailing we are adding! I am using this pearl string from our store along with the prills! These prills are amazing they look look cute and are great for flower centers and mixed media too! 

Start by sticking the nest on the bottom end of the frame. It fits perfectly! 

I've added a thin line of Glossy accents for the pearl string 

You might need a tweezer to fit the string. Let it dry completely before you go to the next step. 

Next add glossy accents to the inner area of the frame and add prills. Shake off the excess and your piece is done! 

I've border punched a strip of Cardstock using this super cute punch by Martha Stewart 

I added it to the base , aligned my frame and added my flowers with some die cut leaves and a metal charm! 

Next i've added these resin flower frames and for the center I've used these amazing glass pearls by Prima! these are high quality pearls perfect for making jewellery! You must try them!
For the finishing I've added some lace from my stash and you are done! 


Next I've taken this super vintage looking glass cabochon from the store and added it to this resin frame from our store

Next I've taken the smallest die die cut from the Spellbinders Decorative Labels 8 die set and added this frame to it. 
Next I've taken an oval die cut from Spellbinders floral oval die and distressed it lightly with tattered rose distress ink. This is such a pretty colour I absolutely love it! 

Now comes the wow part! To add some glam I covered the oval with Art glitter glue and then sprinkled Clearsnap's Pralines & Cream glitter on top of it. This is such a pretty colour of glitter! Goes with all kinds of projects be it vintage, grunge or brights! Its such a must have! 

See this is how it looks! Isn't that PRETTY!?

Adding the die cuts and layering them with foam tape 


Next added some mulberry flowers and die cut leaves. For the finishing I've added the super cute resin bow! And we are done! 

Hope you all enjoyed today's post! 
Hoping to see you all make some pretty envelopes! 
Please feel free to ask any questions. Thanks for stopping by!
Hugs 
Anchal Sapra 


PRODUCTS USED 


Wednesday, 6 July 2016

Folk Art Multi surface paints- Tutorial

Hello crafty friends..
Welcome to Crafters Corner Blog. I am Rupa from Bangalore and so happy to be part of the extremely talented design team here!
I am into altered art and mixed media and I love to up cycle house hold trash in most of my projects. You will see a lot of them in future.
For today, I had this scrap piece of wood that was abandoned after some carpentry work at home and I decided to try this new product Folk Art Multisurface paint on it.
It is durable, weather-resistant SATIN paint for glass, ceramics, wood, metal, rigid plastic, fabric, canvas, paper and terracotta...phew! That’s a lot...isn’t that amazing! I will work on each of these surfaces and let you know. It is water based and dries permanent and there is wide range of colors to choose from.
June was special month for more than one reason... I got my first DT kit from Crafters corner and secondly I celebrated my 21st wedding anniversary!
And so I decided to make something for the house with these new paints and a piece of wood! Ready to see???
Here it is....


Let me explain in detail the process in making this.
Step 1- I cleaned the old piece of wood and gave the first coat of folk art paint, Fresh Cut Grass! Yes...I applied the paint directly WITHOUT gesso! This is how it is after the first coat.
 Good coverage but I could still see some wood beneath and so i went ahead and gave another coat of green.
Step2- I wanted a distressed finish and so took out a plain wax candle and went about rubbing it in parts that I wanted the wood to be distressed. 
I then applied my top coat, Daffodil Yellow. Wow! I just loved the vibrancy of the color...the wood was coming to life!
You can see here, that the wax has resisted the top color and this make it easy for you to sand and reveal the base color. This is one type of wood distressing. I hope you give it a try.
Step3- My wood piece was beginning to look like a piece of green land and I decided to make a nature background. I stenciled some ferns on the top of the plank with brown acrylic paints. You get the feel of swaying palms don’t you???
Step4- I further distressed and gave a vintage look to the panel by dry brushing brown acrylics on the main panel and the edges. 
Finally some color splats with black and white paint and I was pretty much happy with the background!
Step5- I nailed a mini paper clip in the center to hang the photo mat. No nature inspired project is complete without flowers and birds! Crafters corner has some lovely embellishments and you are actually spoilt for choice here!
I have used a pair of resin embellishments, the corners which I have aged with brown acrylics.
Step6- I then tied a jute twine on the lower half of the panel do that the photo mat sits snuggly there.
To the left, I arranged a bed of coconut coir and arranged these lovely flowers from the floral collection at Crafters corner. 
I love calla lilies and I was so happy to use them here, so cheerful and adds so much beauty to the vibrant background! It almost looks like an anniversary bouquet, a symbolic gesture, lol!
The little bird you see sits comfortably there amongst the coir and flowers, just the perfect final touch to my nature inspired anniversary panel!

Step7- I placed the photo mat..it was sheer co incidence that the colors there complimented the entire panel work! Now that’s a bonus .A die cut sentiment and my anniversary gift to  my husband and my first project for Crafters Corner was ready!
I hope you enjoyed the process as much I had a blast making this one! The paints are so easy to work with and believe me, I have not varnished this piece because I dint feel the need to! The satin finish has a lovely feel to touch and see, I dint want to seal it.

A side view of the panel...You can see the distressing of the wood clearly here, all this and more possible with these amazing satin finish paints.

Here are the list of supplies I have used from the shop...
Until my next creative journey,
Happy crafting and recycling.
Cheers,
Rupa


Wednesday, 15 July 2015

Get more from Mixed Media Supplies !

           Hi friends, this month for my DT posts Shalini sent me 2 mixed media products Whipped Spackle and Glass Beads Gel which were quite unfamiliar to me.

          I was plagued with something all of us as crafters go through at one point or the other ......un-certainity and self doubt! The reason for my confession is because  I recently read a comment by a crafter that she had spent so much on craft supplies but was unable to actually make anything as "craft classes" were expensive. Now this comment somehow touched me deeply . Being fortunate enough to attend a class is awesome but sometimes the affordability issue, concerns of whether it is really worth it or as in my case time constraints and other commitments may be a big hindrance to attending classes...but you shouldn't actually let it affect your own individual creativity from blossoming! 
          Now back to the products I am discussing ...Whipped Spackle and Glass Beads Gel are two media there is hardly any material online at this point so I had very little to guide me on how to use it. I felt uncomfortable about committing "mistakes" but then this is Art....there are no mistakes!! And I hope all the new crafters out there take this message...there will always be something new to learn..do not be afraid to experiment on your own and a special word to all the perfectionists out there[ myself included!]....It is OKAY to be imperfect now and then in ART and CRAFT !

Whipped Spackle  On its Own + Stencil

In my last post on Whipped Spackle I used Whipped Spackle embossing powder on Whipped Spackle [ loved the glamour embossing powder lent it] and also experimenting and colored with gelatos[ which I didnt like].Here showing you how gorgeous it looks just as it is.
whipped spackle
You can actually smear on Whipped Spackle  with your fingers or knife and it will hold its shape but I had a few old stencils I tried it with
whipped spackle
Love the crispness of the stencilled Whipped Spackle !

Whipped Spackle + Distress Inks & Acrylic Paints

Whipped Spackle 
I used a tree branch stencil with Whipped Spackle and once it was dry ,painted on it with distress ink [ smear the stamp pad on plastic / craft mat and dip your brush in it and paint like you normally would]


If you want a very vibrant color you can actually layer on paint on the Whipped Spackle and it will take it all without flattening/ smearing.
Altered heart
Since I was experimenting I did layer on several coats of not only distress inks but also regular acrylic paints in many areas of the Whipped Spackle branch and flowers
Resin Fairy

The cracks on the gessoed cardboard surface were made with distress crackle paint.
crackle
And here is the altered heart [which was originally the cardboard base of a cake]

Altered heart
If you want to want to know more about the supplies/ techniques I used to make the altered heart do drop by my blog later [Cards Crafts Kids Projects]

Whipped Spackle + Alcohol Ink

If painting is not your cup of tea and you want a quicker way to add color add inks to the Whipped Spackle !Here I experimented with yummy alcohol inks.
Alcohol Ink
Put whipped spackle on a plastic lid and added a drop of alcohol ink [ a little goes a long way with these vibrant alcohol inks]

Alcohol Ink
Spread the yummy looking icing [whipped spackle] on a stencil

Stencilled
Made it smooth with a plastic knife and lifted it to get beautiful crisp texture a beautiful pale green color.
Stencilled

Whipped Spackle + Glitter

Tried mixing in glitter with the whipped spackle...but that was a failure as the glitter got completely masked
Glittered
But sprinkling glitter on the Whipped spackle while it was wet was a success

Glittered
After shaking off the excess glitter...I got a beautiful shimmer on the bamboo.

Glittered
Once it was dry I used a tiny brush to brush off the excess glitter from the area between the design.

Getting Different Looks using a Palette/plastic knife
Flat
Texture media like Whipped Spackle  act like icing...you can smooth-en it with a knife to get a flat surface

Ridged
Or lift up the surface using your fingers or knife to get a beautiful ridged surface The best thing about it is that once dry the ridges don't get squashed...I put this box upside down and not a tiny part of the design got squashed!

Glass Beads Gel

beads gel
Glass Beads Gel is another cool texturing medium which has tiny translucent glass beads embedded in it
beads gel

Properties of Beads Gel and How to Use Beads Gel

  • Looks white when you take it from the jar
  • Dries absolutely Clear
  • You can apply it to multiple surface like glass, metal , wood, paper on its own - no need to use any other glue
  • You can use a plastic knife, brush or your own fingers to smear it
  • You can use it on a stencil 
  • You can Paint over it
  • On drying it reflects the colors of the surface over which you used it
Sharing a few project ideas and experiments

Beads Gel with Stencil

I placed a Lord Ganesh stencil similar to the one I demoed in the Spray Adhesive tutorial over an alcohol inked background card stock and smeared beads gel over it
beads gel
Its a very quick process...once you have a flat / peaked surface which you like lift off the stencil and you get a cool image!
beads gel
What I found was that if you want it to dry quickly use a thin layer. If you use a thick layer it can actually take upto 2 days to dry clear!
Lord Ganesha Hanging
My stencilled Lord Ganesha reflects the beautiful hues of the alcohol inked background I had created on metallic gold card stock!

Here is a glimpse of the Ganesha + Handmade resin Goddess Saraswati Wall hanging [something ethnic for a change] ...full details of which I will share later on my blog.

Glass Beads Gel and Intricate Stencil


Here is the same butterfly stencil which gave such a beautiful crisp texture with Whipped Spackle in the altered heart project above not giving as cool/crisp design with beads gel ...the lime green color of the beads gel butterfly is a reflection of the mowed lawn distress ink I used on the background !

Glass Beads Gel Smeared

box
Here is the box lid I had stencilled a Bamboo design with Whipped Spackle earlier. Added some Cheery Lynn  grass die cuts and smeared beads gel over it  [seen in white]


 Here is the closeup of the smeared beads gel before it dried

 And here is how it looks after it dried [ average drying time 12 hours]

The beads gel looks gorgeous  doesnt it ?
beads gel 

And here is how the box lid looks with a multitude of materials including homemade resin fairy , Whipped Spackle , Beads gel , actual pebbles, thermocol balls , Metal charms , Crystal flowers ..
Altered Box

Painted Glass Beads Gel

In the altered heart shared above I used a leaf stencil to apply beads gel and painted over it with green acrylic paint
glass beads gel
It was too vibrant for my liking so camouflaged it partially by adding a handmade clay rose and Heartfelt creations leafy branches over it !


Altering Embellishments etc with Glass Beads Gel


This is a plastic Christmas ball decoration [can be seen in this post : Paper tree tutorial ] which I put on a bottle and coated with beads gel ...doesnt it look literally yummy!

My altered bottle got a new funky bottle cap! You can use the same idea to create cool  flower centers or and unique embellishments for your projects!

Glass Beads Gel Jewelry

Glass Beads Gel Pendant Making
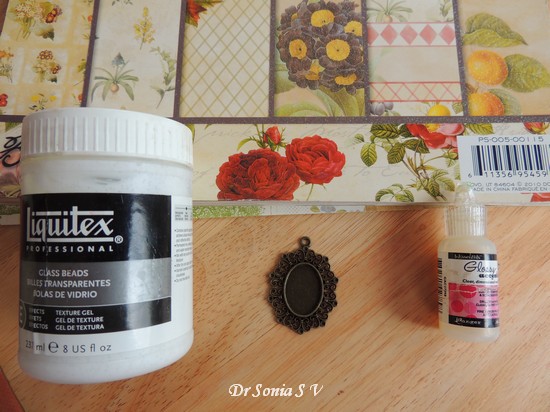
You may have seen my tutorial on how to use glass cabochons and make beautiful Pendants [Glass Cabochon tutorial ] ...here is another fun way to use make pendants using Beads Gel this time- Cut a pretty paper [I used the tiny rose design from the cover of a DCWV stack] and stick it to a metal pendant base using Modpodge or glossy accents

After allowing it to dry scoop some glass beads gel and heap it on the Pendant
Glass Beads Gel Pendant Making
You can really heap it on or just use a thin layer like I did on this pendant base
Glass Beads Gel Pendant Making
On drying [ took approx half a day] this is how yummy it looks!

Glass Beads Gel Pendant 
So I hope friends you dont restrict using a particular product just for what its in vogue for but experiment with it and make your own little crafty discoveries!!
Supplies
Whipped Spackle 
Stencils 
Distress Inks
Resin Kit
Glass Beads Gel
Glossy Accent
Mod Podge
DCWV Paper
Distress Inks, Alcohol Inks
Pendants ,Charms
Glitter
Dies : Heartfelt creations Classic Leaf Cheery Lynn  grass , Cheery Lynn  butterfly  , Spellbinders Beaded Oval, Spellbinders Floral Oval ,Spellbinders Aster, Lifestyle crafts Circle, Memory Box clouds