Followers

Showing posts with label water colouring. Show all posts

Friday, 16 March 2018

Trio of Floral Cards

Hi friends !
Good Morning :)

Preeti Datta (aka Dutt Preety) here. How are you this fine morning ?

Today, I have a Trio of Floral Cards to share with you.
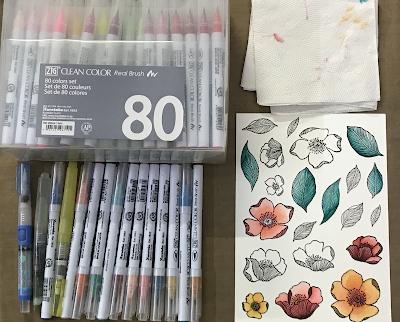
I wanted to create 3 different cards with the same stamp set, "Adore You" by Altenew. This stamp set is one of my favorites and definitely a must have for your cardmaking and other crafting projects. I used similar supplies & color scheme for the 3 cards to show that we can get a different look by making slight alterations. I've used Zig Clean Color Real Brush Markers for watercoloring. They are currently on sale at Crafters Corner, so, it is a great time to grab them! All the supplies from the store are linked at the end of this post for your convenience :)

Let's get started.

Card 1: Happy


Photo Tutorial:

1. Stamped the flowers and leaves from Altenew's Adore You Stamp Set onto Watercolor Paper with Versafine Onyx Black ink 

 2. Watercolored the images with Zig Clean Color Real Brush Markers & Koi Water Brushes.
Tip: Keep a few tissues nearby to dab off excess color/water 

3. Did ink smooshing on Dress My Craft Floral Oriental White Cardstock by scribbling blue markers onto a piece of acetate, spraying it with water and then smooshing the colors onto the paper. Did this a few times to get an organic look of ink splatter. 
Tip: Dry the colors before adding more layers of color on top
 

4. Fussy cut the images with the Cutter Bee Scissors
Tip: Darken the edges of the cut images with a black marker for a finished look 

5. Die cut the ink smooshed cardstock with the largest out of the Gina Marie Designs Rounded Stitched Rectangle Die set and also die cut the word happy a few times in black using Altenew's Happy die. Then stuck the die cuts together (to form a dimensional sentiment) using Ranger's Multi Medium Matte. 

6. Assembled the card by creating a floral cluster with the fussy cut images. Before adhering it to the stitched panel added some black thread under it for texture and interest. Then adhered the cluster with a few foam mounted elements and some adhered with glue. Then adhered the dimensional sentiment & foam mounted the panel onto the A2 sized card base. Finally, embellished the card with a few Nuvo Drops.

Card 2: Thank You (Clean & Simple Style- CAS)


Process:

1. Added a striped washi tape to the right side of the beige colored card (A2 size).
2. Created a floral cluster & adhered some of the elements with foam tape & the rest with glue
3. Stamped the sentiment with Versafine Onyx Black Ink
4. Embellished the card with a few Nuvo Drops

Card 3: Have a Beautiful Day


Process:

1. Created watercolored stripes with zig markers and a water brush on a rounded stitched rectangle die cut. Also created a little splatter with black ink to add interest to the background. 
2. Stamped the sentiment in black from Altenew's Floral Frames Stamp Set
3. Created a floral cluster with the water colored & fussy cut images. Then adhered the floral cluster to the panel.
4. Foam mounted the panel onto an A2 sized white card base.
5. Finally, embellished the card with blue sequins 

Supplies from the Crafters Corner Store

19. Altenew's Happy Die & Floral Frames Stamp (on Pre-Order)

We love to see your gorgeous creations using supplies from the store, so please do share them with us in our Facebook Group- Crafters Corner Showcase using the apt hashtags #craftwithcrafterscorner #dressmycraft #crafterscornerindia, on Twitter or on Instagram. 

Thanks a lot for your precious time :)
Hope you have a great weekend!
Stay Blessed

Sunday, 7 May 2017

MFT- Soak up the Fun

Good Morning Lovelies..

Hope you all are doing great, Isha here back again with MFT stamps and dies .
Today I am going to showcase another fun stamp set from My favourite brand My Favourite Things- Soak up the Fun and its coordinating Die set. 


SUPPLIES USED


In my last Mft post I have showcased Tag builder blue print 5 die set, continuing with the same I have created two fun cute little tags. 
I will be showing you How I have created the same. 
Let's get started ....

STEP 1
Firstly I have stamped, water coloured the cute little sea critters from the stamp set and with the help of coordinating die set I have cut them.

Next I have taken 2 One is a solid tag with a stitched perimeter, a second features stitching and a die-cut rectangular window, and a third includes two die-cut windows with stitched perimeters

STEP -2 

Now take any distress ink of your choice, I wanted to created under water scene therefore I have shade of blue - salty ocean distress ink.
Rub the ink pad against the craft sheet- spritz water over the ink- drag the tags in the inks- heat set the tags.


STEP-3

Once the inks dries out, place your critters/images basically I am just doing my positioning how I want my tag to look.
Once through glue down the images. 


STEP-4

Paste the images and cover the window tags with a sheet of acetate


STEP-5 

On the edges of window tag apply 3d dimensional foam tape.
Next add yummy sequins inside the base tag and paste the window above it and seal the tag.


Viola Tags are ready :)


Hope you like these cue little tags.

Moving with this stamp set I have created few more simple fun and cute little projects.


 For the above card I have simply water coloured the background and used some dress my craft sequins and cute little elephant image and sentiment from the Mft stamp set - soak up the fun.


This one is my favourite from the stamp set. I have created this shaker card using loads of dress my craft sequins.


For the above project I have hand drawn the waves using versamark pen and used white embossing powder and heat set it. Background is distressed and water coloured. Critters and sentiment from the stamp set- soak up the fun .


I hope you all like it and was able to inspire you all.

Have nice day
XOXO
Isha.

Wednesday, 19 April 2017

Playful with MFT stamps & Die

Good Morning Everyone...

I hope you all are doing good!!
Today I am going to showcase MFT - My Favourite Things Stamp and Dies, recently they are the hottest selling brand around Indian Crafting space.

MFT came into existence in the year 2006 and MFT - My Favourite Things offers fresh and fun range of stamps and dies.
For the month of april I got the opportunity to play around with the MFT stamps & dies. I always wanted to try something which is simple and clean and with them I got the opportunity to do the same.
Their stamps are super fun and adorable, lets get started....


SUPPLIES USED - 
My Favourite things stamp set- playful pups 
Distress inks 


          I have stamped the Playful pups stamp set using Archival ink jet black on the Card stock... and water colored the images using Distress inks (please avoid my coloring, I am super bad with it)


Once coloured I have cut the images with its coordinating Die.

Now moving over to Blueprint Tag builder die 5 
"This 18 piece set includes: Traditional tags (3) 1 3/8” x 3 ¼”, Fishtail flag 5/8” x 2 ¾”, Fishtail label ½” x 1 7/8”, Banner ½” x 3 ¾”, Peek-a-boo heart border/confetti 1 ½” x ¼”, Peek-a-boo XO border/confetti 1 7/8” x ¼”, Arrows A 2” x ¼”, Arrow B 2” x 3/8”, Looped border 1 ¼” x 3/8”, Reinforcement A 5/8” x 3/8”, Reinforcement B 5/8” x ¼”, Hearts (5) ½”, 3/8”, ¼”, ¼”, ¼”.- MFT WEBSITE (source)


This set includes three tags, each featuring distinct accent details. One is a solid tag with a stitched perimeter, a second features stitching and a die-cut rectangular window, and a third includes two die-cut windows with stitched perimeters. The square window produces a secondary frame with double stitched border. Additional accents include a narrow fishtail flag, dimensional banner, reinforcement options for the tags, a peek-a-boo heart border, and a variety of small shapes and confetti elements.- MFT WEBSITE (source)


Below is the referral image depicting to what ways you can coordinate the tags, In total 8 ways you can play with dies and assemble the tags, but I believe possibilities are endless.


I have created some really simple cards using the above mentioned craft supplies and I am totally loving them. The paper stack is basic stripes and I personally feel it looks amazing.


In the above Image I used the yummy Dress my craft sequins Little hearts to complete the look of my card. In the below image I have used the confetti die cut from the die set and added some more sequins from Dress my crafts.


Colouring these tiny little images was so much fun and I find them adorable. Playful pups stamps set is really adorable.

Moving to tag builder die set I have made some simple and cute tags, you can make your own fun little tags and are just perfect. I really loved the crisp deep stitched edges this die gives. 


                                                        Some more tags 


I hope you liked my basic card and tags, I personally felt doing clean and simple cards is way more tough then the other cards .


Hope I was able to inspire you all to take out your favourite stamp sets and enjoy water colouring them. Don't forget to leave some love.

I shall be back soon with some more techniques and ways we can use this Blue print tag builder die.
Keep watching the space.

Have a nice day 
XOXO
Isha.

Saturday, 8 April 2017

Mini Album with Zig Brush Pens


Hi friends , Dr Sonia here saying a big HI !!! Recently my family vacationed in Phuket, Thailand and we spent so much time in the ocean  that for my DT post at Crafters Corner I made a mini album in an ocean theme featuring a cute mermaid [from Whimsy stamps], shells and various ocean motifs.

The blue sparkling rose is handmade using Dress my Craft papers and sparkling dust and  I have shared the Tutorial already. The pink flowers are made using foam and Spellbinders and Cheery Lynn  dies. The plumeria was made using thai clay .

The waves background was made using Texture Paste and Carabelle Studio Geometry Stencil and sprayed with Lindy's .

 The Whimsy stamps image was stamped with Versafine and water colored with Kuretake Zig Clean Color Real Brush Pens . Used Wink of stella over the body for a subtle shimmer and added Diamond dust for a chunky sparkle!
Now for some tips on water coloring with Kuretake Zig Clean Color Real Brush
Pens 
  • Stamp your image with an ink such as Versa fine which will not react and bleed with water!
  • Allow enough time for the stamped image to dry before you water color or if you are in a hurry heat set it with a heat gun!

  • Paper Matters!!
    Watercolor paper
    Use water color paper and amongst water color papers itself you will get different results with different brands of water color paper so dont give up if your first attempt is not satisfactory! Will show you what I mean later in the post!
  • Make and Use a Color Swatch Chart
Download a color swatch chart like this one from Kuretake website

Or better yet...make your own. This will come in handy as a quick reference for choosing colors while you color!


I made mine in chronological order but I will suggest you make a color chart according to the color as that will be more useful!
  • While coloring an image such as an animal or human using different shades of the same color, apply dark colors first and blend out with the water brush. If you put dark colors later it is more difficult to blend without using more water!
For the tail of this mermaid I used turquoise green[ No 42] first and  pulled it inside with the water-brush
Later applied light blue [No 36] and blended it in nicely using the waterbrush again.
  • Deciding where to lay on the colors first!
Brush on the ink on the edges and shadow areas

Pull in the colors using the water brush!

This is one of the easiest ways to get seamless blending!


  • Always apply the brush pen directly to only small areas at a time as if it dries it wont blend well
  • Coloring Skin Tones

Flesh Color [No 71] is one of the most useful colors in the Zigs set and using it alone you can get a beautiful skin tone. In this step by step however I first applied Blush [No 69]on the edges and shadow areas and pulled it in with a waterbrush


Later went over the larger area with the Flesh Brush pen [ No 71]


  • Adding Cheek blush!

You can add life to your animal and human images by adding a bit of color to the cheeks using Tea Rose [No 220] or any shade of pink..... Just add a tiny bit of pinkish color and blend with the water brush!
    • While water-coloring tiny areas such as the flowers in this mermaid image use the brush pens directly and use very little or no water as it can bleed easily!

    • Coloring Hair!

      Coloring hair is really tricky using whatever medium you are working with and whilst before Zigs I got a big blob of hair mass when I tried coloring, using zigs my results are much better!!
    • Last Tip is that if you dont get good results  with your attempts try changing the type of water brush you are using and/ or the type of watercolor paper you are using!
      Different Water Color Papers- Canson Montval and Brustro
      In these images the first one is on Canson Montval Paper and the 2nd one is on Brustro Paper.  

    On Brustro the pigment had a tendency to spread more on adding water , bled outside the lines quite a bit and had a splotchier look on layering the colors.
    The colors were however more vibrant and rich on the Brustro Paper and lovely for freehand water-coloring.
    So the main point is to experiment with different brands of watercolor paper if you are not happy with your attempts!

    I am not an expert at water-coloring but I do hope some of these tips will help beginners in their maiden attempts! The main thing is not to give up !

    Here is a list of all the Supplies from Crafters Corner
    Cheery Lynn Dies :  sun flower,Cheery Lynn  Rose Leaf
    Spellbinders : Spellbinders  Rose Creations  
    Dress my Craft: Dress my Craft  papers, Dress my Craft sparkling dust, Dress my Craft Sequins, Dress my Craft Golf tools,
    Stencil : Carabelle Studio Stencil Geometrie