Followers

Showing posts with label Dress My Craft Sequins. Show all posts

Monday, 31 July 2017

MINI ALBUM : Dress My Craft Hydrangea Lawns

Good Lovely Crafters

Welcome to brand new post on Crafters Corner,

Today I will be sharing with you all new product from Dress My Craft which has been recently launched in the market. These pattern papers are already creating Buzz around all social media networking sites and you might have seen some of the fantastic projects recently shared by my fellow Design team members using the same Gorgeous Pattern Papers from Dress My Craft named as Hydrangea Lawns (12x12 pattern paper)
Using Hydrangea Lawns Pattern paper collection I have made a small Mini album and I have a small and super quick video along with some basic instructions on How I constructed this cute little mini album. I shall be Linking all the supplies towards the end of the post.

Voila take a look 
The album measures 5 and 3/8th inches x 6.5 inches approximately


Here is the Video ... 


And some more close ups of the mini album pages. These are perfect cute little albums to gift to your loved ones.
Take a look


On the top of the cover I have used jute paper and sealed the edges with metal corners, On the top of the jute paper have pasted dress my craft pattern paper and the resin frame is from recollections. In the frame I have used DMC sequins and sealed it with dimensional mod podge.

Mulberry roses are dipped in sparkling dust from DMC.

I hope I am able to inspire you all, just in case you have still not bought your first copy of Pattern papers from Dress my craft ... It's time to buy these beautiful pattern paper stack only from 
Crafters Corner- one stop solution to your crafty needs.

See you soon 
Till then keep checking the space for some awesome Inspirations for your new projects.

XOXO 
Isha 


Material Used- 


Sunday, 30 April 2017

Shaker Cards with Anita Kejriwal

Hello Friends !!!

This is Anita here with another session of crafty fun. Today I have something that is very popular nowadays and that is Shaker Cards !!!
Shaker Cards are the talk of the town and Crafters Corner has all the solutions to make awesome shaker cards.
Although making such cards are very much out of my comfort zone and certainly not my style but after seeing this post and my video, you will understand how making such cards was a fuss free and fun process for me.

Crafters Corner has all products that one requires to make shaker cards. So let me just list all the things required and later on you can find the complete list at the bottom of this post.
Generally we need a 3D frame made of foam or die cuts to create a pop up frame to keep the shaker elements in and covered by a transparent acetate sheet. These shaker elements can be sequins, pearls, micro beads, frosted powder, glittered powder , buttons etc.

To make shaker cards in an easy way , Crafters Corner has these super cute Pop Ups from Queen &co. that makes the process of shaker card a matter of few minutes. Those who are not much into die cutting, can go for these card kits that have all the things required to make the cards.


Here is the Video tutorial that will give you a complete know how about making shaker cards


Products used from Crafters Corner

Dogwood stamp and die
Circle dies

Visit Crafters Corner store for all your crafting solutions. It has the best brands at best prices all under one roof.
Do visit my blog too an d leave some love.

Thanks for stopping by and have a nice day.

Wednesday, 26 April 2017

Sequined Superman !!

Good Morning Everyone


Today I am sharing a Book- Box card which I have made on superman theme, and it is to be gifted to someone who is fan of Superman...
Without wasting time, let's get started..
Mind you it’s a picture heavy post and will mention the list of supplies used in the end of the post.

I have used loads of images of superman which I have googled and downloaded.. I am sorry if in case I missed giving any due credit to anyone.. these images were downloaded from free printables.

Let’s move ahead on the project, I have used loads of dress my crafts sequins and Mod podge to make this project.

This is a huge book box card, measures 12x12 inches in size.


That's how the binding looks like...


On the top of the card I mean the cover I have made a big shaker element, which holds loads of sequins, all from Dress my crafts Crafters corner.


 I cannot get enough of the beauties .. some more pictures from different angels..

How to make shaker top- 

-Taken two 1/2 inch strips, measuring 8 inches length 
-Another two pieces 1/2 inch strip of heavy Cardstock 3'7/8 inch 
-double sided foam tape,
-Glitter foam sheets 

Step 1 - make box with double sided tape first 
Step 2 - add card stock strip above the layered foam tape
step 3 -  Add another layer of double sided tape on Black card stock strip 
Step 4 - Add all the elements you want inside the box.

I have added the superman cut out and dress my crafts sequins inside it. And 

Step 5- finally covered the same with acetate sheet.
Step 6- Lastly added the foam glitter strip to cover/ hide the foam tape to complete the look.


I have fussy cut this superman logo and added on the band and have attached Velcro to make this closure band.


Moving inside the box card, tdaaa
here is how it looks when we open the box...


On the base I have done some stamping, heat embossing and decoupage...

This actually reminds me of comic book page and I totally love way how it turned out.


I have used Dimensional Mod podge to make Faux epoxy stickers..


So here we come to an end of my project.
I hope you all liked it :) Don't forget to leave some love.

XOXO


Supplies used -
Black card stock
Mod podge dimensional
Mod podge gloss super thick
Memory box cityscape die
Pattern paper from stash
Tombow glue multi
MS border punch
Dress My crafts sequins
double sided tape - foam/ tacky tape

Wednesday, 19 April 2017

Playful with MFT stamps & Die

Good Morning Everyone...

I hope you all are doing good!!
Today I am going to showcase MFT - My Favourite Things Stamp and Dies, recently they are the hottest selling brand around Indian Crafting space.

MFT came into existence in the year 2006 and MFT - My Favourite Things offers fresh and fun range of stamps and dies.
For the month of april I got the opportunity to play around with the MFT stamps & dies. I always wanted to try something which is simple and clean and with them I got the opportunity to do the same.
Their stamps are super fun and adorable, lets get started....


SUPPLIES USED - 
My Favourite things stamp set- playful pups 
Distress inks 


          I have stamped the Playful pups stamp set using Archival ink jet black on the Card stock... and water colored the images using Distress inks (please avoid my coloring, I am super bad with it)


Once coloured I have cut the images with its coordinating Die.

Now moving over to Blueprint Tag builder die 5 
"This 18 piece set includes: Traditional tags (3) 1 3/8” x 3 ¼”, Fishtail flag 5/8” x 2 ¾”, Fishtail label ½” x 1 7/8”, Banner ½” x 3 ¾”, Peek-a-boo heart border/confetti 1 ½” x ¼”, Peek-a-boo XO border/confetti 1 7/8” x ¼”, Arrows A 2” x ¼”, Arrow B 2” x 3/8”, Looped border 1 ¼” x 3/8”, Reinforcement A 5/8” x 3/8”, Reinforcement B 5/8” x ¼”, Hearts (5) ½”, 3/8”, ¼”, ¼”, ¼”.- MFT WEBSITE (source)


This set includes three tags, each featuring distinct accent details. One is a solid tag with a stitched perimeter, a second features stitching and a die-cut rectangular window, and a third includes two die-cut windows with stitched perimeters. The square window produces a secondary frame with double stitched border. Additional accents include a narrow fishtail flag, dimensional banner, reinforcement options for the tags, a peek-a-boo heart border, and a variety of small shapes and confetti elements.- MFT WEBSITE (source)


Below is the referral image depicting to what ways you can coordinate the tags, In total 8 ways you can play with dies and assemble the tags, but I believe possibilities are endless.


I have created some really simple cards using the above mentioned craft supplies and I am totally loving them. The paper stack is basic stripes and I personally feel it looks amazing.


In the above Image I used the yummy Dress my craft sequins Little hearts to complete the look of my card. In the below image I have used the confetti die cut from the die set and added some more sequins from Dress my crafts.


Colouring these tiny little images was so much fun and I find them adorable. Playful pups stamps set is really adorable.

Moving to tag builder die set I have made some simple and cute tags, you can make your own fun little tags and are just perfect. I really loved the crisp deep stitched edges this die gives. 


                                                        Some more tags 


I hope you liked my basic card and tags, I personally felt doing clean and simple cards is way more tough then the other cards .


Hope I was able to inspire you all to take out your favourite stamp sets and enjoy water colouring them. Don't forget to leave some love.

I shall be back soon with some more techniques and ways we can use this Blue print tag builder die.
Keep watching the space.

Have a nice day 
XOXO
Isha.

Friday, 17 March 2017

Shaker Ideas and Tutorial with Dress my Craft


Hi friends, ever since I got the amazing jars of Dress my Craft sequins I had been holding on to them...they were just too cute ! But finally I just had to use them!!
Dress my Craft 
My first project is a pop up stair step card with handmade flowers made using Dress my Craft papers and Dress my Craft sparkling dust.


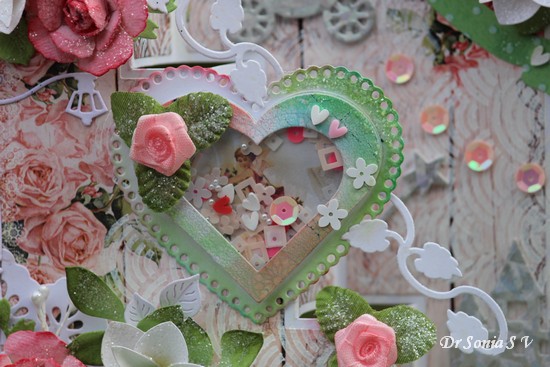
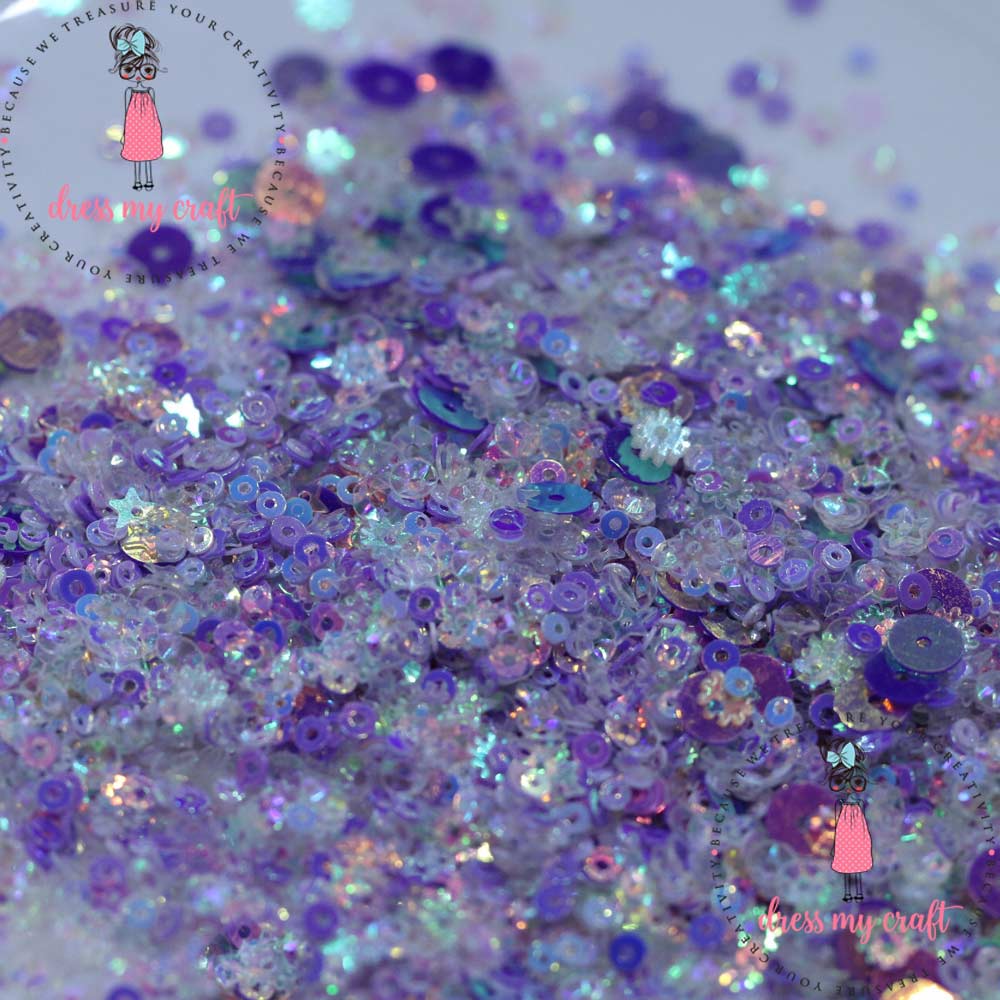
Love the unique blend of beautiful flower shaped sequins in pastel shades and the little hearts from Dress my Craft are sooo gorgeous ! The heart shaker card topper I created also has a sprinkling of sparkling dust glitter!


 The handmade magnolia and rose plus the leaves have a dusting of sparkling dust...love how easy it is to jazz up a project using it!

 The paper on my card is from Bob n Betty and I stenciled over it using Carabelle Studio Stencils

 One panel of the Pop Up step card has a chariot , castle and fairy wand with  pastel pink Dress my Craft sequins!

 Can you spot how many little hearts I have dotted all over this card! No wonder they are a best seller at Crafters Corner!

Hope you liked this shaker card topper idea!

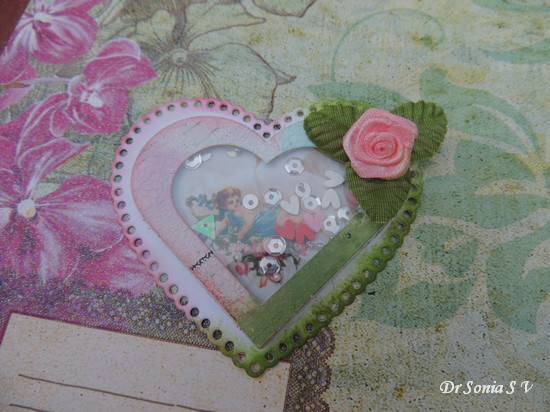
 I made more heart shaped shakers ...they would look lovely on a mini album , box or layout!

 Love the beautiful beautiful pastel shades of Dress my Craft sequins Shalini has launched...and the best thing is they are packed in  wide mouthed jars hence making it easy to pick and choose from the lovely mix inside!

 I had a lovely cat card topper with me and though cute it was rather plain but it looked so much more fun after converting it into a shaker embellishment!

 This cute jumbo was hand drawn and colored by my daughter and  this shaker was made by my 10 yr old who tells me its going to be a fridge magnet!

 Whenever I think of shakers ...I can't help but think of snow globes...this shaker has a DCWV paper as its background and a lovely mix of Dress my Craft sequins.
One more thing that I liked about Dress my Craft sequins was that each jar had a lovely assortment of subtle shades and different sizes and shapes hence making it easy to create interesting shaker embellishments!

 Also used another penguin from the same paper to make a shaker clip!

I added too many sequins inside this one!! LOL!!


And those tiny hearts are irresistible!


This simple card below has a circular shaker element cut within the big flower! The flower within was cut from a pretty scrap of DCWV paper! Love how shakers are gratifying ways to use up scraps of pretty paper!
I also used the beautiful flower sequins from Dress my Craft on the corner of the card!

Though the first card I showcased was the most time consuming and elaborate one, the window shaker card below is my favorite!


I got the idea from a 
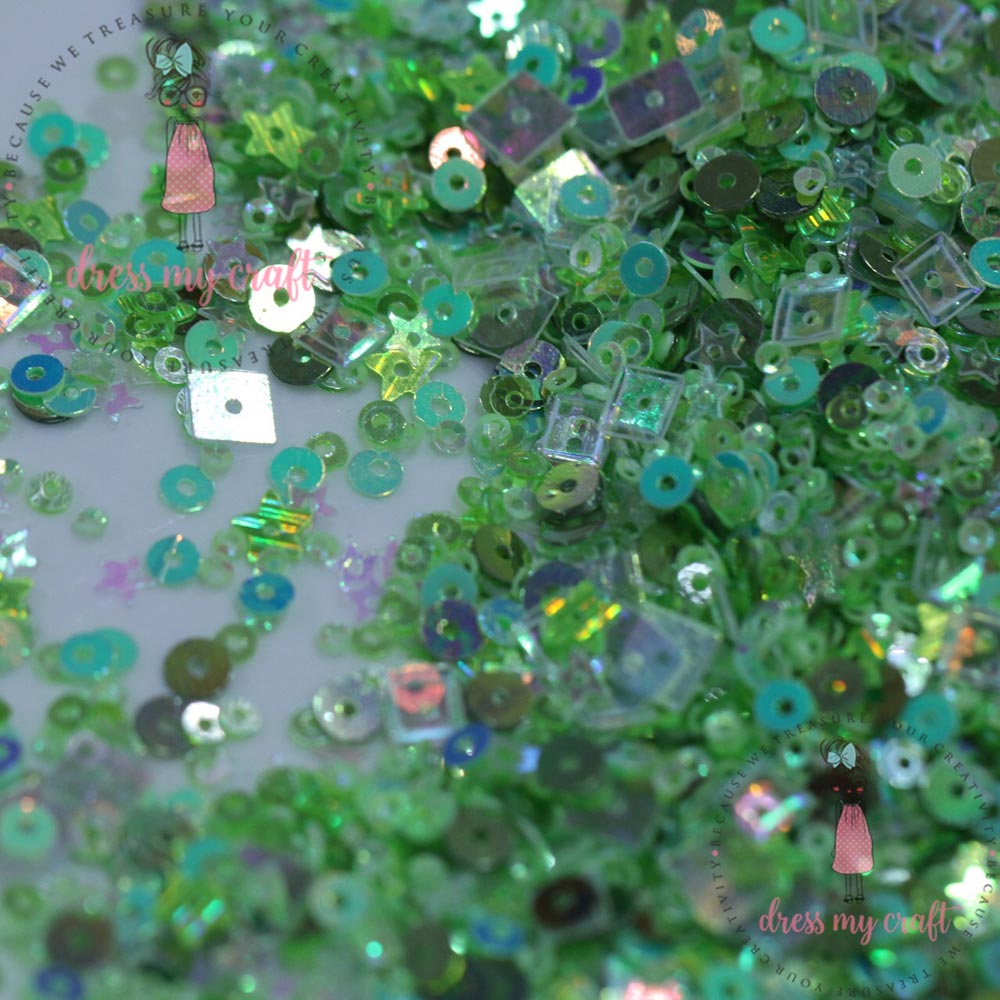
card by Sara Levin and used beautiful green Dress my Craft sequins within a shaker window on the front of the card through which you can see a tree on the inside of the card.

 The rose is again handmade with Dress my Craft papers .


 I also let a few gorgeous sequins " spill over"

 And here is a closeup of a cute ladybird cloth peg holding up the Birthday Banner [ Elizabeth Craft Designs Happy Birthday die]

And this is the inside of the card with a tree from Dee's Distinctively Dies!

This is how you can make this card.
Take a base card[ mine is top folding]  and another piece of card for the front of the card

Die cut/ handcut a window on the top panel and lay it atop the folded base card and use it as a template to trace the window .


Die cut/ handcut the shape on the front of your folded base card


 Chose the size of the window to fit the elements you want peeking from your window

Stick transparency sheets over both the windows you had cut and use double sided foam tape to help make your shaker element. Put in the  sequins onto one window and firmly press the top window panel atop taking care to align the windows as perfectly as you can!


In this design every time you open the card the gorgeous  sequins shake so beautifully !


 Here is another card I made using Dress my Craft products and though there is so much going on in this card, tiny pairs of hearts [from Dress my Craft] are so cute!

My final card is an adorable Scrapberry Bunny stamp colored with Zig Watercolor brush pens ...Yes Shalini has brought in Zig Brush pens at amazing prices to Crafters Corner!

And can you see the little bottle filled with cute gorgeous Dress my Craft hearts and sequins!


Supplies :
Dress my Craft products : Sequins, Papers, Golf tools, Dress my Craft Papers
Little Hearts
Tonic Studio Guillotine Maxi Trimmer 12"
Scoring Board 12.5"
Tacky tape 
Tonic scissors 
Big Shot machine

Dies :  Elizabeth Craft Designs Happy Birthday ,
 Spellbinders Rose Creations  , Spellbinders Magnolia,Spellbinders Elegant Ovals,Spellbinders Happy Days,Spellbinders Pretty Princess,Spellbinders Lace Hearts,Spellbinders Classic Ovals Large
Sizzix Framelits Hearts,Sizzix Framelits Squares,Sizix  Floral Wreath
Lifestyle Crafts Nesting Circles
Winnie and Walter Wishes Cutaway
Cheery Lynn  Cheery Lynn tiny things with wings, Cheery Lynn  Flourish 13, Cheery Lynn Colonial Lamp Post
Joycrafts Butterfly Border
Marianne Anja Border
Stamps : ScrapBerry's Bunny and Plums