
Hello Everybody! What a week!!! Hope you all are enjoying the fantastic posts by my fellow DT's they are doing a fab job!
I did want to take a quick second and thank all of you who left so many, many awesome comments on my last blog post
Today I am here to share a very everlasting dreamy whimsical project for you all!

The festival season going on us, I thought I would share this fun and easy to make doll house room box for gift giving to your little ones... When Shalini ask me to make a gift, my mind went immediately to this. And i challenged myself to make this.
I pretty much stuck in making this. I finally finished Yahooo. It was a blast to design and create!!
I did want to take a quick second and thank all of you who left so many, many awesome comments on my last blog post
Today I am here to share a very everlasting dreamy whimsical project for you all!
The festival season going on us, I thought I would share this fun and easy to make doll house room box for gift giving to your little ones... When Shalini ask me to make a gift, my mind went immediately to this. And i challenged myself to make this.
I pretty much stuck in making this. I finally finished Yahooo. It was a blast to design and create!!
Top view of my box


I decorate 3 sides of box, in that one side can keep photo
For more about this box, see the video here.
These are the paper which i used to decorate outer of my box.
Here is some tutorial pic of gift box
1. Neutral Mount Board is best for 3D boxes.. You can create any size of box

 3. First base i simply wrap with normal gift paper. This is the top portion, and glue the 2nd base on top of this sheet
 4. I Glued 2 bases together
 5. I joined the sides of my box ( chipboard sheet ) with Dupont Tyvak paper. Stick the side walls on the first base
 5. Add magnet on side of chipboard with masking tape
 6. Top cover, just like how we create in explosion box, But here not only paper . You can see the chipboard on my pic. And make sure that the cover fits correctly over the walls of the box

 8. Simply glued with glue gun


2 sheets of MDF furniture

 10. Use sand paper on edges to get smooth effect

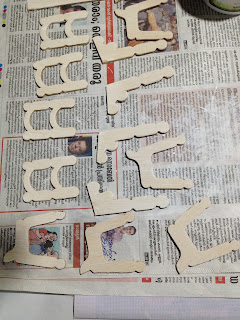


 15. I already shared, how i'm making stand in my last post, or if you want the details check here Miniature-dresser-room
 This little ted with basket, it was a cute keychain


I really love these mini's and all it's incredible goodness! The papers i used are simply outstanding. soft color touch, I love working with them.
That's it for today


2. I use masking tape on the edges. For making this box, need two layer of chipboard sheet


7. Arranging Ribbon, i choose two soft colors


Now its come inside part


9. Main products are Craft and you new born baby paper collection and MDF dining room furniture

For finishing touch i add this white paper on center of wall

This is the way we getting furniture.


11. To start with I have applied Gesso to all the piece of both sheet and joined with glue gun.


13 For Dining table and chair i choose soft pink shade ( mixing gesso with Prima marketing Lipstick mica powder )


12. Curtains are made by gold coin cover with lolly pop stick

I choose violet color

13. Arranging flowers and pot


14. Filling glitters on glass bottle


Here is some more close ups


And i'm just tried with candle...how does it come. Lol, flames never come in miniature way

I really love these mini's and all it's incredible goodness! The papers i used are simply outstanding. soft color touch, I love working with them.
That's it for today
Once again, Here's to a Wonderful Healthy Happy crafting to you all!!!
Thanks for the interest in my pattern! Y'all Rock!
Suzna
Supplies used


