Today I have yet another cute little mini album to share, as part of my DT kit I have got set of Graphic 45 pattern papers - Typography Collection and I decided in seconds will make a Mini album.
Take a look
I have a quick video tutorial and links for all the supplies at the end of the post,
Please avoid my mistakes I was really nervous while making the video.
Apologies ,, Please note the name of the Graphic 45 paper collection is TYPOGRAPHY .
Are you searching for the perfect gift idea? We all know Handmade gifts are such a wonderful way to make a friend or family member feel loved and appreciated. Today i'm going to show you easy and more beautiful elegant Album that are sure to captivate your imagination. I'm so happy to get these materials from Crafters corner. And look at that mini Prima marketing memory hardware. Its perfect and cute. So i choose Graphic 45 Portrait of a lady Paper collection to make more Royal cute look :-)
Do you wanna try?
I've got a fun and easy tutorial Snaps, I will start by gathering my DT pack, Hoo i really really love it.
So we will start with decorating my album cover. So i'm planing to do a Fabric covering
Gluing Fabrics to paper material: I really don't no much about this, but in my experience i like to use Red tracky double side tape or any stronge double side tape. They are very sharp and fast.
This is the Rotary Cutter: Easy to cut fabrics. Before covering fabrics i used sponge sheet. To get the sofa effect. Check my video, I shared all materials in my video.
2nd layer of fabrics: Here no need to add sponge sheet.
I used glue gun to stick 2 layer fabrics.
Crop-A-Dile Hole Punch & Eyelet Setter:This all-in- one tool punches and sets eyelets, snaps and so much more. Easily punch through any material: thick or thin: paper, leather, plastic, metal, chipboard, acrylic, fabric, wood, and so much more.
If you are planing to start album making, you must need this.
Graphic 45 Paper collection have many fussy cutting images, that will help us to decorating more. Even if it pages or cover.
Album Pages are 4X4. My paper pad 8X8. so more wastage.
Parchment scissors and Gyro cutter to best for fussy cutting.
Arranging each pages with fussy cut images. Crafters corner have very thin layer foam tape. which help to pop up the small fussy cut pieces.
Decorating cover: Metal charms, flowers, chipboard embellishments etc.
I have a small tool to bind the light metal pieces: Bought it from hyper market.
Hi everyone! It's Suzna and I'm back with crazy creative project. Yes mixed media Prima Marketing metal frame.Today I'd like to show you one of the projects I decided to put real clock inside frame - I'm sure you remember my Altered tuna tin art
I create texture and color for backgrounds…its basically the same way do in canvas.
So today I will Show you and Give you Ideas how to make your own Altered frame
Here I have basic tutorial pics.
Step 1. Choose your favorite metal frame from Prima Marketing
Step 2. Which is very flexible to remove and attach the frame like this
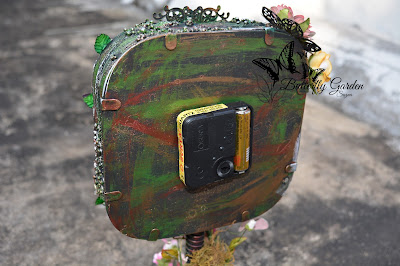
Step 3. Make a hole in center for attach the clock motor.
Step 4. Select clock design depends on needle
I choose numbers
Step 5. Cover the whole frame area with a coat of black Gesso
Step 6. Decorate 2 sides of the frame with flower
Step 7. By using mode podge & 3D matt gel i attach the bandage cloth and prima art stone on the outer side of frame
Stencil design on background
Step 8. Again 1 layer of black gesso, and thine layer touch up with white gesso
Step 9. Randomly start coloring with Prima acrylic metallic colors, Mainly outer part of frame - Royal red, Emerald green, Steampunk copper & Olive green.
Inside frame : Aqua rose, Viva inka gold
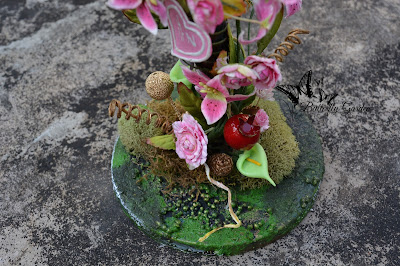
Step 10. Once it done coloring, i decorate my frame with metal charms, Prima flowers, preserved mosses etc
Below image you can see, I attach Prima metal charm : bottle cap. But my clock needle cant move, so i removed that design and i choose thine metal round design charm
Adding more texture with plaid craft product.
Few more decoration
Inside view is so dark, so i painted with Prima acrylic Aqua rose