Followers

Showing posts with label Altered Crafts. Show all posts

Wednesday, 28 September 2016

Altered Box!


Hello everyone! Welcome back to Crafters Corner blog!
Well since I've already started preparing for the upcoming festive season I thought why not do a tutorial on how to alter a wooden box for today's post? Sounds good right?
Well this is what I've created! A shabby chic themed box! Perfect for the gifting season! So lets get started!


I started by painting my box using Prima Marketing Chalk paint in the colour eggshell. I did not prime/gesso my box before using the paint is because I wanted the uneven streaky look of the paint. Plus i used an old paint brush to further enhance the look I was aiming for. If you like the perfect painted boxes you should use a good gesso for sure!


The one thing I absolutely loved about this Chalk Paint is its finish! Its so super matt unlike the acrylic paints I've been so used to which tend to get sticky at times! Also you must checkout the Inks, Paints & tools category on our website We have got such a huge variety of chalk paints in various brands and in some amazing colours!

Moving on to the next step I heat dried my box to quicken the process! I wonder what I'd do without a heat tool? I have low patience hehe :p

Once done I took this super pretty paper pad! Floral Muse by Dovecraft Its one of my favorite paper pads I soo love the shabby chic prints!

Next I trimmed down the pieces according to the size of my box and added tacky tape to them! 

Peeled the tape and adhered them to my box. Next I took a prima frame and painted it with my favorite Prima rose gold paint i soo love this colour! 

Added it to the piece of cardstock closing the window. Next adhere this to the box using 12mm foam tape
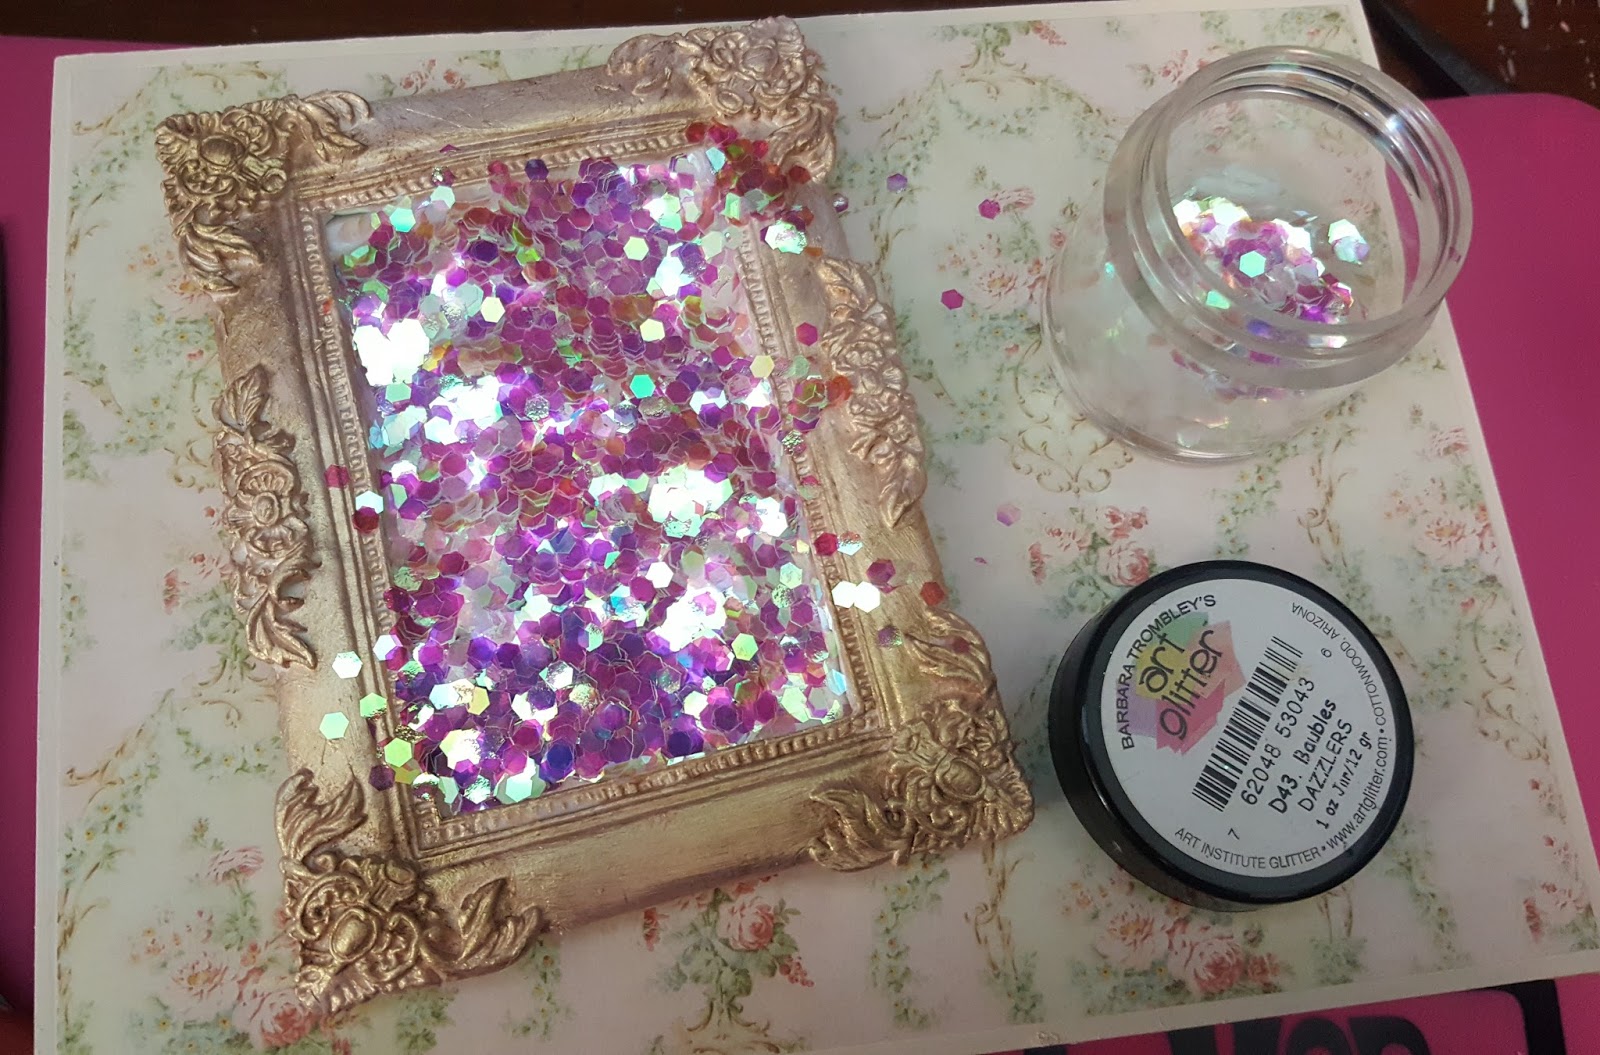

I filled in the inner frame with Glossy accents and then used Art glitter- Baubles over it sprinkle them n then tap off the excess. 
The colour is so gorgeous in person the camera does no justice! 
Its absolutely Gorgeous! 

For the decoration I've used few mulberry flowers, die cut leaves and some embellishments from the store! All products used are listed down below!


Hope you all enjoyed today's post!

Have a great day

Hugs 

Anchal Sapra


PRODUCTS USED
Prima Chalk paint- eggshell
Prima opal magic- rose gold paint
Dovecraft- Floral muse 12*12 paper pad
12mm foam tape
12mm Red tacky tape
Blue gems
Mulberry roses
Resin embellishment
Cheery lynn leaf die
Craft sheet
Mod podge silicone craft mat
Sentiment tiles
Gold butterfly
Art glitter- baubles


Saturday, 23 July 2016

A black makeover

Hello everyone! Hope you all are doing well! Today I'm here to share a brand new tutorial with you covering mixed media techniques and how to alter a LaLa Land crafts shadow box card! Let's see first what it looks like! 
Here are few different angles for to admire :P


Look at these gorgeous pearls from the store....
Omg they are so killing!!!!


Do you guys like it? 
I am sure this is adorable :P

So let's get started 
Here is my base to start with ...
I picked up this beautiful La La Land photo frame to alter......
Since it was a steampunk theme so i followed the same thoroughly....

Here is what the package looks like. It comes will all these pcs along with an instruction manual telling how to assemble it.
Its an ultimate to piece to adore , alter , or gift...


I started with my Prima chalkboard paint ....though we have many more beautiful shades but i decided to choose black n golden....
So i chose the black color!!!
The first thing I did was to paint all the pcs with Black chalkboard paint by prima. I absolutely love the chalkboard range by prima marketing these are amazing and the finish is excellent and our store has recently got all the lovely colours!  
I am sure you will drool over them!!!


Next i started assembling the Base. I've used glitter glue for this step as it dries clear and is mess free. 
U can use glossy accents or tacky glue too but i think i m addictive to this glue :P


I've taken a very grunge looking chipboard pc from Dusty attic and I started painting it with a gold paint by Dusty attic
Next i added 2 of these paints by Prima marketing on top of that piece. 

Taking a piece of chipboard for the photography I've made a border using Rose gold paint by prima marketing 

Next i stenciled the Base using Gel beads paste (micro fine beads)by Liquitex and layered 2 paper clay 
embellishments and some fishnet that is  available at Crafters Corner
Check my previous post to learn how to make embellishments using Prima moulds with paper clay!


now I'm adding some more textures to my piece I'm using this gorgeous pearl string from our store and next i have randomly added some glitter glue and covered it with Prills 
Do check below in pictures :


To give an awesome glaze i used the new Art anthology dimensional magic.


Here i have joined the picture with the frame.
Now comes the top part of the frame.
Now taking this thread i am attatching this beautiful key from the store.......

I have played randomly with them doing stenciling and using some chipboards from the store.
Then i added them on the front base and adhere them with glossy accents.
Here comes my final beads to be added .....
Yayyyyyyyyyyyyyyy....
I love them ....


Do check this list to know more about the products used :
Hope you will enjoy this !!!!!


PRODUCTS USED
Steampunk frame
Chalkboard Black
Couture Creations Non Stick Mat
Designer Dries Clear Adhesive 2oz
Liquitex Glass Beads Acrylic Texture Gel 8oz
Microbial
Plastic Palette Knife Set 5/Pkg
Ranger Heat It Tool - European Version
Sorbet - Dimensional Paint - Dazzle
10 Metallique Steampunk Copper
11 Opal Magic Rose/Gold
12 Vintage Gold - Dusty in Colour
13 Cog Cluster - Chipboard Cutouts
14 Royal Key 2
15 Copper Glass Glitter
16 Gold Leaf
17 Gold Prills
18 Memory Hardware Glass Pearls
19 Time Travel Stencil
20 Ink Black - Wire Thread
21 Iron Orchid Designs Paper Clay
22 Vintage Art Decor Mould Baroque #3
23 Natural - Decorative Fish Net
24 Pearl Bead Strings

Love Anchal 

Tuesday, 12 July 2016

Mixed media Cottage

Hi all my crafty friends! 
Thanks so much for stopping by today! I have a very colorful project to share with you, a mixed media MDF cottage as my debut project for the Crafters Corner Design Team!!! I still can't believe I made one of the team members with Crafters Corner as its like a Dream come True.. I am so honoured and excited with all the projects I will be creating throughout this year, in-sha Allah. I hope you will follow me and find inspiration along the way :) 


I altered Kaisercraft MDF cottage and turned it into a garden house complete with a spanish moss. Lots of texture paste, stencil work, sand paste, flowers and resin frames etc add to the garden home concept.


I really loved this cottage design and was saving it for a special project . For this I used loads of different material like chipboard pieces as well as mdf cut designs, metal miniature, burlap lace etc and some of spray paints and blooms. I always find different look when it comes to mixed media.

I took quite a few photos ;-) to try to convey all the beauty of this project to you. 


I love this idea and I hope you all get inspired to Create Amazing Art!!! And you enjoyed too this project share today 
Hugs 
Suzna

Monday, 21 September 2015

Collage clay cake boxes!

Hello everyone! How are you all doing? Hope you all are enjoying the fab posts my fellow Team mates are posting :)
Well today I'm back with a new post on Collage clay!
This post was originally a video tutorial but sadly I haven't been able to upload the video due to some technical glitch soo I decided to turn it into a pictorial please ignore the not soo high picture quality and bear with me :*

This is the box we will be making and here's another version of it in a small size! ISn't it cute? And looks so edible? My nephews wanted to eat it haha :p

So lets get started!
Lets see if anyone can guess how did I create the texture of the cake? Any ideas?
Welll I used sand :p You require few basic supplies for this project I've linked them all for you :)


Lets get started!

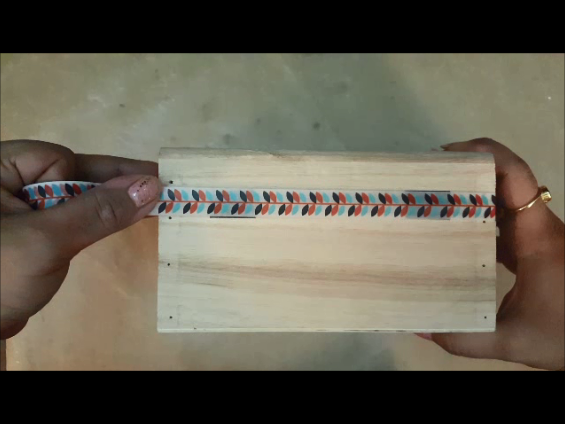
I started with a plain wooden box removing the locks so that I have a smooth surface.

I added washi tape to it so that it stays close as I work on it  and it makes a nice border for me.

I am using the 3d matte gel by Prima for this you can also use mod podge, decoupage glue for the same 

Start by adding an even layer of the matte gel all over the box n sprinkling sand over it. Tap off the extra

The more grainy the sand the better would be the texture

Next coat it again with the matte gel sealing all the sand together n let it dry.


Remove the tape once its dry n begin painting

Im using a chocolate coloured acrylic paint for the box.

Next comes in the fun technique of making coloured clay Just pour some clay in a bowl add your fav colour of acrylic paint n mix well.


Next take a piping bag and add the clay to it. You can use any nozzle with it n then just begin piping :)


I've used 3 colours of clay for this box you can decorate it however you wish! Hope you all enjoyed the tutorial!
Have a great day
Hugs
Anchal Sapra

PRODUCTS USED