Followers

Showing posts with label Pattern Paper. Show all posts

Monday, 11 May 2015

Penny Black... love continues...

Hello Friends,


Neha here with more Penny Black stamps. This time I am using their photo polymer clear stamp set 'Sprigs'. There are various twigs and branches in the set which we can use as a focal point  or to create backgrounds. They are great as silhouette too. They are very good quality stamps which takes all inks pretty well. 

Card : 1


This is totally inspired by Jill's card HERE. I don't remember how many times I have seen that video. Her ease with water colors is amazing.

Ok, back to my card... 

1.Paint the background- slope, sky- with various distress inks. Let it dry.

2. Ink the stamp with 2-3 shades of yellow distress inks. Add brown color to trunk & branches. You can use distress ink with brush, distress markers or any water based marker. I have use tombow markers as I don't own any distress markers. Spritz the stamp with water and stamp on the dry background.

3. At this point you can manipulate your image with thin paint bush and distress inks. Add more colour to trunk and blooms for some dimension. Let it dry.

4. I used hero art's stamp (Woodland leaves and grass- one of my first stamps. ) for those bare trees in the background - it will add depth to the scene.

5. Add some birds and sentiment. I love this quote stamp by Verve stamp. Yup, no one's life is perfect - just like my card... ;) ...hope you will find it wonderful though!


Card : 2

They says inpiration is everywhere. In this case, I was inspired by a lid of Versafine Ink pad.


And here is my take on the inspiration.


1. I chose the Kaisercraft sentiment as it is very bold and will give good contrast.

2. Select a die which will frame the sentiment well. Cut a copy paper with same die for a mask.

3. Deboss the center of cs panel with the same die. 

4. Mask the center with die cut paper. Stamp images around it with various inks. Just make sure you space them out evenly .
 

5. Remove the mask and stamp sentiment.


Card : 3


Here, I have tried 'Layered Batik Resist' technique. I was inspired by very talented Dina Kowal's tutorial here. She is the queen of various techniques and an awesome artist. I even own few Impression Obsession stamps designed by her.  I followed exact same steps but with distress inks. Make sure you allow each layer of ink to dry thoroughly, before adding embossing powder.   


Card : 4


  Last year I took one of the Online Card Classes to learn how to use pattern paper. Yes, I get confused when i have to use pp. I love them but never can use effectively. I used Penny Black pattern paper - Painted Blooms .

1. I clear embossed one of the image on a piece of pp. Apply distress inks in shades of blue. The embossed part will resist the ink. 


2. Sandwich pp between folded copy paper and heat it with mini craft iron to remove the clear embossing. Now, you have your own, altered pp. The patterns peeking through the stamped image is just magical.

3. Add twine, butterfly charm and sentiment to finish off.


Card : 5


I love this sentiment from 'Heartfelt' set - and designed the card around it. I used different shades of grey to capture  essence of the sentiment. Add some butterflies and blings to give finishing touch.


Card : 6


1. Cut the white cs panel with mft Polaroid frame dies and emboss it.

2. Place the panel on card base & mark the position of windows. Remove the panel and stmap various images with choice of your inks. I have used distress inks and tombow markers for the same.

3. Adhear the panel on card base & add die cut frames .

4. For the glitter boarder, stick red double sided tape on the base, pour some glitter, burnish with finger, tap off excess glitter. Add the sentiment.


Card : 7


I have created night scene with them here. They are detailed and delicate so even if you use as silhouette, they won't overpower the scene.


  Background is created with distress inks and masking. Silhouettes are stamped with some grey and black inks. (you can do first and second generation stamping with just black inks too). Moon is winked** with clear wink of stella glitter pen. 


Card : 8


This last one is my favourite one. I always like to mix florals and geometrics.


1. Cut a circle form a colored cs. Stamp stripes in black. Let it dry thoroughly.

2. Rub some anti static powder. Stamp & emboss floral image in gold.

3. Emboss sentiment in copper, add ribbon and pop the circle with foam tape.

Close Up:


These stamps are good as fillers too. Combine them with you favorite floral stamp to make a bouquet. I wanted to try it but ran out of time. Please share if you do that. Let me know how you like this 'one set many looks' series.

 Keep crafting...keep sharing....! 


Supply List :

 Stamps :   Penny Black - Sprigs, Penny Black - Heartfelt, Kaisercraft - True Friendship

Inks :  Distress Inks, Versamark,  Versafine Black,  Mama Elephant-moon light

Embossing Powder :     Clear, Gold,  Copper           

Tools : Stamping Buddy,  Mini Craft Iron,  Heat Gun, Wink Of Stella, red tape, glitter,  , Nonstick Mat, ink blending tool

Die :     Spellbinder - Circle  


Monday, 15 December 2014

How To: Cabochons and pendants

Hi Guys

Am back with another technique filled fun video!! A lot of you wonder how to use the Glass Cabochons and incorporate them on your projects well here is how!! 

Glass Cabochons are very versatile and the possibilities are endless you can use them in many ways as charms, accents and also as jewelry pieces. You can create them in several different ways and use photos pattern paper, scraps and even decoupage napkins.

I love charm bracelets and when I saw this really awesome Ephemera papers with beautiful flowers and foliage in shades of purple I just knew I had to create a collection of charms to make a personalized one of a kind bracelet!! 


Watch the Full Video Tutorial Here


Materials Needed
Watch the Earlier Video on My Charmed Class to see the Basic of putting together charms , jump rings and chains!!

Thanks for Visiting!
Don't Forget to Subscribe!

Ciao
Ashmita


Monday, 8 December 2014

Unique Vintage FInd!!

Hello Everyone

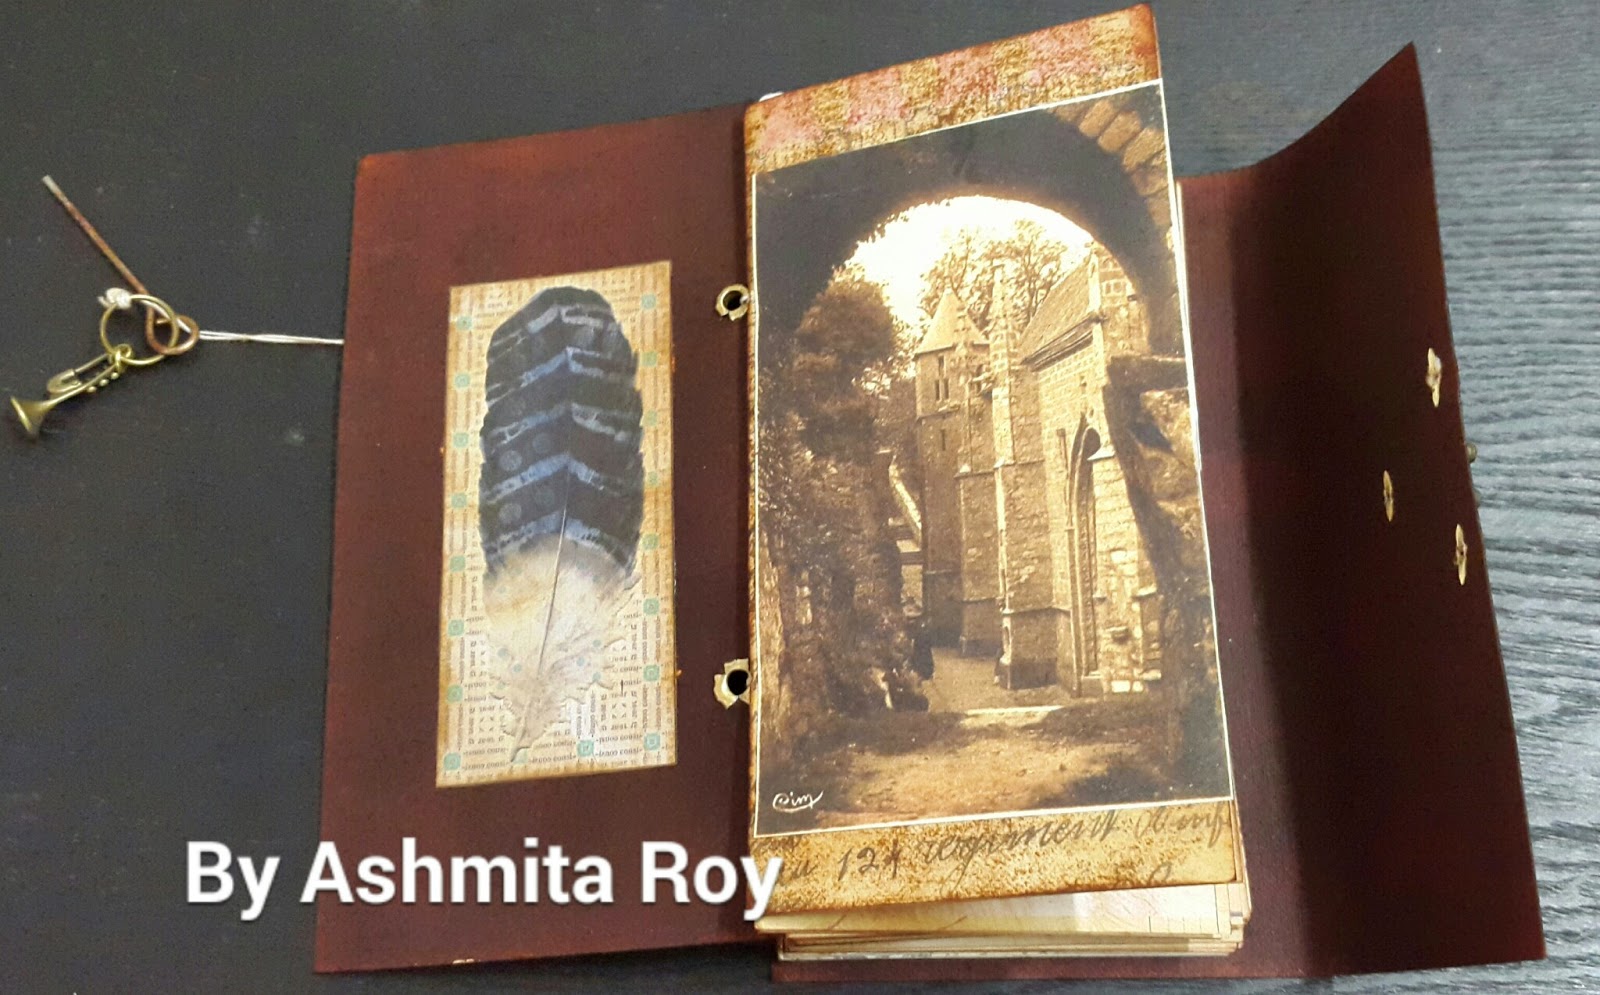
I have a very exciting project to share with you guys its really really unique and what makes it unique is the papers its the new Spellbinders Ephemera Papers One.

This papers are  so beautiful and I wanted to showcase them alone!! 

I used the papers to create the pages and used Coptic Binding Method To stitch the book (This way of binding is hundreds of years old!!) The cover that looks like leather Is not leather but heavy weight cardstock I have used several layers or techniques and materials to get that leather look.


WATCH THE FULL VIDEO FLIPTHROUGH


Materials Used

Thanks for Visiting
Don't Forget to Subscribe!!

Ciao
Ashmita


Monday, 24 November 2014

Travel Junk Journal - What and how My style!!

Namaste Guys

Time for festivals and holidays and everyone will be heading for vacations and I want to inspire you all with a Travel themed Junk journal. Before I show you the finished Project lets talk about what is a Junk Journal or  Junque Journal ?? A junk Junque Journal is a journal made from found items papers and scraps and pattern paper etc! It has many a functions you can use them to store your favorite poems or draw in them or add photos and write in them.
I have come up with a unique style of Junque Journal to take on my travels and the save all my travel memories and memorabilia and instead of using scraps and leftover found papers I use good pattern paper. 
So, this journal  I have designed for my upcoming trip and Ii have used the Far and Away Line from Teresa Collins. This paper collection is awesome to make a travel themed journal as It has some really great patterns and also a Die-cut sheet, and some sheets of Atc's and Journalling cards. A lot of the thinking and the work has been done for you.
Without further ado here is how I design and make my Junque journals, I divide the Signatures Day wise and add tons of pages, pockets, flaps and envelopes. So in terms of texture and page sizes there is a lot of variety and scope for adding elements like brochures and also for writing. You must be wondering as the pages are black how I do my writing I use a simple white gel pen to do so.


Just look at all the pages and the real estate so many places to write and add photos and brochures! So, you can get everything about your holiday and preserve your memories for ever.


As you can see This book is huge and I have made it 12 x 6 to get two full 4x6 photos on the pages !! and there the pages gradient from large to small to create movement fro the eyes that I think is attractive and adds to the charm.  

Materials Used
Thanks for Visiting
Do leave a Comment and Subscribe!!

Ciao 
Ashmita

Saturday, 16 November 2013

Goodies Wrapper !

Hello everyone!
Its Bipasha here with a yummy tutorial for you. How are you all? I had a busy week indeed and really needed this crafty syrup down the weekend to cheer me up ^_^ !!
With a countdown-to-Christmas planning schedule ,a bundle of Christmas cooking and craft projects are on the roll .So I thought of sharing a tute on how to gift Christmas goodies in a special Christmas Candy Treat Boxes !

So lets begin with the tutorial:(a picture heavy post,click on the pics for a detailed and clearer view)
This creative Christmas Candy Treat Box  is very easy to make. You don't have to own a die cut machine or electronic machine to make them.You just need a score board and a 12X12 pp to begin with !
Step 1: Select a 12X12 pattern paper (pp) and start scoring it using a bone folder and a scoreboard at the measurements(blue lines down the Side A / fig 1 and down the Side B/ fig 2 respectively) shown in the below pictures 
Fig 1:


Fig 2:

Step 2: The scored pp layout will look like below :


 Step 3: Now need to make a little triangle cut-out from corner to corner and using this cut-out as a template, fold the sheet to cut out more pyramids thereby forming diamonds down the horizontal length as shown below:


Continuing the same process along the other side down the horizontal length.


 Step 4:You can cut out designs or even add patterns using punches down the outer edge


 Step 5:Push both the sides and pop it out


 Step 6:Just fold it ,attaching the two end sides forming a rectangular box


Step 7:Now we need to close the two ends using some ribbons.


Step 8:Embelish Embelish  & Embelish in your own unique way (Sky is the limit !) and fill it in with some yummy goodies and you are done!!


This creative gift packaging is very unique and versatile! It can be used as packaging for candy treats, chocolate treats, a jewelry box or you can use it as home decor. You can even hang these Christmas Candy Treat Box as ornaments on your lovely Christmas tree. Hope you find my tute interesting and useful...Happy crafting!!

Products used :
Resin
Charms
Dimensional Magic
Mulberry Roses

Papermania paperpad
Gardenia Petals - white
(Ribbon,pearl,printables,bead string from my stash)

Last but not the least,don't forget to participate in our current challenge hosted by Pallavi- Make it festive.

Leave your queries and precious comments below,would love to reply you back


Sionara,
Bipasha ^_^