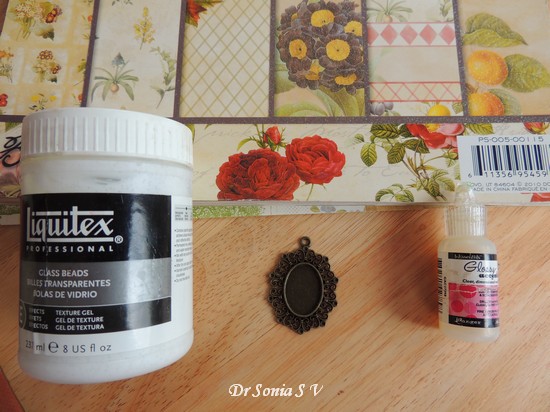
Hi friends, this month for my DT posts Shalini sent me 2
mixed media products
Whipped Spackle and
Glass Beads Gel which were quite unfamiliar to me.
I was plagued with something all of us as crafters go through at one point or the other ......un-certainity and self doubt! The reason for my confession is because I recently read a comment by a crafter that she had spent so much on craft supplies but was unable to actually make anything as "craft classes" were expensive. Now this comment somehow touched me deeply . Being fortunate enough to attend a class is awesome but sometimes the affordability issue, concerns of whether it is really worth it or as in my case time constraints and other commitments may be a big hindrance to attending classes...but you shouldn't actually let it affect your own individual creativity from blossoming!
Now back to the products I am discussing ...Whipped Spackle and Glass Beads Gel are two media there is hardly any material online at this point so I had very little to guide me on how to use it. I felt uncomfortable about committing "mistakes" but then this is Art....there are no mistakes!! And I hope all the new crafters out there take this message...there will always be something new to learn..do not be afraid to experiment on your own and a special word to all the perfectionists out there[ myself included!]....It is OKAY to be imperfect now and then in ART and CRAFT !
Whipped Spackle On its Own + Stencil
In my last post on
Whipped Spackle I used Whipped Spackle embossing powder on Whipped Spackle [ loved the glamour embossing powder lent it] and also experimenting and colored with gelatos[ which I didnt like].Here showing you how gorgeous it looks just as it is.
 |
| whipped spackle |
You can actually smear on
Whipped Spackle with your fingers or knife and it will hold its shape but I had a few old stencils I tried it with
 |
| whipped spackle |
Love the crispness of the stencilled Whipped Spackle !
Whipped Spackle + Distress Inks & Acrylic Paints
 |
| Whipped Spackle |
I used a tree branch stencil with Whipped Spackle and once it was dry ,painted on it with distress ink [ smear the stamp pad on plastic / craft mat and dip your brush in it and paint like you normally would]
If you want a very vibrant color you can actually layer on paint on the Whipped Spackle and it will take it all without flattening/ smearing.
 |
| Altered heart |
Since I was experimenting I did layer on several coats of not only distress inks but also regular acrylic paints in many areas of the Whipped Spackle branch and flowers
 |
| Resin Fairy |
The cracks on the gessoed cardboard surface were made with
distress crackle paint.
 |
| crackle |
And here is the altered heart [which was originally the cardboard base of a cake]
 |
| Altered heart |
If you want to want to know more about the supplies/ techniques I used to make the altered heart do drop by my blog later [
Cards Crafts Kids Projects]
Whipped Spackle + Alcohol Ink
If painting is not your cup of tea and you want a quicker way to add color add inks to the Whipped Spackle !Here I experimented with yummy alcohol inks.
 |
| Alcohol Ink |
Put whipped spackle on a plastic lid and added a drop of alcohol ink [ a little goes a long way with these vibrant alcohol inks]
 |
| Alcohol Ink |
Spread the yummy looking
icing [whipped spackle] on a stencil
 |
| Stencilled |
Made it smooth with a plastic knife and lifted it to get beautiful crisp texture a beautiful pale green color.
 |
| Stencilled |
Whipped Spackle + Glitter
Tried mixing in glitter with the whipped spackle...but that was a failure as the glitter got completely masked
 |
| Glittered |
But sprinkling glitter on the Whipped spackle while it was wet was a success
 |
| Glittered |
After shaking off the excess glitter...I got a beautiful shimmer on the bamboo.
 |
| Glittered |
Once it was dry I used a tiny brush to brush off the excess glitter from the area between the design.
Getting Different Looks using a Palette/plastic knife
 |
| Flat |
Texture media like Whipped Spackle act like icing...you can smooth-en it with a knife to get a flat surface
 |
| Ridged |
Or lift up the surface using your fingers or knife to get a beautiful ridged surface The best thing about it is that once dry the ridges don't get squashed...I put this box upside down and not a tiny part of the design got squashed!
Glass Beads Gel
 |
| beads gel |
Glass Beads Gel is another cool texturing medium which has tiny translucent glass beads embedded in it
 |
| beads gel |
Properties of Beads Gel and How to Use Beads Gel
- Looks white when you take it from the jar
- Dries absolutely Clear
- You can apply it to multiple surface like glass, metal , wood, paper on its own - no need to use any other glue
- You can use a plastic knife, brush or your own fingers to smear it
- You can use it on a stencil
- You can Paint over it
- On drying it reflects the colors of the surface over which you used it
Sharing a few project ideas and experiments
Beads Gel with Stencil
I placed a Lord Ganesh stencil similar to the one I demoed in the
Spray Adhesive tutorial over an alcohol inked background card stock and smeared beads gel over it
 |
| beads gel |
Its a very quick process...once you have a flat / peaked surface which you like lift off the stencil and you get a cool image!
 |
| beads gel |
What I found was that if you want it to dry quickly use a thin layer. If you use a thick layer it can actually take upto 2 days to dry clear!
 |
| Lord Ganesha Hanging |
My stencilled Lord Ganesha reflects the beautiful hues of the alcohol inked background I had created on metallic gold card stock!
Here is a glimpse of the Ganesha + Handmade resin Goddess Saraswati Wall hanging [something ethnic for a change] ...full details of which I will share later on my
blog.
Glass Beads Gel and Intricate Stencil
Here is the same butterfly stencil which gave such a beautiful crisp texture with Whipped Spackle in the altered heart project above not giving as cool/crisp design with beads gel ...the lime green color of the beads gel butterfly is a reflection of the
mowed lawn distress ink I used on the background !
Glass Beads Gel Smeared
 |
| box |
Here is the box lid I had stencilled a Bamboo design with Whipped Spackle earlier. Added some Cheery Lynn grass die cuts and smeared beads gel over it [seen in white]
Here is the closeup of the smeared beads gel before it dried
And here is how it looks after it dried [ average drying time 12 hours]
The beads gel looks gorgeous doesnt it ?
 |
| beads gel |
And here is how the box lid looks with a multitude of materials including homemade resin fairy , Whipped Spackle , Beads gel , actual pebbles, thermocol balls , Metal charms , Crystal flowers ..
 |
| Altered Box |
Painted Glass Beads Gel
In the altered heart shared above I used a leaf stencil to apply beads gel and painted over it with green acrylic paint
 |
| glass beads gel |
It was too vibrant for my liking so camouflaged it partially by adding a handmade clay rose and Heartfelt creations leafy branches over it !
Altering Embellishments etc with Glass Beads Gel
This is a plastic Christmas ball decoration [can be seen in this post :
Paper tree tutorial ] which I put on a bottle and coated with beads gel ...doesnt it look literally yummy!
My altered bottle got a new funky bottle cap! You can use the same idea to create cool flower centers or and unique embellishments for your projects!


Nice post ...
ReplyDeleteThank you !
DeleteNice post ...
ReplyDeleteWow...Dr Sonia...what an amazing fun post...such amazing techniques and awesome projects...TFS this wonderful post...❤️❤️❤️
ReplyDeleteThank you so much Nupur
DeleteAwesome in depth tutorials Sonia. As good as attending a class. Love that bamboo stencil.
ReplyDeleteThank you Rupa ! Such a morale boost getting such a comment from you!
DeleteFàb review Dr. Sonia...its always a pleasure to read your super informative n detailed posts....love the glass bead gel effect...and your creations are as always beautiful n rocking !!
ReplyDeleteThank you so much Shalu yes I Especially loved the Ganesha hanging ...I couldnt capture its true photo in the photos but it looks amazing shimmering!
DeleteOne more " Exactly what I needed post " ;D ! I recently got glass bead gel and searched tutorials on how to use it with very little success ! With stencils yes the stencil has to be tapped down very firmly ,and we have to apply the gel very carefully or seeps blow the stencil ,giving imperfect design :( I loved the effect it creates after drying.Your post is ver helpful in using the mediums you have shared .Thanks.
ReplyDeletePooja I didnt tape down the stencils but found that it gave best effect with bigger non detailed ones...as you can see in the Ganesha but the butterfly which was a delicate stencil was not so good.
Deletelovely post Sonia, love your experiments and lots of info here !! I strongly believe that one should never be afraid of trying new things....all failed experiments teach much more than following the tried and beaten track :)
ReplyDeleteVery well said Suman...I think we need to get together and explore more about made in India supplies too since I think you have tremendous experience there
DeleteAwesome Information & well explained post.
ReplyDeleteThank you Neha
DeleteWhat great ways to use these fab mediums. Loved your tutorial. Thanks for sharing!!
ReplyDeleteThank you Vinita coming from you it means a lot since you are so good with various products
DeleteCheers
Dr Sonia
Cards Crafts Kids Projects
SONIA u always surprise me with the natural talent u have ...ur excitement to work with different products and the way u create projects inspires me the most
ReplyDeleteWhat a lovely thing to say Arjita...Thank you so much !!
DeleteThats a whole loads of information Doctor... Love all the projects so well explained. Glittery shimmery effects are super awesome and Ganesha is my favorite :)
ReplyDeleteLove :)
Isha
Thank you Isha Yes Ganesha is my fav too and I couldnt really capture its glamour in the photo!
Delete:) Catching up on what I have missed and this post is WOW! Beautifully explained Dr. Sonia! Thank you so very much!
ReplyDeleteThank you for the support Halak
DeleteWow....amazing....
ReplyDeleteThank you Tanvi
DeleteCheers
Dr Sonia
Cards Crafts Kids Projects
Wow....amazing....
ReplyDeleteBoth beautiful pieces DrSonia. V tempted to buy glass bead gel now.
ReplyDeleteKripa the Glass Beads Gel is indeed a unique medium!
Delete