Followers

Showing posts with label uses of scallop circle die. Show all posts

Monday, 24 December 2012

Baby Carriage Tutorial

Hello Friends ,
This is Mallika here from Aola Handmade Cards with a tutorial on how to make these pretty favor Baby Carriages .
I had a tough time deciding what tutorial to make and I actually changed three projects . I was suppose to post this yesterday but was stuck in some emergency so couldn't post .Apologies ..
Now onto my project

How to make a baby Carriage ??


Item You ll Need -
Cardstock -  I am using Nana's Kids from DCWV 
Scoreboard - Martha stewart 
Trimmer - Tonic Trimmer
Nesting Dies - Circle scallop
Big shot 


Step 1: Cut the two pieces of cardstock, pink 4” x 5”, white 3 15/16” x 4 15/16” and one piece of 4 x1/4'' inches of cardstock


Step 2: Score both pieces of large cardstock at 1” on all sides


Step 3: Cut in at four places on both pieces of cardstock .


Step 4: Fold on score lines and adhere together.


Step 5: Insert lining into box to make sure it fits.


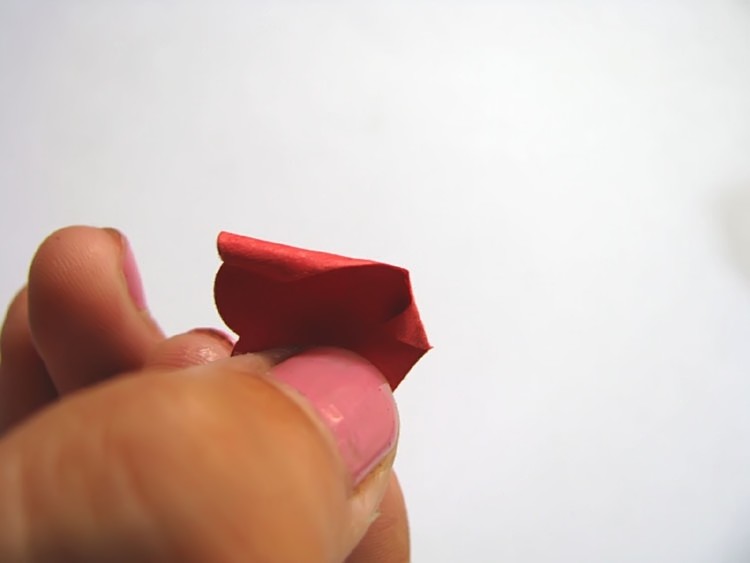
Step 6 : Cut either a round circle or oval for the carriage hood.  I used my largest Nestie Scallop Circle.  Cut 1/3 of it away.


Step 7: Using the larger piece of the circle, punch holes on
ends and attach it to the carriage with brads:


Step 8: Insert lining back into carriage box


Step 9: Put adhesive on ends of 4” x ¼” piece of
cardstock and stick in-between lining and box for handle:


Step 10:
Assemble the wheels and adhere to carriage.  Finish off with embellishments
For wheels you can simply take your nesting dies circle of course and assemble with the help pf small button /.


Wednesday, 24 October 2012

A tag and a flower tutorial..!!


Hi everyone,
This is Hussena here....And today I am going to share with you the tutorial for the scalloped punched flower which I had made on My gift box ..But I have to warn you all thats its gonna be a Picture- heavy post..So please bear with Me ..:)..So here's the picture of the tag first :-

                                                                   
Supplies used for the Tag ..All of these are available in Crafter's Corner :)

PP- DCWV Garden Party pack
MS Daisy Border punch
Butterfly -Paper pieced from DCWV Garden Party pack
Flourish Die cut -Cherry Lynn  Tropical Flourish
Mulberry Leaves & White fillers 
Scallop Punch
     

And here's a look at the scalloped flower tutorial :-

Supplies required :-

 1. Scallop punch...You will require a 1 1/2 Inch Scallop & you can use any brand whether be Punch bunch or Ek success or any other..!!These scallop punches are available in Crafter's corner..You can check them out Here & Here

Step2- Punch out around 6 of these scallops & fold them into halves and then into quarters like shown in the picture..!

Step 3- Now, cut these quarter scallops out and also punch out atleast 3 of the circles..This is a 1/4 inch circle punch.

 
Step 4- -  Fold these quarter scallops around you tweezers & roll them completely.

 
Step 5 -This is how it will look after you have done this to all the scallops.

Step 6- Now start unrolling these petals & bend the pointed corner into a small triangle as shown in the picture.


Step  7-Now ,start gluing the petals on the circle as shown below.


Step 8- This is how it will look after you have glued all the 6 petals.


Step 9- Now, with the help of a embossing tool or the back of a ball -point  /pencil emboss the centre of the petals.


Step 10-Create two  layers as shown in the above picture & then take the second layer & squish it between your fingers as shown .


Step 11- And ,glue  into the centre of the first layer of petals.


Step 12- After, gluing both the layers ,now shape your petals  outwards using your tweezers.


Step 13- Now, add a third layer of the scallop petals in the centre.Now, you have got a total of three layers and glue the third layer in the centre as shown in Step 11.


Step 14- Finally, take a quarter scallop petal & roll it completely to form a bud as shown in the picture & glue it in the centre of the flower.

  
Step 15-This is how your end flower will look like.I have added glitter to My flower & have used this in the Tag above.. :)

  
Hope you all like this tutorial ...Please do leave us your feedback and for any queries regarding products used either leave a comment or You can mail Shalini at mshalini79@yahoo.com   ...:)

Thanks for dropping by,
Have a good day everyone..!                                                                                                                                                                                                                                                                                                                                                                                                                                                                

Friday, 12 October 2012

SUPER EASY FLOWER TUTORIAL

Hello all,
hope you all are enjoy our inspirations ans tutorials,please feel free to let us know what you want to see in future as we are here to help you out in some creative way:) Its me kavitha here to share a super easy flower tutorial with you all today.We all love to make handmade flowers and use it in our projects,but always flower making takes lots of time and needs loads of patience too,so we probably end up in using ready made flowers.What if you can make a handmade flower in less than 10 mins?here is it..

All you need is spellbinders scallop circle die,punch craft paper(for this flower you need a bit thicker paper than usual,say 110-120 gsm),mini mister and fevicol.

I have left the first and last size of the die and have taken the middle 5 sizes.it totally depends on what size flowers you are going to make.The first two sizes you need 2 pcs each and rest one piece of each

With the help of your mini mister  spray water generously,crumple them and make it into a ball.If you don't have mini mister keep a bowl of water,dip the petal and take it out immediately

And then slowly open them and get it back into shape.Do each petal individually like this

Allow them to dry a little  for 5-10mins and when they are still damp stick all pieces together with the help of fevicol.Give a little shape with hands and fill the center with glitter balls,brad,or rhinestones.Super easy isn't it?you needn't  to punch,emboss,shape or anything,as easy as that,and the result?so effective.Doesn't it looks like a cabbage rose?


I have made Autumn wreath using these flowers.I don't have a picture tutorial for making the wreath,but i just explain how i have made it. I have cut 2 circles in a thick card stock with Martha stewart circle cutter.THe outer circle is 61/2 inches and inner circle is 4 inches.Sticked them together and wrapped with raffia ropes.
The flowers and leaves are arranged using silicone glue,the filler flowers are done with mini punched flower and wire pollens available in crafters corner.You can get all varieties of punch bunch punches at crafters corner.


Hope you like them:)
Happy crafting,

http://kalalayaa-artclub.blogspot.in/