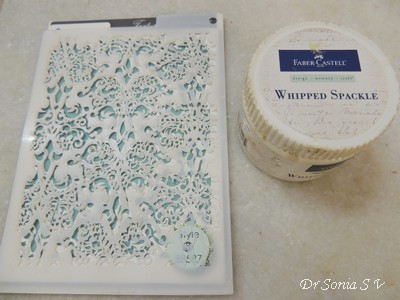
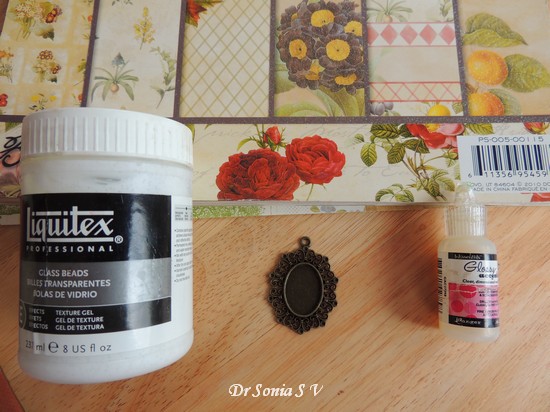
Hi friends, this month for my DT posts Shalini sent me 2
mixed media products
Whipped Spackle and
Glass Beads Gel which were quite unfamiliar to me.
I was plagued with something all of us as crafters go through at one point or the other ......un-certainity and self doubt! The reason for my confession is because I recently read a comment by a crafter that she had spent so much on craft supplies but was unable to actually make anything as "craft classes" were expensive. Now this comment somehow touched me deeply . Being fortunate enough to attend a class is awesome but sometimes the affordability issue, concerns of whether it is really worth it or as in my case time constraints and other commitments may be a big hindrance to attending classes...but you shouldn't actually let it affect your own individual creativity from blossoming!
Now back to the products I am discussing ...Whipped Spackle and Glass Beads Gel are two media there is hardly any material online at this point so I had very little to guide me on how to use it. I felt uncomfortable about committing "mistakes" but then this is Art....there are no mistakes!! And I hope all the new crafters out there take this message...there will always be something new to learn..do not be afraid to experiment on your own and a special word to all the perfectionists out there[ myself included!]....It is OKAY to be imperfect now and then in ART and CRAFT !
Whipped Spackle On its Own + Stencil
In my last post on
Whipped Spackle I used Whipped Spackle embossing powder on Whipped Spackle [ loved the glamour embossing powder lent it] and also experimenting and colored with gelatos[ which I didnt like].Here showing you how gorgeous it looks just as it is.
 |
| whipped spackle |
You can actually smear on
Whipped Spackle with your fingers or knife and it will hold its shape but I had a few old stencils I tried it with
 |
| whipped spackle |
Love the crispness of the stencilled Whipped Spackle !
Whipped Spackle + Distress Inks & Acrylic Paints
 |
| Whipped Spackle |
I used a tree branch stencil with Whipped Spackle and once it was dry ,painted on it with distress ink [ smear the stamp pad on plastic / craft mat and dip your brush in it and paint like you normally would]
If you want a very vibrant color you can actually layer on paint on the Whipped Spackle and it will take it all without flattening/ smearing.
 |
| Altered heart |
Since I was experimenting I did layer on several coats of not only distress inks but also regular acrylic paints in many areas of the Whipped Spackle branch and flowers
 |
| Resin Fairy |
The cracks on the gessoed cardboard surface were made with
distress crackle paint.
 |
| crackle |
And here is the altered heart [which was originally the cardboard base of a cake]
 |
| Altered heart |
If you want to want to know more about the supplies/ techniques I used to make the altered heart do drop by my blog later [
Cards Crafts Kids Projects]
Whipped Spackle + Alcohol Ink
If painting is not your cup of tea and you want a quicker way to add color add inks to the Whipped Spackle !Here I experimented with yummy alcohol inks.
 |
| Alcohol Ink |
Put whipped spackle on a plastic lid and added a drop of alcohol ink [ a little goes a long way with these vibrant alcohol inks]
 |
| Alcohol Ink |
Spread the yummy looking
icing [whipped spackle] on a stencil
 |
| Stencilled |
Made it smooth with a plastic knife and lifted it to get beautiful crisp texture a beautiful pale green color.
 |
| Stencilled |
Whipped Spackle + Glitter
Tried mixing in glitter with the whipped spackle...but that was a failure as the glitter got completely masked
 |
| Glittered |
But sprinkling glitter on the Whipped spackle while it was wet was a success
 |
| Glittered |
After shaking off the excess glitter...I got a beautiful shimmer on the bamboo.
 |
| Glittered |
Once it was dry I used a tiny brush to brush off the excess glitter from the area between the design.
Getting Different Looks using a Palette/plastic knife
 |
| Flat |
Texture media like Whipped Spackle act like icing...you can smooth-en it with a knife to get a flat surface
 |
| Ridged |
Or lift up the surface using your fingers or knife to get a beautiful ridged surface The best thing about it is that once dry the ridges don't get squashed...I put this box upside down and not a tiny part of the design got squashed!
Glass Beads Gel
 |
| beads gel |
Glass Beads Gel is another cool texturing medium which has tiny translucent glass beads embedded in it
 |
| beads gel |
Properties of Beads Gel and How to Use Beads Gel
- Looks white when you take it from the jar
- Dries absolutely Clear
- You can apply it to multiple surface like glass, metal , wood, paper on its own - no need to use any other glue
- You can use a plastic knife, brush or your own fingers to smear it
- You can use it on a stencil
- You can Paint over it
- On drying it reflects the colors of the surface over which you used it
Sharing a few project ideas and experiments
Beads Gel with Stencil
I placed a Lord Ganesh stencil similar to the one I demoed in the
Spray Adhesive tutorial over an alcohol inked background card stock and smeared beads gel over it
 |
| beads gel |
Its a very quick process...once you have a flat / peaked surface which you like lift off the stencil and you get a cool image!
 |
| beads gel |
What I found was that if you want it to dry quickly use a thin layer. If you use a thick layer it can actually take upto 2 days to dry clear!
 |
| Lord Ganesha Hanging |
My stencilled Lord Ganesha reflects the beautiful hues of the alcohol inked background I had created on metallic gold card stock!
Here is a glimpse of the Ganesha + Handmade resin Goddess Saraswati Wall hanging [something ethnic for a change] ...full details of which I will share later on my
blog.
Glass Beads Gel and Intricate Stencil
Here is the same butterfly stencil which gave such a beautiful crisp texture with Whipped Spackle in the altered heart project above not giving as cool/crisp design with beads gel ...the lime green color of the beads gel butterfly is a reflection of the
mowed lawn distress ink I used on the background !
Glass Beads Gel Smeared
 |
| box |
Here is the box lid I had stencilled a Bamboo design with Whipped Spackle earlier. Added some Cheery Lynn grass die cuts and smeared beads gel over it [seen in white]
Here is the closeup of the smeared beads gel before it dried
And here is how it looks after it dried [ average drying time 12 hours]
The beads gel looks gorgeous doesnt it ?
 |
| beads gel |
And here is how the box lid looks with a multitude of materials including homemade resin fairy , Whipped Spackle , Beads gel , actual pebbles, thermocol balls , Metal charms , Crystal flowers ..
 |
| Altered Box |
Painted Glass Beads Gel
In the altered heart shared above I used a leaf stencil to apply beads gel and painted over it with green acrylic paint
 |
| glass beads gel |
It was too vibrant for my liking so camouflaged it partially by adding a handmade clay rose and Heartfelt creations leafy branches over it !
Altering Embellishments etc with Glass Beads Gel
This is a plastic Christmas ball decoration [can be seen in this post :
Paper tree tutorial ] which I put on a bottle and coated with beads gel ...doesnt it look literally yummy!
My altered bottle got a new funky bottle cap! You can use the same idea to create cool flower centers or and unique embellishments for your projects!