Hi friends,
Happy winters guys!!! hope you are enjoying the yummy soups and hot coffee with your near and dear ones.The weather is getting chilly day by day and all are busy getting dressed and attending weddings this month ....huh!! it has been a real busy month for me too....anyways ...lets come back to some crafty chit chats...
I fell in love with a colour which is so attractive and fresh. I wanted to make everything around me look "teal" 😍
Yes this beautiful blue is my pick for the post today.
One of my friends sent me this gorgeous bottle(empty.....lol) she wanted me to dress it up and gift it back to her😝
This will be a picture heavy post as I really wanna share all the tips and tricks to make this beauty.
So let's begin....
Step 1:
Wipe the empty bottle nicely with a baby wipe and dry it completely. Peel out all the labels and stickers.
Step 2:
Apply two coats of white Gesso on the bottle and allow it to dry completely
Step 3:
Choose a patterned paper/napkin which you want to decoupage and cover the entire bottle as smoothly as possible. It won't be wrinkle proof so don't bother a lot.Use Mod Podge to adhere the paper pieces and to add gloss to the project.
Step 4:
I chose the beautiful colour blooms by prima to give some interest to the bottle. Kept layering colours till the time I was happy and satisfied. I used a tissue to wipe the excess and also dried it with my heat tool in between.
Step 5:
Once the spraying was done I allowed it to dry and then patted the entire bottle with some talc so as to get rid of stickiness(if any).
Now begins the favourite part of the project . Adding your creativity, embellishments and thought. I just make a rough sketch of the project but always change the my mind in between.
DECORATION :
I added some natural jute twine around the neck of the bottle, then wrapped it with a ribbon and pearl strings.
I love the chic effect embossing enamel gives to a surface and I added it at few spots on the bottle.
Dabbed the Versamark ink pad and melted the powder with my heat tool.
I wanted to make my own flowers for this bottle and I chose the gorgeous Arianna Blooms by heartfelt creations to create my teal blooms.
It's super simple to create these beauties. I stamped the image on a light blue cardstock with memento teal zeal ink and cut it with the coordinating die.
Added a touch of yellow in the center and layered them together.
The special effects sheets and their vintage pics are so beautiful that it's a must have for every crafter.
I trimmed the picture with my oval die and poured UTEE over it to make it look old and weathered. The effect is super cool.....completely loved it.
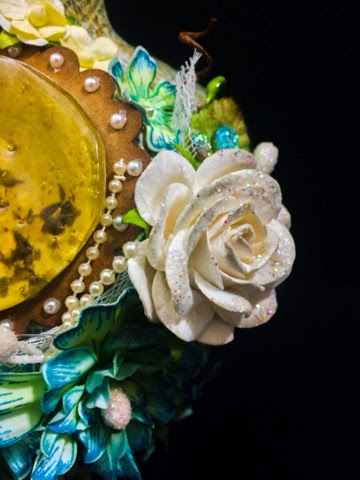
The final floral arrangement was super easy ,keeping the frame as the centre I created a cluster with my blooms and few mulberry leaves and roses.
Here are few closer snaps for you to have a better look at the sides .
I added some iridescent sprinkle over the roses and also used the glitter pollens as the center of the Arianna blooms.
Can you spot the cute lil bird ....I have not seen a prettier bird than this ever 😍
The melted granules of the embossing enamel looks really nice.
That's all for this post. Guys do give this a try it will add a beautiful personalised touch to your decor.
List of supplies :
Arianna blooms stamp
Pearls,twine,ribbon( from stash )


So many things to drool about on your project Arjita..love the enamel embossing, the beautiful twine idea and your gorgeous flowers. I picked up some Heart felt creations flower stamp- dies too from Crafters Corner...yet to really sit down and play with them!!
ReplyDeleteCheers
Dr Sonia
Cards Crafts Kids Projects
Thanks Sonia... Ur comments bring a smile on my face 😊
ReplyDeleteA Lovely Bottle .. The Vintage lady is my fav :)
ReplyDelete