Followers

Monday, 27 April 2015

Shabby tea pot

Hi guys!!
Welcome to crafterscorner!
It feels so good to be able to use all the best supplies of the world in our creativity and all this is possible because of "crafterscorner". There have been so many new brands which are pouring in our store almost everyday and that allows us to be more creative and to be at par with the top crafters of the world.

The new and old releases of heartfelt creations are extreemly gorgeous and blend beautifully with each other. My focus for this month was on flowers and heartfelt creations . In my last post I created flowers with the botanical wings die and altered a bird cage . Today I got my hands on an old teapot and gave it a makeover.
I have a detailed video tutorial at the end of the post and u can watch all the steps I used to create it.
For quick reference I am sharing some steps and pictures...
Step 1:
Clean the teapot properly and allow it to dry. Apply 2-3 coats of gesso to prime the surface. Allow it to dry naturally or use the ranger Heat It took to dry it faster.


Step 2:
Take modpodge and Tim holtz Tissue paper and stick it over the entire surface of the tea pot. This is called decoupage and it gives the surface a new look and texture. Once dry add thin diluted layer of gesso to lighten the print .


Step 3:
Take prima chalk edgers in shade DRY SAND to distress the edges. Blend using a wet baby wipe. Then add Inka gold GOLD on the egdes and other spots to give the teapot an old Victorian look.
Inka gold are highly pigmented creamy wax based paints which can go on porous/non porous  surface and dry super quick.


step 4:
Now add the Distress Inks with the help of a sponge and I used CRACKED PISTACHIO , BROKEN CHINA AND WORN LIPSTICK all over the tea pot.


This is all I did to prep the surface and then I started with the embelishments.
I chose heartfelt creations majestic morning Die and stamp to make my flowers. And Elizabeth crafts leaf die for my project today.


Step 1: 
Stamped the stamp with versafine watermark ink and heat embossed using ultra fine white embossing powder.
Step 2:
Die cut the flowers by creating a die template .
Step 3:
Colour the flowers with distress inks 
ABANDONED CORAL,PEELED PAINT AND WORN LIPSTICK.
I used a water brush to colour the flowers and the embossing areas left white.


Step 4:
Moulded the flowers with a ball stylus and stuck them together. Then added some gold glass glitter in the centres using aleen's tacky glue.


Finally I arranged everything on my teapot. I also used three butterflies from the peon papers, few mulberry roses and leaves to make my bunch look fuller.
Added few blings ,metal charms and lace to make the look complete.


I have a detailed video showing all the above steps. 
Here is the link:


Hope u liked my post for today.
See u soon....till then keep crafting 
And take care 
Hugs
Arjita 

List of products:
Laces,bling,pearls,Ribbon (from stash)

Friday, 24 April 2015

Capture Memories!


“The gladdest moment in human life, me thinks, 
is a departure into unknown lands.” 
– Sir Richard Burton


To travel is to discover,
Its all about exploring the unknown,
making memories,
capturing the moments
cherishing...
those good old days... 


Filled with freshness, lively designs, happy colours and soothing feel
Heidi Swapp - September Skies Paper Pad suited the best to work with.

The theme being travel, I choose the following papers
with graphic elements with blues and greens .
(oh these patterns are amazing!)
Decisions, decisions, decisions! 
Which paper goes at the top?
Which paper goes at the bottom?
Which paper dwells in between?
(after a bit of thinking...)

Using the amazing super sturdy Tonic super trimmer
I have trimmed the following papers according to the sizes mentioned below.
(12" x 12" - Base)
no need to trim
(11.5" x 11.5"- Centre)
(11" x11" - Top)


Then I decided to go with the following paper being at the top.
(It is upto you to decide which paper you want to embellish.)
I turned the blue pattered paper over and used the white page instead as I love White.
(There are several times when breathing space is required.Hence White suited the best.)


Viola! After deciding their positions it is time for the icing.
I picked these 2 papers from the Stack with some 
amazing quotes, words, patterns, bright and happy snap cards.
Timmed them using the super amazing Martha Stewart Scissors.
(It is always a good idea to use the snap cards to make your projects interesting
 and to give that little memory touch.)


Then I chose the following papers and 
trimmed them according to the sizes of the snap cards. 


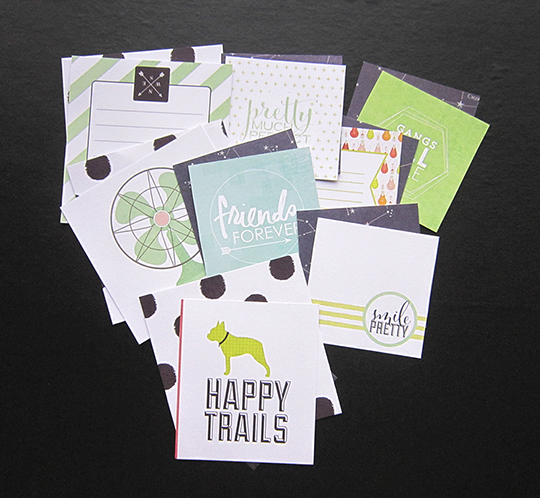
Having looked at all the snap cards I picked few of the co-ordinating ones,
especially the ones with travel icons and memories icons.
I loved the friends forever, happy trails and smile pretty.
(good old memories! These few words took me right back in those times.) 


Then aligned each of the following snap cards
to that of the black trimmed paper pieces.
Using the super tacky - red tacky tape I pasted the snap cards 
on to the black cards to make the snap cards sturdy.
(I always prefer using the amazing tacky tape 
due to its  super tacky and transparent clear crisp sticking qualities.)


Lets begin assembling now.
Using the super red tacky tape - especially 24mm is excellent to stick and align the 3 papers 
in the centre as shown in the image below.
(There are several ways to arrange these papers)
(The red tacky tape is also a bubble free solution to stick your pages)


Now its time for the snap cards arrangement,
Using the 3D foam tape and the red tacky tape - 4mm and 8mm suits the best
(It is always a good idea to add dimensions to you layout, 
it add depth and makes your layout look interesting, 
hence a play with both is must.)
(Its a must must have tacky tape.)


Once all the snap cards have been placed
its time to add the photo mats.
(There are several way to arrange the snap cards and photo matts.) 

Moving it all around and then deciding where it looks good 
could be very fun idea to experiment.


Oooh these eye candies are just too amazing.
Playing around with it all is indeed super fun.
(I just cant get my eyes of these candies, they are so yum..
I love these embellishments.)
But at times a question about how to stick them often gets me thinking..
All thanks to the amazing tacky glue
it dries all clear and indeed a perfect solution for all the sticking problems
(If you haven't tried it yet, its must a try).


Ahaa...now its time to add some cherries on the top, using the amazing and super cool
(These beauties are a must, they are just super cool and can do 
wonders in beautifying your projects and add those little emotion touches and boost up your page. )


And here it is...all ready...

 - - - - - - - - - - - - - - - - - - - - - - - - - - - - - - - 

If you wish to play around with this wonderful collection here are some more Inspirations.


- - - - - - - - - - - - - - - - - - -


The Products List:
- - - - - - - - - - - - - - - - - - - - - - - - - - - - - - -

I hope I have inspired you to create 
Have a crafty weekend
Thanks for Stopping by
...Nupur Patel...