Followers

Sunday, 25 September 2016

Money Envelopes!


Hello everyone! 
Welcome to Crafters Corner Blog! The festival season is about the begin and the easiest form of Gifting is Money envelopes! We all use them all the time! I just love making them So I thought why not make some Gorgeous envelopes for today's post? I've used a mix of Dies, Punches, Mulberry flowers , metal charms and not to be missed our latest Glass Cabochons! They look absolutely amazing! 

So without much ado lets get started! 
Well Here's the fist one I've made! Isn't it pretty? Keep scrolling to learn how to make it! 


I started of by taking a die cut of the Gorgeous Prima Marketing Doily die and distressing it lightly with Stormy Sky distress ink 

Now add this to the base. 

Next taking a small oval die cut from the Spellbinders floral ovals set I pasted it on top of the 1st die cut and added the lovely cabochon on top of it 


Next I used some Gorgeous mulberry flowers from our store along with some leaves i die cut using a cheery lynn die. For the final touches I've used metal dragonflies from the store along with some crystals! 


For the next envelope I started by painting one of these frames with Prima Artalchemy Stempunk copper paint. It looks soo pretty! 

Next I pasted this piece on some cardstock so the inner window has some base for the little detailing we are adding! I am using this pearl string from our store along with the prills! These prills are amazing they look look cute and are great for flower centers and mixed media too! 

Start by sticking the nest on the bottom end of the frame. It fits perfectly! 

I've added a thin line of Glossy accents for the pearl string 

You might need a tweezer to fit the string. Let it dry completely before you go to the next step. 

Next add glossy accents to the inner area of the frame and add prills. Shake off the excess and your piece is done! 

I've border punched a strip of Cardstock using this super cute punch by Martha Stewart 
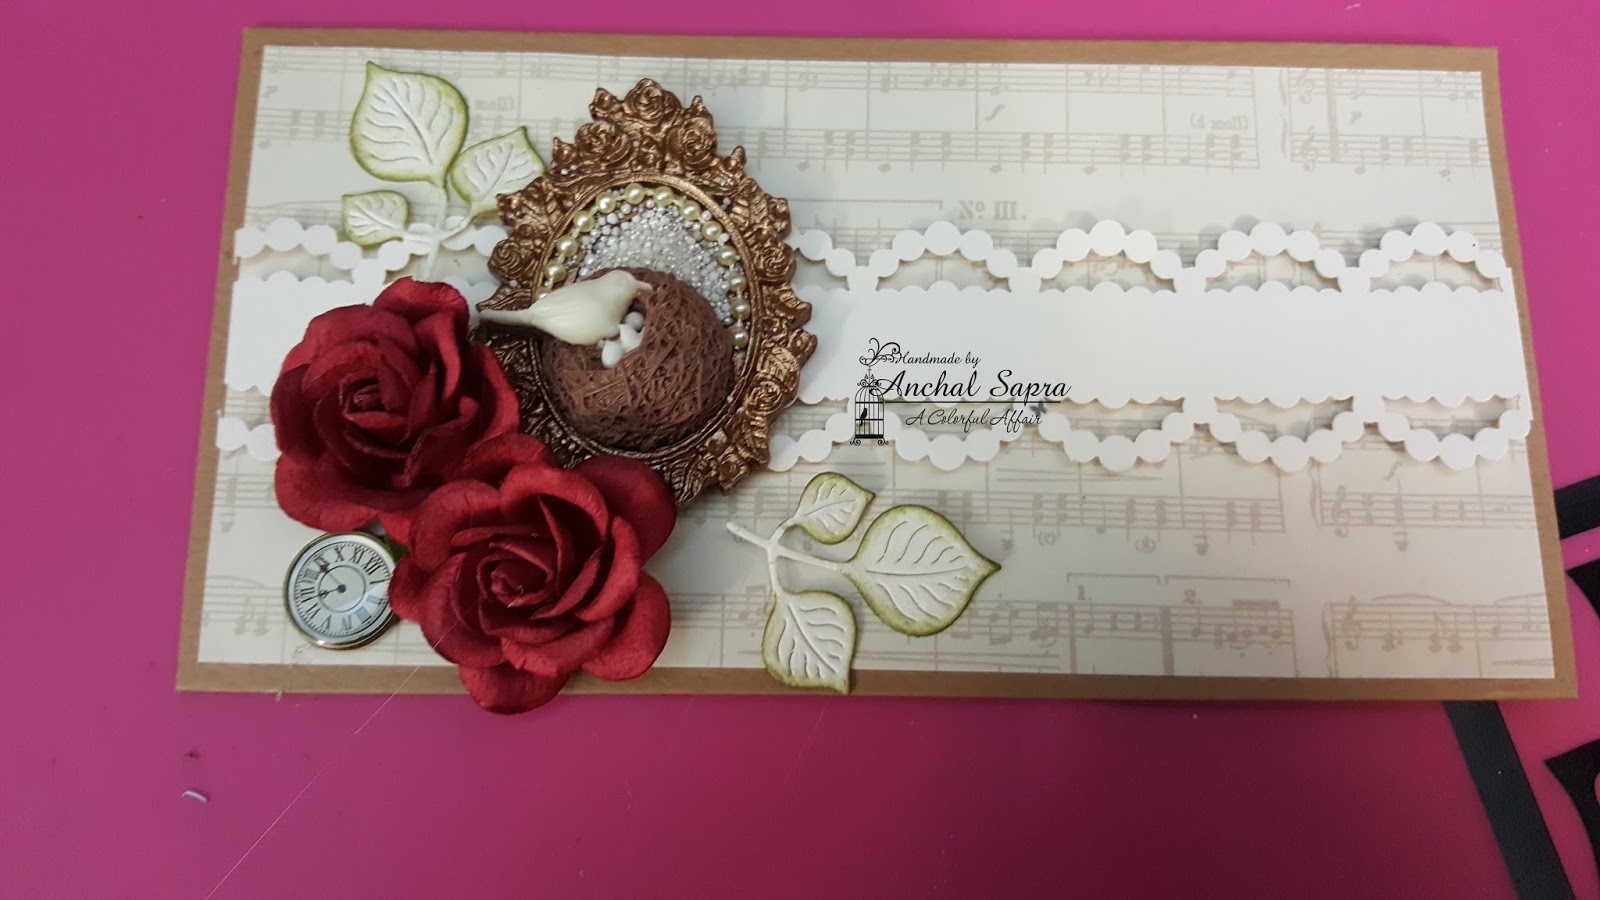
I added it to the base , aligned my frame and added my flowers with some die cut leaves and a metal charm! 

Next i've added these resin flower frames and for the center I've used these amazing glass pearls by Prima! these are high quality pearls perfect for making jewellery! You must try them!
For the finishing I've added some lace from my stash and you are done! 


Next I've taken this super vintage looking glass cabochon from the store and added it to this resin frame from our store

Next I've taken the smallest die die cut from the Spellbinders Decorative Labels 8 die set and added this frame to it. 
Next I've taken an oval die cut from Spellbinders floral oval die and distressed it lightly with tattered rose distress ink. This is such a pretty colour I absolutely love it! 

Now comes the wow part! To add some glam I covered the oval with Art glitter glue and then sprinkled Clearsnap's Pralines & Cream glitter on top of it. This is such a pretty colour of glitter! Goes with all kinds of projects be it vintage, grunge or brights! Its such a must have! 

See this is how it looks! Isn't that PRETTY!?

Adding the die cuts and layering them with foam tape 


Next added some mulberry flowers and die cut leaves. For the finishing I've added the super cute resin bow! And we are done! 

Hope you all enjoyed today's post! 
Hoping to see you all make some pretty envelopes! 
Please feel free to ask any questions. Thanks for stopping by!
Hugs 
Anchal Sapra 


PRODUCTS USED 


Friday, 23 September 2016

Intricate Die Cutting Tips


        Hi crafters, Dr Sonia here back with another post on die cutting! I got my Big Shot a couple of years back and have been in love with die cutting ever since!!Whether you are a hobby crafter like me or considering turning your hobby into a profession or side business this is one baby you should get .....and no this is not the "DT" in me speaking....I just love die cutting!!
          In the last 2 DT posts I showed you various ways to use labels/ nesting dies . Here are the links in case you missed them : Stretching your Dies and Going 3 D with Die

         I got this beautiful ,beautiful Spellbinders Floral Gazebo die from Crafters Corner for my DT post and since it is such a gorgeous intricately designed die I thought I will show you some tips to die cut such intricate designs.

And before I do that let me give you some tips on buying dies
  • Google up the name of the die and see if the project photos appeal to you .
  • See if you are getting value for money...Count the number of dies in a set and also check out the size of the dies as well as the individual die designs. for eg in this Floral Gazebo die set...you get 7 dies which includes 3 styles of leafy vines , a flower, a cute bird and a very versatile heart in addition to the main gazebo!
  • If you are confused which brand die to get....I would advise you to opt for the more reputed brand even if it is more expensive unless you have read / heard rave reviews of the "cheaper/newer" brand! Some years back I got a circle die set from a brand which I will not name and was so frustrated that it wouldn't give clean cuts! And yes mailing them didn't change the situation. Later I bought a more expensive circle die set from a reputed established brand and boy do I love the clean easy cuts it gives!
Well I can go on and on about tips on buying dies but then ...you are here for another subject isnt it!!

I created a Stair Step Pop Up Card using the Spellbinders Happy die as the base and used a couple of gorgeous intricate dies from Spellbinders like the Spellbinders swirl bliss pocket and the Spellbinders Romantic Agenda in addition to my all time favorite die brand Marianne Designs !

The beautiful lacy corners were made by cutting up the  Spellbinders swirl bliss pocket die cut and dressing it up with tiny pearls[ with the help of the Crystal Katana!]

I used the gorgeous papers from Bob n Betty for the base of my Pop Up Card and hence kept the embellishments to a minimal.

Now coming to the tips on cutting Intricate Die Designs...these will be known to the seasoned papercrafter but sharing here for the benefit of the newbies!


When you use an Intricately detailed die such as the Floral Gazebo or any other when you pass it through your big shot  it is common to get what you see below.....the die has hardly made an impression on the paper!


Factors which determine how easily and crisply you can cut intricate dies
How old your Big Shot is 
How bent your Cutting pads are
The brand of your die
The thickness of your paper
The Intricacy of the die design
How to Cut Intricate Dies
1. Use the Metal Adapter Plate

Well the solution which works for me and which is the standard recommendation in crafting circles is the metal adapter plate.....this literally changes your die cutting life. So if you dont have one...I suggest you add it to your next purchase!!
Add the metal plate adapter under your cutting plates and proceed with the usual die cutting sandwich.

2. Keeping your die cutting surface up
This is especially important for intricate designs. In case you have to see where you are cutting...in the first round use the die cut surface down but in the event you get a partial cut ...flip it and run it though your machine with the cutting surface up

In the picture above the area in the lower part is still not cleanly cut even after the use of the metal plate...in this case just rotate the die and pass it again through your machine
3. Give 2 passes Rotating at 90 degrees

This will give a lovely clean cut unless you have a really naughty die with a super delicate design!

Releasing your Die cut

Releasing die cuts from the die or releasing the tiny die cut pieces from the main die cut can be time consuming.
You can  use the popular Spellbinders tool n one which Shalini tells me is an awesome tool and good investment as it has a brush end to clean your die and a needle end and spatula to help release the die cuts.

If you want a cheaper alternative....use nice fat pins like the corsage pins shown above which by the way are also available at Crafters Corner at this link :  Corsage Pins  and a foam pad.
You can poke the die cuts while the die  is still in the die or peel the die cut off and poke out the pieces.

I find that using the foam pad gives a nice support to the die cut and makes poking out the tiny pieces quicker and easier.
Releasing Stubborn die-cuts from the Die

Suppose you have a really stubborn die cut sticking to your die  and it irritates  you big time...there are a couple of things you can do..
1. Try the conventional poking with needle 
2. Try with needle and brush part of the Spellbinders tool n one
3. Use die release paper or wax paper between your die and paper the next time you die cut
Picking up tiny Die cut Pieces

If you want to try techniques such as inlaid die cutting or you have some really tiny die cuts or negatives of die cuts you want to use...picking up these tiny pieces can be tricky. Some of the tools which can make your job easier are
1. Reverse tweezers.....my fav for flower making and embossing...not so much for tiny piece picking after I got the Tanto and Crystal Katana
2.Silhouette's pick me up tool
3. The best pick up tools...as reviewed in this post : Crystal Katana and the Tanto

Sticking Intricate/ Delicate Die cuts

Sticking those delicate die cut pieces can be so tricky
Here are some options
2. Fine nozzle glue which is quite tacky such as the Tombow 
3.Glue Pens
4.Thin double sided foam tape or tacky tape

And here is a final look at the card with all the intricate die cuts!
I hope you find these tips helpful.
Shoot any die cutting queries you may have in the comments and I or any of the experienced DT or Shalini will try to help you!

List of other Supplies
Dies : Cheery Lynn Flourish 13 , Cheery Lynn Build A Flower Embellishments 3 ,  Marianne   Anja Border , Heartfelt creations  Sun kissed fleur ,
Papers: Bob n Betty