Followers

Showing posts with label Wall hanging. Show all posts

Wednesday, 30 November 2016

Wall Decor and FolkArt Painted Finishes

Hello friends !!!! Anita here!!
Can you believe that we are at the end of the year and in just 30 days, we will be saying goodbye to to 2016!!!!
And what a year this has been !!!! At least for me , it's been a lucky year !!!! Because this year I joined Crafters Corner !!!!!

Do let us know how good or bad the year has been for you. And now to some crafty chit chat !!!

FOLKART PAINTED FINISHES 


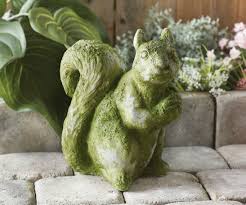
Does the name seem to be familiar!!! Well, that's the awesome new paint from Plaid Folk art range and it is one fabulous product.So beautiful is the finish that I could not believe that such natural looking texture could be achieved with this.


Picture from Google


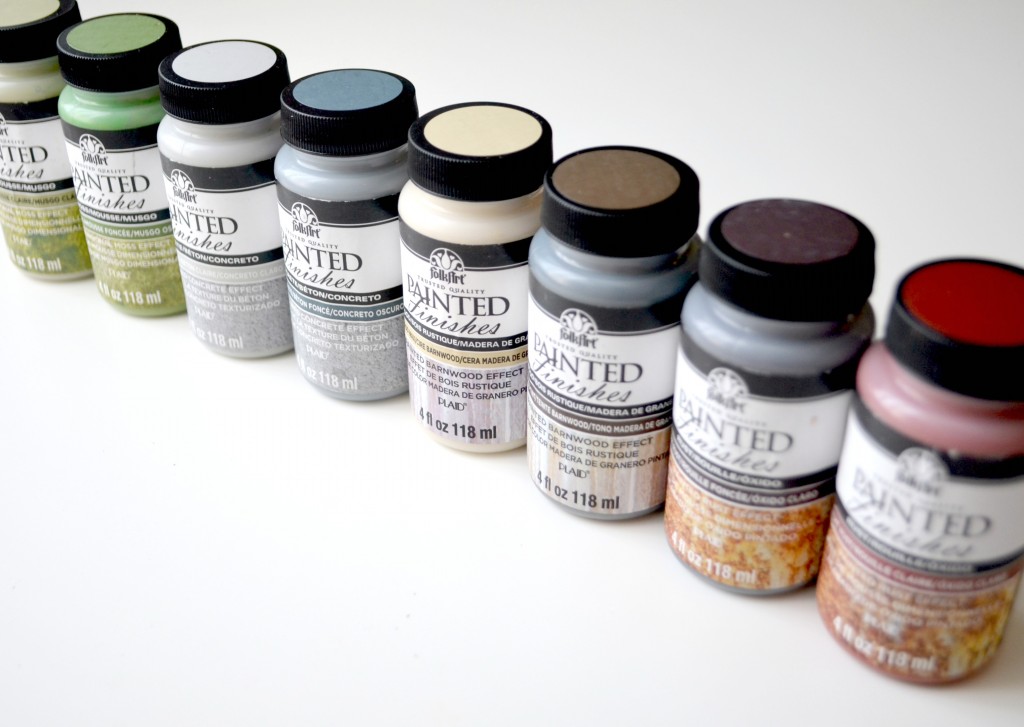
Pictures are from Google

FolkArt Painted Finishes is a Texture finish paint that gives a natural organic look to a project. These come in four colours-Concrete, Moss, Rust and Barnwood . Crafters Corner has Rust and Moss in both light and dark shade.
It is applied with a DAB-ON technique that is dabbing method and is non-toxic in formula.
You need not apply Mod-Podge to seal the project when painted with Painted finishes as it is a sealer also. I can be used on wood, plastic, ceramic, metal, concrete and glass.
I usually takes 4 hours to dry.
Surface preparation depends on the type of surface you've chosen.

  • Wood –  Because FolkArt Painted Finishes Moss is a thick textural paint, there is no need for additional prep whether working on finished or unfinished wood, even if the surface is very rough.
  • Terra Cotta – No prep is necessary when decorating terra cotta.
  • Plastic – Wash plastic surfaces in warm, soapy water to remove any existing grease film. Allow to thoroughly dry.
  • Papier Mache – No prep is necessary when decorating papier mache surfaces.
  • Metal – Wash all new metal surfaces in warm, soapy water; allow to thoroughly dry. Moisten a paper towel or soft cloth with distilled white vinegar and wipe over surface; allow to dry.
  • Cement, Masonry and Garden Statuary – Apply a coat of white vinegar (to neutralize lime), allow to dry, rinse, and then allow to dry thoroughly.
All  Painted Finishes paints can be used outdoors.

What type of brushes should be used for painting with Painted Finishes?

You must use Stiff bristle brushes to paint as these are heavy paints. The brushes can be easily cleaned with warm water and soap.


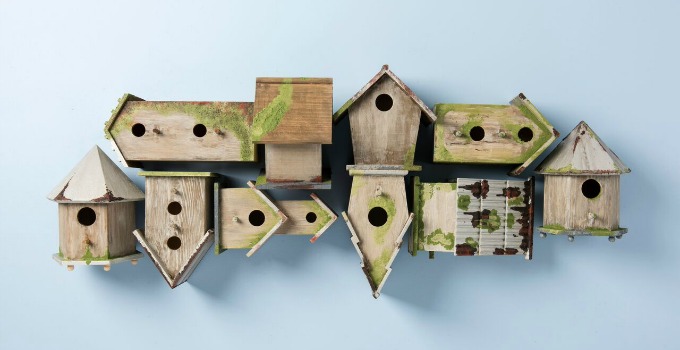
I have used these paints to create a wall decor piece with some textured effect using the Painted Finish Moss and Rust.


Do follow the video where I show you how to make this.


Products used


Do leave your comments and feedback. If you have any queries, please email us at info@crafterscorner.in
Thanks for stopping by.


Sunday, 21 April 2013

The 'showcase' of Mod podge continues!!!

Hello everyone!

Good morning! How are you all? Isn't the summer unbearable already? :-/ I feel like sitting in an air conditioned room all day and do nothing! :-D

Well, before I forget what I'm here for (Yes, I'm capable of that, I almost forgot that it's my turn to post today!! :)) let me share whatever I wanted to. :)

I have a pretty wall decoration and two cards to share. For those of you whose eyebrows are raised, let me tell you that I've a habit of making many cards in the process of making the one I planned to. :)

So here they are... (Since Mod Podge is the product of the month, all my three creations have mod podge on this)

The first one a 6x6 wall decoration. I couldn't hang it on to the wall and take a picture as the pictures taken indoors are coming out horribly.
 Zoom in the picture to have a look at how mod podge looks... used satin finish mod podge for this one.... I used mod podge matte to glue everything down onto an MDF chip board.

Applied mod podge to the flowers too...There is good collection of flowers available at Crafters Corner.


Supplies list-
For the wall decoration-
PP- Zephyr paper pad.
Tumbled glass and mustard seed distress inks
Flowers, label, doilies and glitter balls- Stash


The second one is a card...

Oh yes, I know it is pretty! :-p

Did you notice the black 'grainy' black band on the top of the card? What do think that is? It's Semolina (Suji) mod podged onto the card stock! :) I don't have pictures of how I did but it's simple...

Take a strip (whatever size you want...)of CS and apply mod podge on it. sprinkle Semolina on it. See that there are no gaps. Take some Mod podge in a bowl, mix acrylic color of your choice and apply on the layer of Semolina. Let it dry. 


By the way, isn't the bee stamp adorable? You want one? Get it HERE. :) I sooo love the tiny pink flowers. They are Kaiser crafts flowers.

Supplies list-

PP- Rondelle aper pad
Cheery Lynn Lace corner deco dies
Mod podge Satin finish
Kaiser crafts flowers
Stamp- Lawn Fawn 'Bee mine'


The last one to share is a card again...


See the finishing of Mod podge? I'm in love with this product!
Hope you like them...

Supplies list-
PP- Romance Novel paper pad
Mod podge Satin finish
Tumbled glass , spun sugar distress inks
Eiffel tower die
Sentiment- MME- The sweetest thing honey
MS doily lace punch
Pearls- Stash

That's all from me! Have you entered the challenge yet? Click HERE for details. You still have 9 days to enter...

See you!! Have a great day...

If you have any queries regarding any product, you can get in contact with Shalini - info@crafterscorner.in


Sunday, 7 April 2013

MoD PoDgE MaGiC!

Hi All!!!

All this month we are showcasing a wonder product.. Mod Podge!!! This is used for decorating almost any surface... The most famous use is decoupage.. which is decorating anything with paper.. I am showing you use of mod podge on MDF surface.. for this I have made a wall hanging..


I have converted an MDF mini album into a wall hanging.. Sorry for the bad images but it looks so wonderful in real.. I glued papers on wood with Mod podge and coated it again with mod podge on top to protect paper from dust and fading...

Here is a closer look...


Products Used:

1. Mod Podge
2. Lost/Found 2 Rosy Designer Paper
3. Lost/Found 2 Breeze Designer Paper Pad
4. Petal Palette Handmade Paper Flowers
5. Ribbon and other embellishments from my stash

I hope you are playing the current challenge which is BINGO! I have use middle coloumn.. Pearl/Rhinestones+ Pattern Papers + Dies...

Products used here are all available at www.crafterscorner.in, for any query contact us at info@crafterscorner.in

Happy Sunday!
Priya...

Sunday, 6 January 2013

Tilda Wall Hanging

Hi All,

It's Priya here.. Today is my turn to showcase the loveliest girl Around; Tilda! She is the most sought after cutie among paper crafters..
Since, the challenge for this month is anything but a card/Layout, I made a wall hanging...

Here it is..


I used the paper weaving technique again to make background...
Now let me show you Tilda clearly.. I colored it with water color pencil... I wish I had distress markers.. :(  But no worries! Crafters Corner have Koi Water Brush ! it's a gr8 tool for coloring...


This is Tilda loves flowers stamp.. You can see so many expressions of Tilda at Crafters Corner... and on top it, you can buy these stamps at the most reasonable price at Crafters Corner... Believe me.. Sometimes I think, I should import this cutie from India.. :D

Other supplies that I have used is..

1. Lovely Fence Die
2. TIm Holtz Worn Lipstick DIstress Ink
3. Tim Holtz Mustard Seed distress ink
4. Koi Water Brush
5. Gardenia Flowers
6. Magnolia Crystal Stems
7. K & Company frame die cut
8. Ribbons, laces and metal charm from my stash

So that's it from my side..

For any further information regarding any of the products please contact :-info@crafterscorner.in

Have a great Sunday!

- Priya..

Wednesday, 21 November 2012

Wall hanging tutorial

Helloall,
 its kavitha here to share a tutorial today.First of all i am so sorry for the poor pictures,my camera phone is already dying and top of it my computer is corrupted and all software's has been deleted,so not able to edit the pictures:(.
The tutorial is to make a mobile hanger with paper scraps.All you need is circle punch-from EK success,Martha stewart doily lace border punch,fevicol,stitching thread,pattern paper scraps and ribbon.

Take a 18" strip of card stock(2 inches width) and punch the border.Stick both the ends together,you will get a base like this.

Take the punches circle,apply glue and fix the thread in the middle and stick another punches circle over it.In this way the thread gets covered and both the sides will have patterns.In case you can stitch you don't need to stick the other sides,instead you can use double sided pattern papers.

I made 8 strands of punched circle and attached it to the base.For hanging it punch 4  holes on four sides in the base,take one meter of ribbon,put a knot on one side and attach it to  the base.Finally join all the four ribbons together and tie a bow.

Hope you liked it,you can try this with different shapes like heart,stars,butterflies etc.Best way to use your scrap too.This looks lovely in real.
 http://www.crafterscorner.in (All craft supplies under one roof)
For any further information regarding any of the products please contact :- info@crafterscorner.in


Happy crafting,
kavi

Sunday, 7 October 2012

CUTE TILDA HANGING

Hello all!!:)
its me kavitha here to share my part of inspiration today,but before that i want to thank you all for the wonderful response you gave for our new blog.Reaching 100 followers within a week is a record for sure,thanks for all the love and keep them coming.We promise you to give the best part from our side.And also thanks for the amazing response for our first challenge,i just want to remind you all again that the theme for this month is "Celebration+flowers",that is we want to see projects with celebration theme like birthday,anniversary etc with lots of flowers,i have seen some entries without celebration theme so thought of giving a gentle reminder.

 So now moving on to my project,i have made a cute wall hanging with my favorite tilda stamps.This can used as card hanging,door hanger etc.I have use tim holtz weathered clock die as the base and decorated them with magnolia stamps n dies.There is nothing much to explain,hope you liked it.If you have any question feel free to ask in the comment section.Scroll down for the complete supplies list.

Supplies used:
Magnolia doo hickey heart swirl and doily flowers
Magnolia stamp:Tilda with cozy heart


Happy crafting,


Kalalayaa art studio