Hi crafters Dr Sonia here to share a 2nd project with Liquid Leaf .Sharing a mini tutorial on decoupaging a plastic container with gorgeous Bob n Betty papers .I jazzed up the edges of the container with fabulous Copper Liquid Leaf to bring out a uniform and rich metallic copper theme to the project.
Heartfelt creations Botanical Wings flowers
The flowers were made by heat embossing in copper some Heartfelt creations Botanical Wings stamps.
Heat Embossed Flower
The heat embossed parchment flowers were randomly inked with Distress Inks to match the colors of the florals in the pattern paper.
Pearls placed with Crystal Katana
I have been adding lots of tiny pearls to my projects ever since I got the Crystal Katana as its so quick and easy!
Crystal Katana and Tanto
Used the Crystal Katana to add the pearls on the edges of the paper and on the tiny plastic butterflies
Crystal Katana in Action
I used the Made in India Ornate Annie papers designed by the talented Deepika Sharma and which is sold exclusively at Crafters Corner .
Bob N Betty Pattern Papers
Here is the plastic container I altered by decoupaging
Altered Project
For anyone wishing to start decoupage these are the Basic tools of the trade!
Decoupaging on Plastic Tutorial
Decoupage Glue- most popular is Modpodge
Scissors - normal and fine if you want to fuzzy cut pictures to decoupage
Scale- to measure out the sides of your projects and pattern paper
Pen/ pencil to help mark your pattern paper and cut
Squeegee- I have used a different type of plastic squeegee in my Sospeso Trasparente projects which is rather nice but totally in love with the squeegee in the Mod podge kit because of its rubbery nature and wedge spage at its ends which allows one to reach awkward nooks and corners like I will show in the subsequent pictures
Not shown in the picture : Sanding / distressing tool and
Brushes to apply modpodge - use sponge brushes or regular brushes
Decoupaging on Plastic Tutorial
Measure your project and cut pattern paper to line it. I personally like to cut slightly less than the dimension of the side to be covered as I hate to later sand down and cut the paper once it is stuck to a project.
Decoupaging on Plastic Tutorial
If your plastic is super smooth ,sand it to give it a grip .
Apply decoupage glue using a brush as shown above[ the brush I am using above comes with the Plaid Decoupage Kit] - dont add too much glue as it will just wrap and wrinkle your paper.
Decoupage kit
Stick on your pattern paper starting from one end of your project.
Decoupaging on Plastic Tutorial
You get the best results on decoupaging if you remove excess glue from under you paper and here comes the advantage of having a squeegee. Use the squeegee to firmly but gently [ too much force and you will slide your paper off the project!] slide over your paper and the excess glue will come out from the edge of the paper at the end and you can simply wipe it off.
Decoupaging on Plastic Tutorial
Using the squeegee you can easily slide into corners which are otherwise difficult to reach as you can see in the picture below.
Decoupaging on Plastic Tutorial
I have used the squeegee to get a proper adhesion of the pattern paper in the depths of the container I was lining .
Decoupaging on Plastic Tutorial
Once the paper had dried you can give a top coat of mod podge if you wish and later seal it off with a varnish if you want.
Decoupaged Container
Notice the uncovered rather unsightly looking exposed edges of plastic in the project photo above-- well I could line it with paper but that would involve quite a bit of hard work so I took the easier and more fun way out by painting the edges with Liquid Leaf .
Hi crafters ,Dr Sonia here with a product review post that is an exciting post for me as I get to introduce you to two awesome tools which Shalini has brought to India post CHA 2016.It is the Crystal Katana and the Tanto which have been getting rave reviews from crafters all over the world and being recommended left and right by jewelry makers, papercrafters and DIY ers! Ok what exactly are the Crystal Katana and Tanto?
In simple language these are "pick up" tools to help pick up any tiny teeny embellishment such as pearls, sequins , tiny rhinestones etc .And so these tools make your crafting easier, quicker and more fun!!
If you are like me you must have marvelled at how crafters use tiny pearls so extensively in their projects making beautiful eye-catching lattices and borders and wondered how they had the patience to work with those fiddly little embellishments!
Well you don't have to have super nimble fingers or the patience of a saint or wrestle with tweezers or chase runaway flying pearls!
These awesome tools were invented by Kellie DeFries who works extensively with Swarovski crystals and has used the Crystal Katana to completley cover in crystals some crazily huge stuff such as cars, whole dresses to name a few Uses of the tools
To easily and quickly pick up and release tiny embellishments such as
pearls
beads
sequins
rhinestones
crystals
tiny bits of paper etc
Video Demonstration of the Crystal Katana
-to pick up small pearls and rhinestones
Steps
Apply tiny dots of glue on the places you want to stick your pearls/rhinestones to
Pick up tiny pearls using the wax tip of the Crystal Katana
Touch the pearl onto the glue dot- the pearl will release immediately
Optional- move it around or press it using the chrome metal end of the Crystal Katana !
Crystal Katana Instruction on its packet
In this video my little girl helps me to demo the Crystal Katana for you....Please do forgive the little errors that inevitably creep in !
If videos are not your cup of tea...keep scrolling down ...I have tried to take step by step pictures Features of the Crystal Katana
Crystal Katana
The Crystal Katana has a lightweight wooden body with a special wax tip at one end and a chrome metal end at the other end
Crystal Katana
The Waxused is specially formulated and said to be much superior to normal wax as it leaves no residue on the pearl/crystal it picks up - an important consideration for professional jewelry makers working with crystals
Crystal Katana wax end
One big advantage over competitor pick up tools is that both the Katana and the Tanto quickly release the pearl/rhinestone when it is touched to a glue drop.
Before I got the Katana , I had bought a Silhouette pick me up tool which is super for quickly picking up tiny pearls and beads but refuses to let go of it once it picks it up...requiring additional effort of using some other tool to release it ! The Chrome metal end can be used to firmly push the pearl/crystal etc into the glue or move it around to get a perfect positioning!
The metal end itself is a two in one tool with two diameter tool options.
Crystal Katana
It can be unscrewed like a pen tip and you can store the thinner pointed nib inside and just use the larger diameter tip - an important feature for jewelry makers who play with teeny tiny crystals and larger crystals/beads !
Crystal Katana
The photo above shows the Crystal Katana with its fine needle tip attached
Crystal Katana
On unscrewing you can see the two types of tips possible
Crystal Katana
You can store the needle tip inside the body of the Crystal Katana
Crystal Katana
And screw on the large diameter metal tip if you want to work with larger crystals/ pearls etc
Sharing a few simple projects to show you how the Crystal Katana works
2. Working with small round pearls
Crystal Katana
If you like working with beads or other tiny embellishment the bead funnel tray is a nice investment...it has a screw on cap which you can open once you are done to put away your glitter/beads back into the bottle.
Funnel
I lined the funnel tray with a piece of foam so that my pearls don't run away too much!
With the Katana it hand it was easy to add tiny pearl bodies to all the butterflies on my project!
A thin line of Tombow glue - prefered Tombow mono multi over my usual Fevicol mr in this setting as I wanted to work quickly and wanted a strong long lasting adhesive.Tom bow is nice and tacky and the pearls won't fall off easily.
Crystal Katana
Gently picked up a pearl using the wax tip of the Katana
pearl on katana
See how the pearl stays stuck to the tip.
wax tip
On touching the pearl onto the glue on the butterfly , the pearl is easily released from the wax tip
chrome end
If you want to fiddle around with its position you can use the metal tip end
butterfly
Yes easy peasy without struggling with clumsy fingers and flying pearls!
butterfly
One more butterfly dressed up....Such a lovely touch a few pearl add on isnt it!
Butterfly
Added lots of pearls on my collage clay cake using the Crystal Katana and you can see the full project here : Faux Rainbow Cake
pearls
3. More uses- Making or repairing hair accessories and jewelry with pearls and crystal
Hair clip repair
Some of my favorite hair clips had lost some tiny crystals and pearls and I had been postponing even attempting to repair it till I got the Crystal Katana !
Crystal Katana Use
Used jewelry grade Modpodge wonder glue and the Crystal Katana to repair it and now they are as good as new!
Crystal Katana use
4. Easily and quickly adding pearls/sequins/rhinestones to a project
5. Nail art - sticking on tiny rhinestones and sequins to a small area
nail art
The Crystal Katana is extremely popular with nail art artists and you will find innumerable videos on you tube about its use in nail art.
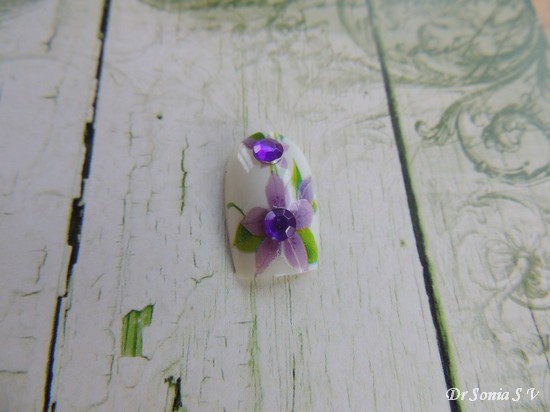
Being a surgeon I dont grow nails and mostly even avoid nail polish for that matter as that is what we have been taught in medical college! But my daughter is one girly girly child and you can see the nail art she created using the Tanto
What is the Tanto ?
Tanto
The Tanto is the economical version of the Crystal Katana . Features of the Tanto
It looks like an eyebrow pencil
It is lightweight and easy to handle without stringing your hands
It is made of wax and works as well as the Crystal Katana in picking up tiny embellishments
Tanto
There is a protective lid on the tip so that you can store it without damaging the soft tip
You can actually sharpen it just like a regular pencil when the tip blunts
It will last a looong time!
The difference with the Crystal Katana is that the Tanto does not have a metal tip to move around and firmly press the pearl/crystal onto your project
Here is my daughter's nail art using the Tanto
Nail Art with Tanto
Unlike your fingers both the Crystal Katana and the Tanto can pick up tiny embellishments from tiny storage spaces like in this picture below
Tanto in Action
Nail art with tiny plastic flower sequins
Nail art with Tanto
Using tiny sequins
Nail art with Tanto
Nail art with Tanto
Using tiny rhinestones
Nail art with Tanto
Nail art with the Tanto using rhinestones, pearls and sequins