Hello everyone!
Welcome to a brand new post at the Crafters Corner Blog!
I will be doing a tute-inspirational post using the Gorgeous paper pad by Dress my Craft called
HYDRANGEA LAWNS

Its such a beautiful paper pad! Comes in the size 12x12 inches absolutely perfect for Scrapbook layouts, Albums, altering boxes and of course card making. It has 12 designs ,2 sheets each. 24 sheets in all, Acid & Lignin free. It also has 2 sheets which have these adorable die cuts! A paper pad one MUST own! And the best part now... Its only for Rs595! Isn't that great?
Now for todays post I first want to start with some cards I created for all of you using these Gorgeous papers! Lets have a look ?

Do you like them? Aren't the prints to die for!

Lets get started
The first thing I did was I scored 4 cards and added pattern paper to those. I've layered 2 cards with Kraft cardstock just to add some more depth to the card

Well I had hard time deciding which prints to select cause all of them are so beautiful and shabby chic!

For the first card I've selected some die cuts and Im using these note cards (the ones on right) from the die cut sheet thats included in the paper pad

Im sticking the bored die cut to the base using my favourite glue! Now this is one glue that I use everywhere! Its light, dries clear and doesnt make a mess! A must have!

Next I've layered a piece of pattern paper on top using double sided foam tape to add some dimension to the card.

Next comes my favorite doily die by Prima marketing! It looks beautiful everywhere!

Now I wanted a frame for my card so I've made one using a mold and Mod podge melter and I painted it using some pretty paints by Prima Marketing
If you dont know how to use a melter please check this post on how to use Mod podge Melter!
Also you can check this post to see how to make embellishments using paper clay -Prima Marketing - Paper clay and Vintage Art Decor Mould

Next I'd added some mulberry flowers and die cut leaves to my card. And do you see those pretty pearls? These are a part of the new Fashion Accessories range by Dress my craft! These are pearl hangings I've added them in such a way that they look like stick pins!
Next I've added my all time fav art pebbles by Prima Marketing to my card and painted them using some wax and unicorn hair paint.


And ta-daaa the card is ready!

The butterfly is from the Hydrangea stamp set by Justrite stamps I've painted it with some distress inks. Havent done the pretty shading cause I wanted a worn out distressed look ! Cause well Imperfections make it look beautiful!
Now coming to my next card I've basically just done some die cut layering on this card but there is one technique I really wanted to show you all. Im sure a lot of you already know how to do it but for all the newbies I want to show how to partially distress your die cut! I remember when initially I got into crafting n discovered this technique I absolutely loved it!


So here we go place the die on top of the die cut and then distress like you normally would, for a variation you can also you 2 colours Since Im looking for a monochromatic look I used only one colour

And here its done!

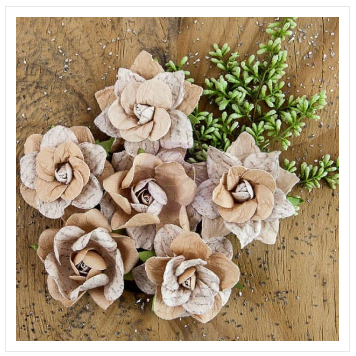
Layered the die cuts using some foam tape and added my all time fav mulberry flowers! I really hope one day I develope the patience to sit and make some handmade flowers! Till then Mulberry flowers shall rescue me hehe!

Now for my next card I wanted to do something grunge/mixed media style So I decided on doing some foiling to start with. I have used an adhesive rub on here, you can check a detailed post on it here- Foiling all the way!


I've torn a paper and now Im using a rub on and foil over it

To add some more colour to the card I've used my fav stencil along with some gathered twigs distress ink!

Layered the paper using some foam tape and added this beautiful chipboard cutout by Wycinanka

Next I've added some flowers and embellishments by Dress my Craft and the gorgeous sequins that match perfectly and add the required bling to the card!


Next card I did some layering using these border print outs from the die cut sheet!


And this sentiment is also from the paper pad! Not to miss the beautiful fashion accessories here!

Lastly I have some moreee inspiration for you all! I made these for my personal use and I have posted the box on my facebook page but I thought I will add them to my post cause I really want you all to see how stunning this paper pad it!


Hope you all enjoyed today's post!
Feel free to ask any questions and
Dont forget to leave some love!
Hugs
Anchal Sapra
PRODUCTS USED
1 Hydrangea Lawns - 12"X12" Paper Pad
2 Crystal Hearts Charm - Pink
3 Flower With Pearl
4 Double Tone - Hanging Pearls
5 Sunshine Flower
6 Mini Flower Bunch
7 Kikyou Flower - English Green
8 Pearl Crown
9 Cute Flower - Sea Blue
10 Studded Teddy Bear
11 Play With Green Sequins
12 Crystal Clear Sequins
13 Gathered Twigs - Distress Ink Pad
14 Chipped Sapphire - Distress Ink Pad
15 Ink Blending Tool
16 Ink Blending Foam 10/Pkg
17 Mono Aqua Liquid Glue Carded
18 Red Tacky Tape - 12mm
19 Kraft Sheet Cardstock - 300 GSM
20 Microbial - Stencil
21 Wildflowers & Butterflies
22 Mint & Light Pink - Minc Foil Combo
23 With Daffodils - Frame 2
24 Metallique Mermaid Teal - Alchemy Acrylic Paint
25 Unicorn's Hair - Acrylic Paint 1.7oz
26 Crochet Doily - Purple Metal Die
27 Flourish #13 (Set of 2)
28 Purple - Mulberry Curved Roses
29 Blue Tone & White - Micro Roses Combo
30 Poppy Rose - Purple/Lilac Tone