
Hello
As promised ,today is the day that we announce the winners of last month's challenge. We saw some great entries and are thankful for your participation.
So without further ado, here is the line-up of the winners,top 3 entries and honourable mentions.
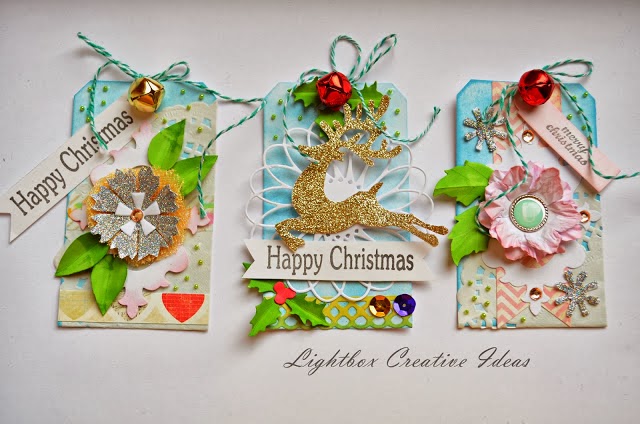
The winner this month is ENTRY NO.4 -Pooja for her gorgeous Christmas tags
 I especially love the Reindeer with its glittery goodness.
Congratulations!!
Please write to info@crafterscorner.in with 'winner' in the subject to claim your prize and badge.
On to the top 3 entries this month.In no particular order ,we have -
Entry no 16 - ROHINI with her lovely Diwali Cards

Entry no.31 - LEKHA for her beautiful textured and quilled wedding layout.Totally in love with the background.

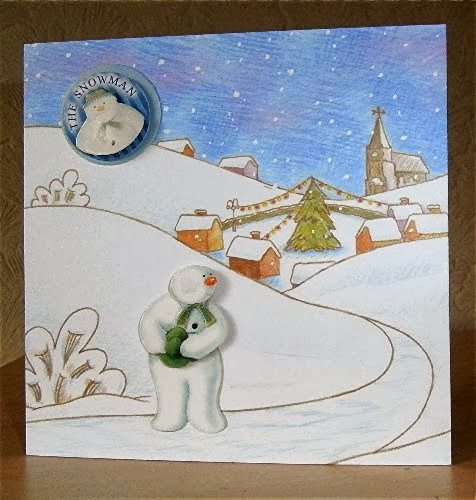
Entry no.9 - HAZEL for her adorable winter scene card.

Congratulations ladies!Great job!
Please claim your badges soon! Write to info@crafterscorner.in with 'Top-3' in the subject.

Entry no 22 - TINA .I loved all the little ornaments she made for her Christmas tree tag. Very creative ,I must say.

Entry no. 13 -RASHI GUPTA for her quilled Tea-light holder.

Entry no.28 - Dr. Sonia for her beautiful thermocol lotus and the tutorial that she generously shared.

and a special mention for our youngest participant entry no.6 - LITASHA who is just 14 years old and tried her hand at quilling.Kudos to you baby girl. May you stay crafty always.:-)

Congrats to all the special mentions !! We would love to see your projects once again in our upcoming challenges !!
Please claim your badges soon!
Write in to us at info@crafterscorner.in with 'Honorable Mention' in the subject.
oops, I almost forgot.I also need to announce the random winner,don't I? :-)
Our random winner for this month is ENTRY NO 27 - GAYATRI GANESH.Congratulations!
Congrats ! You have won yourself a Gift Voucher from Crafters Corner worth Rupees 500.
As promised ,today is the day that we announce the winners of last month's challenge. We saw some great entries and are thankful for your participation.
So without further ado, here is the line-up of the winners,top 3 entries and honourable mentions.
The winner this month is ENTRY NO.4 -Pooja for her gorgeous Christmas tags
Congratulations!!
Please write to info@crafterscorner.in with 'winner' in the subject to claim your prize and badge.
On to the top 3 entries this month.In no particular order ,we have -
Entry no 16 - ROHINI with her lovely Diwali Cards

Entry no.9 - HAZEL for her adorable winter scene card.
Congratulations ladies!Great job!
Please claim your badges soon! Write to info@crafterscorner.in with 'Top-3' in the subject.
And last but not the least we have some entries which definitely need to be mentioned for their creativity and in no particular order ,those are .................
Entry no 3 - MONISHA with her set of Christmas tags.I love the Angel and the wreath she made.

Entry no 22 - TINA .I loved all the little ornaments she made for her Christmas tree tag. Very creative ,I must say.

Entry no. 13 -RASHI GUPTA for her quilled Tea-light holder.

Entry no.28 - Dr. Sonia for her beautiful thermocol lotus and the tutorial that she generously shared.

and a special mention for our youngest participant entry no.6 - LITASHA who is just 14 years old and tried her hand at quilling.Kudos to you baby girl. May you stay crafty always.:-)
Congrats to all the special mentions !! We would love to see your projects once again in our upcoming challenges !!
Please claim your badges soon!
Write in to us at info@crafterscorner.in with 'Honorable Mention' in the subject.
oops, I almost forgot.I also need to announce the random winner,don't I? :-)
Our random winner for this month is ENTRY NO 27 - GAYATRI GANESH.Congratulations!
Congrats ! You have won yourself a Gift Voucher from Crafters Corner worth Rupees 500.
Go shop from our store & Have fun crafting !!
Pls write to us at info@crafterscorner.in with ' random winner' in the subject to claim your gift voucher.
That's all for today folks.As mentioned in my previous post,we are on a break and will be back in the New year,so let me take this opportunity to wish a Merry Christmas and a very very happy new year from all of us at Crafters corner.
See you soon!
Pallavi


