Followers

Showing posts with label Prima Marketing. Show all posts

Friday, 3 August 2018

Pretty Gifts with DMC products

Hey Everyone, Suzna here......Today i have 2 DMC projects to share with you. Now DMC have wide range of different products. I love love these ...... :-*

So the 1st one is Glass jar decor : Actually this jar i bought from shopping mall, not costly but its cute one, and this jar is actually for storing the spices. But crafters who are interested in altered art :-) ....is it? 
This jar decoration, its very simple. I just fill with some cute DMC stuffs and Prima Marketing flowers. Use glue gun for gluing. Please check the link below of this post, so you can easy to find out 


DMC product 


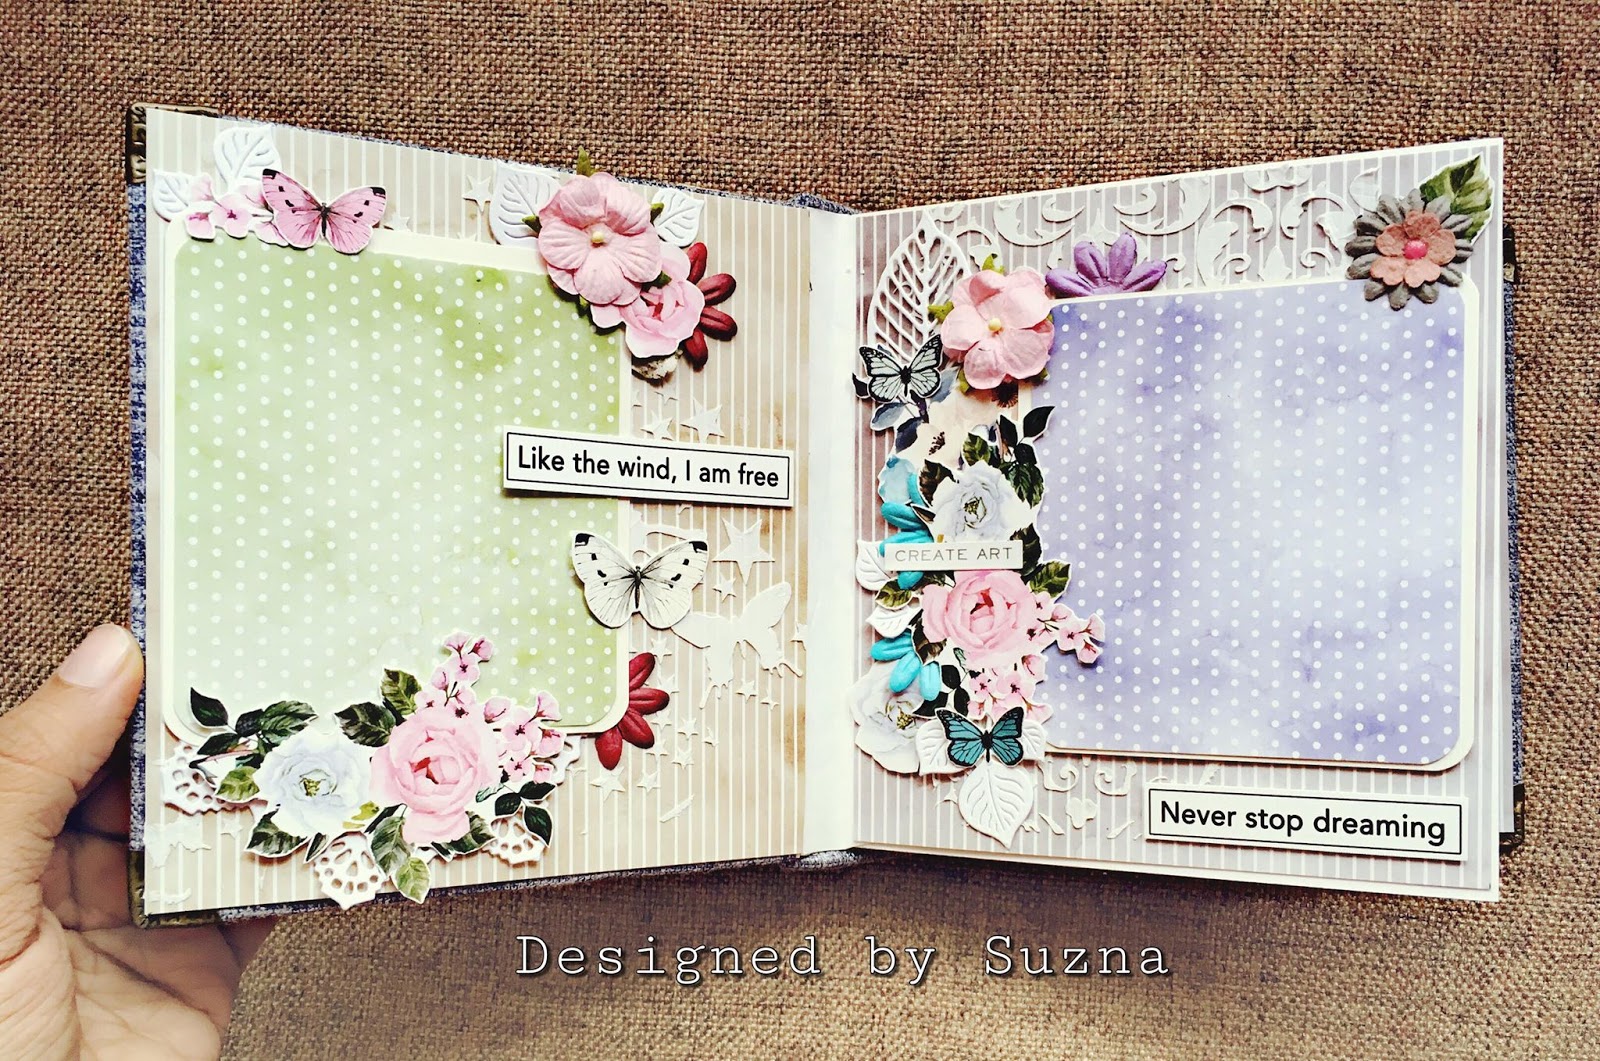
My second one is a small Scrapbook, This project i uses the simple and beautiful DMC paper pad "Dots n Strips", and Floral symphony motif sheets. Why i choose this paper? Bcoz i need to highlight the textured stencil design. Same time this Motif sheet's fussy cut images help me to decorate more. 


First i made a scrapbook base: Size 5X6 inch : just 4 piece of white chipboard


These are my arrangements: Base sheet, fussy cut pieces and die cut leaves. 


First part: Texturing with stencil


2nd part: Designing, layering the six pages. Its not easy, actually i'm trying many combinations, and once it fix..i start gluing.


Finally Like this :-)


Gluing the pages to the base: I prefer red tacky double side tape. And layering i choose form tape. Check the below links, Crafters corners have very nice and thin form tapes in different width( like 6mm to 2mm)



Cover Design: I have used one pair earrings, Fussy cut image and Butterflies from Dots n Strips motif sheets


I hope you have enjoyed this creation. 
Thank you for stopping by 
Hugs 
Suzna
Supplies Used

Little Hat Purple
Prima Marketing Stencils
TheCraftersWorkshop Stencil
Paletee Knife
Liquitex-light-modeling-paste-acrylic-gel-medium-8-ounces
DMC DotsNStripes 6X6 paper
Floral-symphony-motif-sheet-19443
Craft-toppings Flower pearls
Miniatures-accessories miniature-red-cup
Miniatures-accessories Red roses
Miniatures-accessories/mini-pink-plush-teddy-bear
PrimaMarketing Flowers
Mulberry-flowers-leaves rose-buds-red
Miniatures-accessories miniature-wicker-flower-basket
Miniature-printed-vase--3
Charms-embellishments medium-bottles
Adhesivestapes-tools/3d-foam-tape-18mm
Paper-craft-tools Scissors.
Fashion-accessories
Dots-n-strip-motif-sheet


Wednesday, 4 July 2018

Mixed Media Altered Frame

Hello again, everyone.............. This is Suzna here. 
I'm excited to share with you a mixed media frame, I made using the DMC new product beautiful oval resin frame. I love love this frame. I cant express my feeling here, Its beautiful and low coast, dont miss to buy this beautiful frame.


 All the product details are in end of this post. So keep finding them and make your own creation.

So lets discuss about how i made this ..........Okay


As usual i start with black gesso, before going any metallic paints use black gesso (alteration art). Thats give you awesome effect. Here i did 3 to 4 layer coloring (very thin coloring layers )


These are the first layer metallic paints


You can see green effect on my frame


Purple(Dark velvet) effect on my frame


2nd layer Metallic wax: Just random coloring on my frame


See my frame, how its look like. This is okay, but i want something more.  So i decided to add patina effect paints.
  

In between i am designing inside decoration on frame. So i took canvas sheet, cut it as oval. Glue down on 1mm chipboard. And again cut it as oval. Check the below images.


Adding metal charms : Prima Marketing-Finnabair Mechanicals Metal Embellishments


Theses are the 3rd layer paints.


Inside of frame i use Lindy's Spray. Or instead of canvas coloring use mixed media design papers.


Again and again decorating :-) with DMC mixed size pearl beads. Use glossy gel paste for perfect transparent glue.


Finally adding few words from Tim Holtz word stickers
I am filling empty space or use any fussy cut of your favorite image


And Finally i altered this beautiful frame.


I was inspired Finnabair mixed media projects :-)
I hope you enjoyed my project today
hugs
Suz
 
Supplies Used


Monday, 4 June 2018

Easy And Quick Scrabook Album Binding

Hey there! Suzna here......:-) 
Did you think I disappeared? I know it's been a few weeks since my last posting.
So my project today is a small scrapbook with easy binding technique. I took few the step by step pic. Hope u guys can understand.
And This is the cover design of my Album


This Album Binding originally by me ;-), Actually i am a lazy women - same time i am finding easy way to finish it.

Okay let start sharing the idea

Here i took 300gm Black cardstock, perfect for album pages


Main cover of scrapbook : I choose 1mm chipboard, In that i stick 300gm black cardstock. So that will get little more heavy weight cover.


These fabrics are Men's shirt pieces. Easily available in any textile shop.


This is rotary cutter, Easy to cut fabrics.


This is the way i am choosing pages. This album has only 2 pages. And i am planing each page can hold multiple pics.
  I start sticking with both cover sides. 
My album size : 6X8.5 inch
I score my cardstock like this : 8.5" - 9" - 9.5"
and the rest of the card stock is 2.5"
so that is the 1st page of my album
And i did same on other side too.


These two piece of cardstock going to sick on it. Like pocket style.


And here i stick small piece of fabric to cover / attach the 2 pages. Because of this style attaching pages (fabrics), this album can widely open.


Embellishing stuffs.


After pasting pattern paper, This is what my album looks like.


So how is my easy binding scrapbook Album? 
I hope you all like this Album
If you would like to create one of your own,
Don't wait for long, do it fast
Thanks for stopping by
Hugs
Suz

Supplies Used