Good morning!
Rupa here from Crafters Corner and wishing you all a very
HAPPY DIWALI. As you are bursting crackers and eating those sweets, I would like to share with you a
little deco piece that I made for Diwali this time and I have involved quite a
lot of ingredients from PLAID FOLK ART. Here is a look at the entire PLAID
family who helped me in this project.
Let me warn you that this is a very long post with lots of
pictures and I hope you enjoy your journey till the end.
Here we go….
I started to build a wooden shelf/organizer with the wooden
scraps that have been lying around at home.
I managed to get the raw structure
done in about 2hrs with the help of my driver who pitched in as a temporary
carpenter and I must say, he loved his new role, lol!
This is what I started off with! I know it was this bad…I
told you they were wood scraps! But trust me…the PLAID family wove a magic here
and you will see what happened to this ugly duckling!
STEP 1- I gave a coat of black gesso to all the nooks and
corners of the shelf. I then took Folk Art multi surface (orange) and gave a
coat on one of the sides.
Then came the magic tool, FOLK ART HOME DÉCOR COMB!Yes…I had an instant love for this member in the family! There is so much that
you can do with one tool! Today I am going to show you 2 textures possible with
this. In the months to come, I am going to explore this product with various
mediums and for different styles. Hang on!
Here I applied orange with a little BLENDING GEL over the
entire surface and dragged the toothless side of the comb over the wet paint.
And here you see that when it is dragged this way, you
get a lovely linen effect . The paint settles on the wood grains and the excess
is dragged off reveling the base coat, in this case black. The minute patterns
resemble the linen fabric.
STEP 2- Next member from
the family is the FOLK ART DIMENSIONAL MOSS EFFECT. I first gave a base of fol art green and
then dabbed in the dimensional paint.
I left it to dry overnight and what I saw
in the morning was a lovely growth of moss on the shelf!
This product is great
for creating moss like feel to your projects with a combination of a lighter
color to give shading and depth.
STEP3- On the sides of the shelf, I applied yellow color with some
blending gel and then swiped the comb with the wide tooth.
As you drag the
comb, you can see the lovely striped pattern! This
magic comb when dragged over the top cost of paint reveals a great texture and
dimension and best thing is you can play with this in different directions.
A
closer look and you will see the raised dimension of the top coat paint.
I continued this pattern on both the outer sides of the shelf and
on the top.
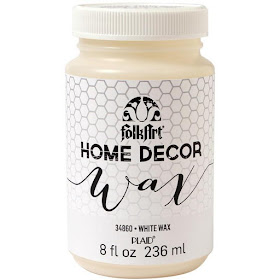
STEP4- Next i took WHITE WAX and applied in on the lower of the
striped pattern that I just created. A closer look and you can see the
difference.
Where I have applied the white wax and wiped, it gives a white
washed look to the project. This removes the stark brightness of the color and gives a lovely shabby washed look. The top half if you see, you can see the
starkness of the black. In the lower half, the white wax settles in the wood
grains and gives a lighter look.
I continued this process on the entire shelf and then gave a 2
coats of SATIN VARNISH and let the project dry overnight.
STEP5 _ I took these lovely papers from BOB AND BETTY FLORAL LOGS.
I wanted a festive and colorful look to this shelf, and look these lovely
blooms and stuck them.
I also added some orange rhine stones as flower center to bling up the project! here is how it looked all done up after the cosmetic
changes.
The play of paints and the colors that I have chosen gives me the
freedom to use this shelf for different purposes and I can also give
different looks to the same project
Hers is LOOK 1- The contemporary style..A very practical one and I
have used it as a tissue holder and some flower to brighten up the work space.
LOOK 2 is a Desi, festive look...near my dressing table. It holds
all my bangles and some garden fresh flowers add some more color. Just so to
let you know, the the pole that goes to hold the tissue and the bangles is a
dry piece of branch from the garden too.
That brings us to the end and I hope you could stay on till here,
lol! I had a great time playing with these products and will be back soon with
another one.
Until my next creative journey,
Happy Crafting and recycling.


wonderful project Rupa !! I love the design of your base structure and of course the transformation with amazing techniques and textures !!!
ReplyDeleteBeautiful project and very detailed article.Thanks Rupa, n also now I know I need to buy a few more products.hehe
ReplyDeleteAwesome .. You have magic in your fingers who can convert a beast to beauty .
ReplyDeleteAwesome..rupa Di..
ReplyDeleteU r a makeover queen...:-)
What ever you making i totally Lovvee it.
ReplyDelete