TABS

Sunday, 30 August 2015

Collage clay - few experiments

Hi friends,
I hope the fesival of Rakhi brought joy and affection in your life . I too had a great gathering at my home and we all become lil kids when our siblings are around...
Today's post is all what little kids fancy about and even the adults get tempted with it....
yes !!! We will b creating a yummy looking candle, canvas ,hair clips and few cupcakes...
All this is possible only with mod podge 
Collage clay and cabochons which make anything look like cake frosting .
I wanted to work in the traditional and most common way of using this product but tried it on different bases .
So let's begin...
There is a video linked at the end of this post and its best if u watch me create these adorable things. There is nothing much I can write about and things will be clear once u watch the video.
I am sharing few pictures and u hope u will like them.

*Canvas
 *Candle


 *Hair clip


 *Fridge magnet


 *Gift tags


I encourage u to try your hands on this unique product and art which will take u to the fairy world of Hansel and Gretel..

Here is the video link..

Hope you liked my projects altered by the collage clay...Do let me know what you think...

C ya 
Happy crafting n frosting 😀

Hugs
Arjita 

List of products used:
canvas (from stash)
hairclips (from stash)
resin enbellishments and cabochons 
candle (from stash)
heidi grace -cupcake stamp
memento reinkers
versa fine black ink


Friday, 28 August 2015

Elegant home décor with Collage Clay

Hello friends!
Jaya here wit you all.
You all  must have tried the new Collage clay launched by Crafters Corner recently.
I too had the opportunity to try it and I came up with some creations.
Hope you will enjoy these. They aren't super cute like what I saw everywhere but this is just my style of interpreting the product.

Well here is what I came up with..


CUPCAKE EMBELLISHMENTS
HOW?

Technique- Flat nozzle technique

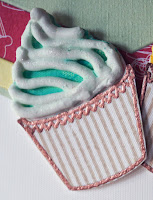
I tried making some cupcakes with the collage clay and I have to say they turned out so gorgeous!

  • I tried this with the same nozzle that comes with it.
  • Just piped some clay in the cupcake wrapping .
  • While it was still wet I sprinkled some fine glitter white sequins and some caviar beads in light blue on top.
  • You might even insert some flag /toppers on this for more fun :)


CANVAS/GIFT WRAP

HOW?

Technique- stencilling
  • First I painted the box with white gesso and heat dried it.
  • Next I took out my Prima Bubble stencil and Collage clay and stencilled through it. 
  •  I sprinkled the shimmer in both Gold and teal colours and once all the are was covered I removed the stencil very carefully.
  • I heat embossed my 2Crafty 'Love you' Chipboard in Rangers gold embossing powder and adhered it to the canvas with tacky glue
  • I ran some gold washi tape on the edges of the canvas as well. 


MONOGRAM

HOW?

Technique- Round Tip technique
  • I decided to go with the trellis pattern which is one of my favourites. So for this I used the round tip that I got in the Collage clay pack itself.
  • Very carefully I piped the clay in slant lines keeping the distance between each almost equal. I tried using a ruler for this initially but it didn't work out as the clay kept sticking to the ruler itself. so avoid this and go with instinct!
  • I also outlined the entire monogram to give it a clean finish
  • Next I embellished this using the gorgeous mulberry flowers in the shop in white. I used some Prima flowers and paper twine to go with it. A few pearls and I was done!


ALTERED WINE GLASSES AS DECORATION PIECES

HOW?

Technique- Finger technique 
  • Take a blob of the clay on the index finger and just run it from the middle of the stem of the glass to the middle of the bowl .
  • Do this all around.
  • Sprinkle your favourite fine shimmer and make sure it covers all areas. Repeat with shimmer if required.
  • Just fill these with your favourite candies or whatever and these are good to go decoration pieces!


CHRISTMAS DECORATION

HOW?
Technique- Star tip technique

  • I first made out cone of paper and adhered the ends with tacky tape.
  • I used the star tip technique and piped the clay on the cone working bottom upwards and in small strokes
  • Ones the whole area was covered in rested it on a flat surface standing upright and sprinkled the shimmer in silver gold and teal to give a lil 'christmassy' feel. I guess I went a little too far ..Lol!
  • Once you are sure that the clay is relatively dry only then go ahead and attach the base/trunk.
  • If you want to do it before hand /alongside you have to be careful as to pipe the clay in halves on the cones. Working in front half first and drying it and later working on the backside. This is so as the clay will give weight to the cone and it will tumble down because of the small and unsupportive area of the base.


Some more clicks. You may click the pics to enlarge them a little bit for closer view.


And thats how the whole thing looks together! Isn't that just an awesome decoration idea for your craft room?


Supplies used-


Note**- we have a new feature on the site which helps you to put your name on the waiting list for any items that must have sold out. That way you don't need to go to shops and sellers with your lists!.  Just put yourself in the waiting list and you shall be informed as soon as the product is in stock again. And you can be sure that will happen pretty soon :)


Hope you liked my rather different try on the collage clay...Would love to hear what you think..
Let me know what other fun and creative ideas you have in your minds that you think would look great.

Until next time... Happy Crafting!
Hugs
Jaya


Monday, 24 August 2015

Collage Clay - My way!

Hey Friends,

You all must be knowing that Collage Clay by Mod Podge is the latest addition at Crafters Corner. A while back Shalini sent me the same. Honestly, I was baffled initially that how am I going to use it? But once I saw the consistency,  I decided to use it differently from what it was meant to be. Its texture is very similar to embossing paste. 

For the first card, I used it to make clouds.


I used Koi Water Colours  to paint the sky and allowed it to drip to make it look like rain. 
I used following supply


Used paper smooches die for rainbow & coloured each band with zig clean markers. Adhere it to the white panel. 


I used PTI cloud dies to make stencil & used it to apply clay at the both ends of rainbow. 


I embossed sentiment in copper on a stripe of vellum and painted the RAINBOW part with copics from back. 

For the next card, I used the thin nozzle to apply icing on my cupcake...;)


Close up


Isn't it yummy? Once it was dry I painted it with distress inks. Added the sentiment to finish it off.

For the next card, I tried two tier cake....:P


I added texture on both tire with thick needle. Let it dry and apply perfect pearl with water to give that gorgeous shimmer.  Added some bling and mounted on BG made with distress ink. 

Ok, enough of cake...ummm...how about some ice cream?


I die cut three scoops and a cone. Embossed the cone with a folder to give some texture. Added colorbox reinkers to white clay for ice cream scoops. Apply on die cut and pat it with spatula for the texture. The consistency of the clay is so beautiful that it will hold the texture even after drying. I added sentiment and a resin cabochon. 


Above card is inspired by the below inspiration picture of  Runway Inspired Challanege #90. This is my all time favourite challenge. I just love to translate all the gorgeous dresses into cards. 


I decided to use some floral stencil with coloured clay for the upper part of dress.


Clay can be easily coloured with reinkers or acrylic colours and it leaves crisp images while stencilling. 

For the skirt of the dress, I used various floral stamps with dye inks and stamped directly on the card base. Mounted the yellow stencilled panel with foam tape. Added a sentiment and heat embossed butterfly. 


For the next project, I tried something different. 

I took a glass and masked it. I applied  blue alcohol ink at the bottom portion. 


I mount a sail boat stamp on a piece of acetate so that I can bend it along the curved surface of glass while stamping. (Black StazOn ink for non porous surface)


I applied white clay with narrow nozzle at very bottom of glass. Added blue glitter  while wet. Allowed it to dry for 24 hrs. Tie some twine on top and add some charm. Your candle holder is ready.


I know it is sloppy but hey...it is my first time at any such thing. So please don't judge the clay by this thing....clay is great...this is just me... ;)...:P


I really hope that you will enjoy this unusual use of clay and give it a try. I wish I could have used more of those cute resin  cabochon. May be next time. 

Do share your projects with us. We love to see them. Hugs.


Supply from the store :


Tuesday, 18 August 2015

COLLAGE CLAY

Hello Everyone!!!


Hope you all doing great :) I am back with yet another post on MOD PODGE series. It's all about COLLAGE CLAY. Everyone of us is so smitten by Collage clay & Crafters Corner Collage Clay art is the new sensation around the Indian craft corner.

Collage Clay is the hottest selling product and CRAFTERS CORNER brings you the steal deal KITS of Collage Clay at awesome attractive  prices .. Grab your set of clay soon before it goes out of stock.


In this post will be telling you what and how to use collage clay. If you have missed the launch of new art in town click here and get yourself updated.

In today's post I have a video tutorial for you all. Yes a video tutorial .. in advance I am sorry please this is my first episode for Crafters corner and I really hope you will overlook my mistakes. And its a really long video so grab your favourite drinks or food before hand and enjoy.


This is my favorite collage clay project so far, I am so much in love this cute house. I am so smitten by Disney movie FROZEN and was very much inspired from the same to create this one. I am sorry I could not cover this in my video as I finished making after filming my video.

The next two projects are cute little frames which I have made by using Sizzix dies.

Frame made with Vanilla white clay and I have used the bread/bakery theme Cabochons from the store.

The second frame I have done using Strawberry Pink Collage clay and used mixed set of cabochons.
Aren't they all looking gorgeous.

Theme Cabochons


Now coming over to the next set of Projects that I have for you all, is Mobile Phone covers .
The above cellphone cover was my old cover and I revamped it totally using the yumm clay and gorgous cabochons.


COLLAGE CAY - MIX MEDIA 


Collage clay works perfectly for mix media purposes. You can create stunning backgrounds using this clay. You need white collage clay and some acrylic colors of your choice.

Crafters Corners brings you the stunning FOLK ART - Acrylic Colors by Plaid Enterprises in India for the first time and will be online soon.


Now for all the details on  Collage Clay hop on to this.video


POINTS TO REMEMBER-

1- Collage clay retains it original color, it just don't fade away.
2- Collage clay dries out completely in 2-3 days ( air dry naturally)
3- Collage clay don't crack once its dry.


Wow.. I speak so much :P, I hope you liked and found the video informative, Please do press thumbs up and subscribe.

For any queries feel free to drop a comment below or you can even write us at info@crafterscorner.in.


Supplies Used-

Mod Podge Collage Clay - Vanilla white & Strawberry Pink 
Cabachons
Rainbow Crumb
Adhesive Stick/Pencil
Sizzix Die


Have a nice day
Love & Hugs
Isha